Noticed a nasty scrape on your alloy wheel after hitting the curb? That ding in the rim doesn’t just look bad — it can make your car feel older and reduce its resale value. Many drivers face the same frustration and wonder whether to pay a shop or fix it themselves.
This short guide reviews the best DIY curb-ras h and alloy wheel repair kits. You’ll get easy-to-follow buying help, clear pros and cons, and a quick comparison so you can choose the kit that fits your skill level and budget. Restore your wheels and save money with the right tools and a little patience.
| Product Image | Product Name | Best For | Check Price |
|---|---|---|---|
 | XpertChemy Alloy Wheel Repair Kit | For Thorough Repairs | Check Price |
 | Tesla Model 3 Curb Repair Kit | Tesla Model 3 Owners | Check Price |
 | Hoghaki Quick Alloy Rim Repair Kit | Quick Touch-Ups | Check Price |
XpertChemy Alloy Wheel Repair Kit
Ideal for DIY car owners and weekend mechanics who want an affordable, reliable way to repair light curb scuffs and scratches on alloy wheels without a trip to the body shop.
The kit’s core strengths are its ready-to-use filler and matched touch-up paints, plus a set of sanding pads and applicators. In practice that means you can sand the scrape, apply the epoxy filler, smooth it with the included abrasives, then paint and clear-coat—all in one session. For example, a shallow curb scrape can be sanded, filled and repainted in a couple of hours.
Durability and finish quality stand out: once cured the repair resists chipping and blends well with most factory finishes. The compact, well-organized case makes it easy to store and repeat the process on multiple wheels. It’s a strong value for light cosmetic repairs, though deep structural damage still needs pro attention.
Pros:
- 👍 Complete kit with filler, paints, sanding pads and clear coat for one-stop repair.
- 👍 Easy-to-follow steps make it approachable for beginners.
- 👍 Quick curing formula gets wheels back on the road fast.
- 👍 Good blend and durable finish for cosmetic fixes.
Cons:
- 👎 Not suitable for major bends or structural wheel damage.
- 👎 Color match may need minor tweaking on some finishes.
- 👎 Filler has limited capacity for very deep gouges.
Tesla Model 3 Curb Repair Kit
Perfect for Tesla Model 3 owners who want a straightforward, at-home fix for light curb scuffs on alloy wheels.
The kit’s two standout features are the color-matched touch-up paint and a moldable filler with sandpaper and polishing compound. Together they let you fill scratches, sand smooth, and blend the repair into the wheel finish. For example, a shallow curb scrape can be filled, sanded, and painted in about 30–45 minutes for a nearly invisible result.
Another strong point is durability and fit-for-purpose design: the materials cure hard and resist everyday road chips, and the kit is sized for Model 3 wheel profiles. Clear instructions and small applicators make it user-friendly. Overall, it’s a practical, cost-effective choice for cosmetic repairs that don’t require professional wheel refurbishment.
Pros:
- 👍 Color-matched paint for seamless repairs
- 👍 Complete kit with filler, sandpaper, and polish
- 👍 Easy to use with clear instructions
- 👍 Durable finish suitable for daily driving
Cons:
- 👎 Not suitable for deep structural damage
- 👎 Requires some sanding and buffing skill for best results
- 👎 Limited to the Model 3 wheel color options included
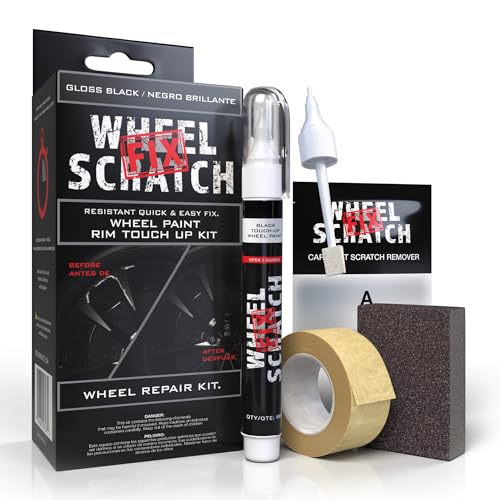
Hoghaki Quick Alloy Rim Repair Kit
Perfect for DIY drivers who want a quick, budget-friendly fix for light curb damage on alloy wheels.
The kit includes a quick-setting aluminum repair putty, primer, touch-up paint and clear coat, plus sanding pads and applicators. That combo lets you fill gouges, sand smooth and seal the repair without sending the wheel to a shop. For example, a 2‑inch curb rash can be filled, sanded and painted in under an hour, restoring the look while you wait.
The cured surface is hard and resists road grime and light corrosion, so repairs hold up between professional services. The compact kit and clear instructions make it easy for beginners to follow. It won’t replace a full OEM refinish on complex colours, but with careful prep and a light polish you can achieve a near-match—making this a strong, affordable choice for light-to-medium repairs.
Pros:
- 👍 Complete kit with filler, primer, paint and clear coat
- 👍 Fast drying for same‑day repairs
- 👍 Beginner-friendly instructions and tools included
- 👍 Durable finish that resists grime and light corrosion
Cons:
- 👎 Not suitable for deep structural or bent-rim damage
- 👎 Colour match can be imperfect on complex OEM shades
- 👎 Requires careful sanding and prep for best results
Buyer’s Guide: 3 Key Factors to Consider
Durability & Materials
Choose kits or services that specify automotive-grade fillers, primers, and clearcoats rated for wheel use and salt/UV resistance. Actionable tip: look for epoxy-based or polyurethane clearcoats and read reviews for long-term weather resistance in your climate.
Ease of Use & Tools Required
Match the product to your skill level. Simple all-in-one DIY kits (abrasives, filler, paint pens) work for light curb rash; more advanced repairs need orbital sanders, touch-up spray guns, or professional equipment. Actionable tip: pick a kit that includes sanding discs and clear instructions if you’re a beginner.
Finish, Color Match & Price vs. Performance
A perfect color match and smooth clearcoat are what separate “good enough” from “like-new.” Actionable tip: if the kit offers multiple primer/paint shades and tip guides for blending, it’s worth a bit more. For deep gouges or bent rims, prioritize structural repair or replacement over cheap cosmetic fixes.
Frequently Asked Questions
Q1: Can I safely repair curbed alloy wheels myself?
A1: Yes for light curb rash and shallow scratches — a DIY kit with sanding, filler, and clearcoat can produce durable, attractive results. For cracks, bends, or severe structural damage, stop and consult a professional to avoid safety risks.
Q2: Will repairing my alloy wheel affect wheel balance?
A2: Cosmetic repairs usually won’t affect balance if material removal and filler are minimal. After any repair, it’s wise to have the wheel mounted and balanced to ensure no vibration issues.
Q3: How long does a DIY repair typically last?
A3: A properly executed DIY repair with quality materials should last several years under normal driving conditions. Longevity depends on prep quality, correct curing, and protection from curb impacts and corrosive elements.
Q4: Can paint pens match my OEM wheel color?
A4: Paint pens can work for small chips but often struggle with metallic or multi-layer OEM finishes. For a near-perfect match, choose a kit with spray-able touch-up paint or consider a professional refinish using OEM color codes.
Q5: Is it worth repairing or should I replace the wheel?
A5: Repair is cost-effective for cosmetic damage and small gouges. Replace the wheel if it’s cracked, severely bent, or if repair costs approach the price of a new or refurbished wheel—safety and longevity should guide the decision.
Q6: How much should I budget for professional repair versus DIY?
A6: DIY kits range from budget to mid-priced ($20–$150). Professional cosmetic repairs generally cost $75–$250 per wheel; structural or full refinishes are higher. Get quotes and compare against replacement costs for your wheel model.
Final Verdict: Which One Should You Buy?
For most drivers with light curb rash, a high-quality DIY alloy wheel repair kit that includes sanding pads, filler, primer, and clearcoat is the best choice—affordable and effective when you follow prep steps. If the rim is cracked, bent, or you need a perfect OEM finish, opt for a reputable professional repair or replacement to ensure safety and long-term value.