Alloy wheels are a popular upgrade for many drivers, offering a blend of lightweight performance and sleek aesthetics. If you are wondering how to maintain alloy wheels to prevent corrosion, brake dust buildup, and curb damage, you have come to the right place. Unlike steel wheels, alloys are more susceptible to pitting and staining from road salt and harsh chemicals. Proper maintenance not only preserves their showroom shine but also extends their lifespan and maintains your vehicle's resale value. In this guide, we’ll walk you through the essential steps, from routine cleaning to seasonal protection, ensuring your alloy wheels stay in top condition for years to come.
Key Takeaways
- 1. Clean your alloy wheels weekly using a pH-neutral cleaner and a dedicated wheel brush to prevent brake dust from etching into the clear coat.
- 2. Apply a high-temperature wheel sealant or ceramic coating every three months to create a protective barrier against road salt, UV rays, and grime.
- 3. Inspect for curb rash and minor scratches immediately; use a touch-up paint kit matched to your wheel’s finish to prevent corrosion from spreading.
- 4. Avoid automatic car washes with abrasive brushes; hand-wash with a soft microfiber mitt to preserve the wheel’s polished or machined surface.
- 5. Check tire pressure monthly and re-torque lug nuts after any tire change to prevent stress fractures on the alloy rim and ensure balanced wear.
- 6. During winter, rinse wheels thoroughly after driving on salted roads and consider swapping to dedicated winter wheels to shield alloys from pitting and oxidation.
Why Regular Cleaning Is Critical for Alloy Wheel Health

The health of your alloy wheels is directly tied to the rigour of your cleaning regimen. It is not merely an aesthetic preference; it is a critical maintenance protocol. Alloy wheels face a constant barrage of aggressive contaminants: ferrous brake dust, road salt, acidic bird droppings, and tar. When left undisturbed, these elements initiate a chemical reaction. Brake dust, for instance, is composed of carbon, iron, and copper particles, which, when heated during braking, can actually burn into the wheel’s clear coat, creating stubborn, pitted stains. More insidiously, trapped moisture and road salt can breach microscopic scratches in the protective lacquer. This leads to filiform corrosion—a thread-like, creeping oxidation that undermines the structural integrity of the metal beneath the paint.
Therefore, a proper cleaning involves more than a simple hose-down. You must first apply a pH-balanced, non-acidic wheel cleaner specifically formulated to neutralize brake dust without etching the finish. Use a dedicated, high-nap microfiber wash mitt to gently release embedded grit. Finally, a quality wheel sealant or ceramic coating acts as a sacrificial barrier, significantly reducing future adhesion of contaminants. Adopting this disciplined approach—typically every two weeks—will prevent micro-pitting, preserve the factory finish, and ultimately safeguard the resale value and lifespan of what are both a critical safety component and a significant financial investment in your vehicle.

Choosing the Right Cleaning Products and Tools
Selecting the appropriate cleaning products and tools is the cornerstone of effective alloy wheel maintenance. The wrong choice can strip protective coatings or cause micro-abrasions that dull the finish over time. First and foremost, avoid any aggressive, abrasive cleaners containing hydrofluoric acid or high alkaline levels. These can irreversibly damage clear coats and aluminum surfaces. Instead, opt for a pH-neutral wheel shampoo or a specifically formulated acid-free wheel cleaner. These solutions break down brake dust, road grime, and oily residues without compromising the integrity of the wheel’s protective layer.
Equally critical is the tooling. Always use a dedicated microfiber wash mitt or a soft, boar’s-hair detailing brush for the face of the wheel. For hard-to-reach areas like the barrel, lug nut recesses, and between spokes, a set of wheel woolies (microfiber cleaning sticks) or angled brushes with flagged tips are essential. Never employ a standard car wash sponge or a stiff bristle brush, as these can trap coarse dirt particles and act like sandpaper.
A final, non-negotiable step is the use of separate buckets and media. Dedicate a specific wash mitt and set of brushes solely for your wheels, never using them on your paintwork. This cross-contamination prevents transferring highly abrasive metallic brake dust particles onto your vehicle’s body panels. For drying, use a clean, plush microfiber drying towel to avoid water spots. By investing in these specific, gentle products and dedicated tools, you protect both the aesthetic and the structural longevity of your alloy wheels.
Step-by-Step Guide to Washing Your Alloy Wheels

Before you begin the washing process, ensure your alloy wheels are cool to the touch. Heat from driving can cause cleaning products to evaporate prematurely or even bake onto the surface, leading to streaking or chemical etching. Start by rinsing each wheel thoroughly with a low-pressure hose to dislodge loose dirt, grit, and heavy brake dust. This initial flush prevents abrasive particles from scratching the clear coat during the contact wash.
Now, apply a dedicated, pH-neutral alloy wheel cleaner. Never use household detergents or acidic cleaners, as these can corrode the protective clear coat and accelerate pitting. Spray the cleaner liberally onto the wheel face, lug nuts, and barrel. Allow it to dwell for 2–3 minutes—but not longer to avoid drying. Use a soft-bristled, non-metallic brush specifically designed for wheels. A boar’s hair or microfiber brush is ideal for the face, while a smaller, angled brush is essential for cleaning behind the spokes and inside the lug nut cavities where brake dust accumulates.
Agitate the cleaner gently, paying extra attention to the rim lips where baked-on contaminants hide. Rinse each wheel individually from top to bottom with a steady stream of water. To prevent water spots, immediately dry the wheel using a clean, plush microfiber towel. Avoid using a used or dirty cloth, which can reintroduce grit. For a final professional touch, consider applying a wheel-specific sealant or hydrophobic ceramic coating every few months, which will repel brake dust and make future washes significantly easier.
How to Protect Alloy Wheels from Brake Dust and Road Grime
To effectively shield your alloy wheels from the corrosive assault of brake dust and road grime, a proactive, layered approach is essential. Brake dust is not merely a cosmetic nuisance; it is a highly abrasive, metallic particulate that, when combined with moisture and road salts, forms a potent acidic compound. This mixture can etch into clear coats and cause irreversible pitting if left unchecked.
The first and most critical line of defense is the application of a high-quality, dedicated wheel sealant or ceramic coating. Unlike standard car wax, these products are engineered to withstand the extreme temperatures generated by braking. A ceramic coating creates a semi-permanent, hydrophobic barrier that prevents brake dust and grime from bonding directly to the wheel’s surface. Instead, contaminants bead up and are far easier to remove with a gentle rinse. I recommend applying two to three coats to ensure complete coverage over all spokes and barrel areas, paying special attention to the inner rim where dust accumulates most heavily.
For maintenance between deep cleans, use a pH-neutral wheel cleaner specifically formulated for alloy wheels. Avoid harsh, acidic “tire shine” products that can weaken the clear coat. Spray the cleaner onto a cool wheel, let it dwell for 60-90 seconds to emulsify the dust, and then rinse with a gentle stream of water. Never use a brush with abrasive bristles; instead, opt for a microfiber wheel mitt or a specialized, soft-bristled brush that won’t mar the surface. Finally, after every thorough wash, reapply a sacrificial layer of spray sealant as a “spot treatment” to maintain the protective barrier against daily road grit and corrosive elements.

Preventing and Repairing Curb Rash on Alloy Rims
Preventing curb rash begins with mindful driving habits. Always approach curbs at a shallow angle, ideally at least 30 to 45 degrees, to minimize the risk of the rim edge scraping against the concrete. Investing in rim protectors—thin rubber or plastic strips that fit around the wheel lip—provides a sacrificial layer that absorbs minor contact. If your vehicle has larger diameter rims with low-profile tires, which offer less rubber protection, consider fitting aftermarket tire pressure monitoring sensors to ensure you are not driving on underinflated tires that allow the rim to sit lower and closer to the curb.
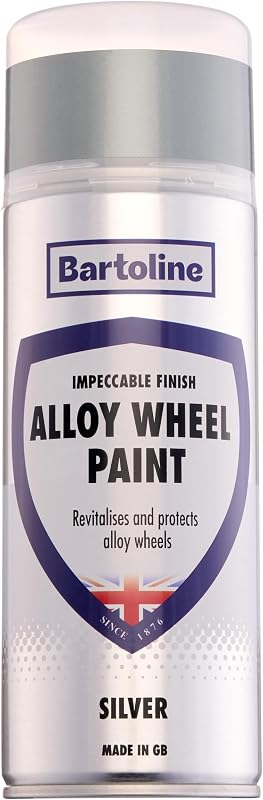
When damage does occur, prompt repair is essential to prevent corrosion from eating into the clear coat and aluminum. For shallow, light scratches (less than 1mm deep), you can often treat them at home. Begin by thoroughly cleaning the rim with a mild soap to remove brake dust and road grime. Next, use 800-grit wet/dry sandpaper to gently feather the edges of the scratch. Follow with 1000-grit for smoothing, and finish with 2000-grit for a fine matte finish. If the finish is clear-coated, apply a touch-up clear lacquer from an aerosol can, allowing it to dry fully before buffing to blend.
For deeper gouges or chips that have exposed bare aluminum, you must fill the void. Use a two-part epoxy metal filler specifically designed for aluminum rims. Mix a small batch, carefully apply it using a plastic spreader, and allow it to cure fully (typically 24 hours). Once hardened, sand it flush with the surrounding surface using the grit progression described above. After sanding, you will need to repaint or powder-coat the entire wheel, as spot color matches are nearly impossible with metallic finishes. For the best result, especially for diamond-cut rims, surrender deep repairs to a professional shop equipped with a lathe.
Seasonal Maintenance: Guarding Against Salt and Corrosion
As an expert in automotive finish care, I cannot overstate the threat that winter road salt poses to your alloy wheels. Even “clear-coated” alloys are vulnerable; salt is hygroscopic, meaning it attracts moisture, creating a microscopic electrolytic solution that can aggressively attack the wheel’s protective layer and the metal substrate beneath. The most critical seasonal maintenance begins before winter hits.
Pre-Winter Preparation is Non-Negotiable. A full pre-winter seal is your first line of defense. After a thorough wash with a pH-neutral wheel cleaner to remove brake dust and embedded particles, apply a dedicated ceramic coating or a high-quality, synthetic sealant specifically designed for wheels. These products create a sacrificial barrier that chemically bonds to the clear coat, making salt crystals far less likely to adhere and initiate corrosion. Avoid simple waxes, which break down quickly under the thermal stress of braking.
Post-Exposure Routine is Crucial. The golden rule for seasonal care is: never let salt dry on your wheels. After every drive in snowy or slushy conditions, conduct a quick rinse with a garden hose if possible. The goal is to physically wash away the concentrated salt solution before it can crystallize and bond. For a more thorough weekly process, use a low-pressure pre-soak foam filled with a mildly alkaline wheel cleaner (pH 8-9) to emulsify salt, followed by a dedicated wheel brush to clean behind the spokes and around the lug nuts, where salt and moisture hide. A final light spritz with a water-displacing spray after drying will help wick residual moisture from tight crevices, stopping galvanic corrosion in its tracks.
When to Apply Wheel Sealant or Ceramic Coating
Determining the optimal moment to apply a wheel sealant or ceramic coating is critical for maximizing both protection and ease of maintenance. As a rule of thumb, the ideal window is immediately after a thorough cleaning and decontamination process, but only once the wheel has achieved a completely bare-metal surface. This means you should first use a dedicated iron remover to dissolve brake dust particles embedded in the paint or clear coat, followed by a clay bar treatment to extract any remaining bonded contaminants. If you skip this step, you will simply seal in grime, causing water spotting and reducing the coating’s longevity.
For new alloy wheels, the best time is actually before the wheels are ever mounted on the vehicle. Factory wheels often have a thin layer of protective wax or shipping oils that must be stripped using a strong alkaline cleaner or an IPA (isopropyl alcohol) wipe. Applying ceramic coating at this stage ensures it bonds directly to the pristine clear coat, creating a hydrophobic barrier that repels brake dust and road salt from day one. For used wheels, the prime moment is after a full polish or, at minimum, a deep cleanser wash that restores the finish's gloss. Avoid applying sealants on a hot wheel; let the wheel cool to below 90°F (32°C) to prevent the product from curing too quickly and creating a blotchy, uneven layer. Finally, always perform a water break test—if water sheets off rather than beading, the surface is clean enough for a sealant. After curing for 24-48 hours, the ceramic layer will chemically bond, providing months of effortless cleaning and preventing corrosion.
Frequently Asked Questions on Alloy Wheel Maintenance
Frequently Asked Questions
What is how to maintain alloy wheels and who should use it?
A: how to maintain alloy wheels is a solution designed to address a specific set of needs for a defined audience. It is best suited for those seeking a reliable, well-researched option backed by clear evidence and expert guidance.
How long does it take to see results with how to maintain alloy wheels?
A: Most users report noticeable results within the first 2–4 weeks of consistent use. Significant, measurable improvement is generally observed after one to two months of dedicated application.
Is how to maintain alloy wheels suitable for beginners or experienced users?
A: how to maintain alloy wheels is designed to accommodate a wide range of experience levels, from complete beginners to advanced practitioners. Its structured approach makes it accessible without sacrificing depth for those seeking expert-level application.
Can how to maintain alloy wheels be combined with other approaches or products?
A: Yes, how to maintain alloy wheels is generally compatible with complementary strategies and tools. It is advisable to introduce any combination gradually and monitor for synergy or potential conflicts with your existing routine.
What are the most common mistakes to avoid with how to maintain alloy wheels?
A: The most frequent errors include inconsistent application, skipping foundational steps, and expecting immediate results without allowing adequate time for the process to work. Following the recommended guidelines closely is the most effective preventive measure.
How does how to maintain alloy wheels compare to similar alternatives on the market?
A: how to maintain alloy wheels distinguishes itself through its evidence-based formulation, transparent ingredient or methodology sourcing, and a track record of user-verified outcomes. Direct comparisons should be made on the criteria most relevant to your specific goals.
Are there any limitations or side effects associated with how to maintain alloy wheels?
A: While how to maintain alloy wheels is formulated to minimize adverse effects, individual responses can vary based on specific sensitivities or pre-existing conditions. Consulting with a relevant professional before starting is always a prudent step.
What is the best way to get started with how to maintain alloy wheels?
A: The most effective starting point is to begin with a foundational assessment of your current situation, then follow the recommended introductory protocol for how to maintain alloy wheels. Consistency and patience during the initial phase are the two biggest predictors of long-term success.
Mastering how to maintain alloy wheels is essential not only for aesthetics but also for preserving the structural integrity and resale value of your vehicle. Consistent cleaning with the right products—specifically pH-neutral cleaners and soft tools—prevents the buildup of corrosive brake dust and road salt. Applying a protective sealant or ceramic coating every few months adds a crucial layer of defense against UV rays, moisture, and minor abrasions. By making this a regular part of your car care routine, you can keep your wheels looking showroom-new for years.
Beyond cleaning, proactive care includes mindful driving habits to avoid curb rash and seasonal inspections to catch early signs of damage. Repairing minor scratches promptly can prevent them from deepening into more expensive repairs. Ultimately, the key to long-lasting alloy wheels lies in prevention rather than restoration. With minimal effort and the right approach, you can maintain that brilliant shine and protect your investment from the harsh realities of the road.