Mastering the Can You Paint Rims on a Car? A 2026 DIY Guide Sizing & Specs Checklist is the first step toward achieving a professional-grade finish on your vehicle's wheels without the high cost of a professional powder-coating service.
This guide is designed for the intermediate DIY enthusiast who understands basic automotive safety. It assumes you are comfortable removing wheels from your vehicle and working in a well-ventilated space with basic hand tools and power-sanding equipment.
By the end of this guide, you will be able to evaluate the structural integrity of your rims, choose the appropriate finish, apply a durable paint coat, and troubleshoot common application errors.
- How to properly clean and decontaminate wheel surfaces.
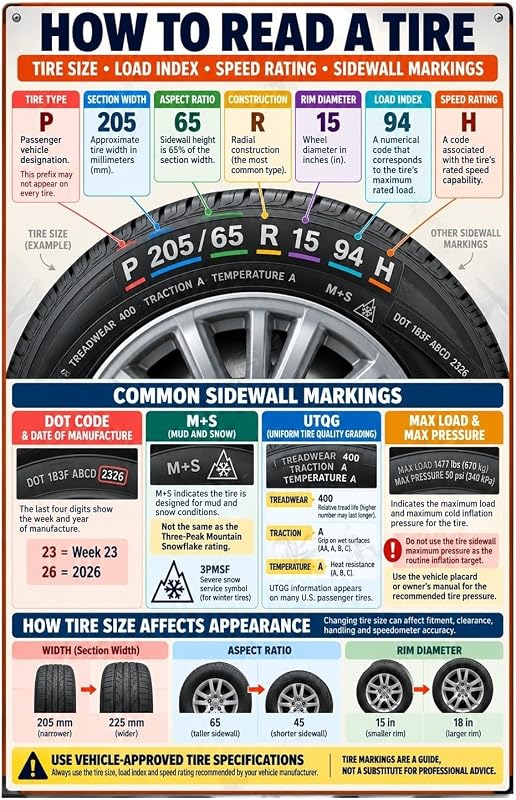
- The importance of selecting the right sizing for your specific rim offset.
- Techniques for sanding and feathering curb rash.
- The correct application sequence for primer, base coat, and clear coat.
- Methods for long-term maintenance of your new wheel finish.
Overview & Prerequisites

Required Tools and Material Safety
Before beginning, gather high-grit sandpaper (400-2000 grit), automotive-grade degreaser, masking tape, drop cloths, and your chosen wheel paint. Ensure your workspace is temperature-controlled to prevent "orange peel" or drying issues during the painting process.
Evaluating Wheel Condition
Not all rims are candidates for DIY painting. If your wheels show deep cracks, structural bending, or significant oxidation, paint will not resolve these safety hazards. Always verify your Best Wheel Offset: Finding the Right Fit for Your Vehicle before committing to a refinish, as aesthetic changes should never compromise your vehicle's handling specs.
Always work in a ventilated area using a respirator mask, as aerosolized automotive paints contain volatile organic compounds (VOCs) that are harmful when inhaled in confined spaces.
Core Concepts & Fundamentals

Surface Tension and Adhesion
The success of any paint job relies on the microscopic texture of the wheel surface. If the surface is too smooth, the paint will flake; if it is too rough, the finish will appear grainy. Proper sanding increases surface area, allowing the chemical bonding of the primer to the metal.
Chemical Compatibility
Mixing different types of paint systems—such as using lacquer over enamel—often leads to lifting or cracking. Always ensure that your primer, base, and clear coat are chemically compatible, preferably from the same manufacturer line to ensure consistent curing cycles. Refer to Can You Paint Rims on a Car? A 2026 DIY Guide vs Top Competitors: Which is Best? for deeper insight into product selection.
| Factor | Correct Mental Model | Incorrect Mental Model |
|---|---|---|
| Surface Prep | Matte finish via wet sanding | Glossy finish on bare metal |
| Coat Thickness | Thin, multiple layers | One heavy, thick coat |
| Environment | Dust-free, low humidity | Outdoor driveway application |
Step-by-Step Execution Guide

Preparation Phase
Begin by deep-cleaning the wheels with a degreaser to remove brake dust and road grime. Use painter's tape to cover the valve stems and ensure the tire beads are masked completely.
Execution Phase
Best Practices & Pro Tips

Curing Environment
Even after the paint feels dry to the touch, the molecular bond continues to harden. Avoid mounting the wheels back on the car for at least 24-48 hours. Excessive heat generated by braking can cause uncured paint to soften and collect road debris.
Layering Logic
Pro painters prioritize "tack time" over total drying time. Wait until the previous layer is tacky before applying the next, which ensures chemical fusion between layers rather than just a top-down drying process.
Troubleshooting & Common Pitfalls

Identifying Failure Modes
Paint failure usually manifests as peeling, bubbling, or fish-eyes. Peeling often indicates improper surface prep or residual wax left on the rim. Bubbling, meanwhile, is frequently caused by spraying in high humidity where moisture becomes trapped beneath the paint film.
Correcting Application Errors
If you encounter a run or drip, allow the area to dry completely, wet-sand the imperfection with 2000-grit paper, and perform a light "spot" repaint followed by a final clear coat finish.
Frequently Asked Questions
Can I use standard spray paint for wheels?
A: It is strongly recommended to use high-temperature automotive-grade wheel paint. Standard spray paint will likely yellow or peel under the heat generated by your brakes.
Do I need to remove the tires to paint my rims?
A: While it is possible to mask the tires, professional results are best achieved by removing the tires to ensure even coverage of the rim lip and inner barrel.
How long does DIY wheel paint last?
A: With proper prep and 2K clear coat, a DIY paint job can last 2-3 years. Longevity depends on road conditions and how frequently you clean your wheels.
Is it possible to paint over powder-coated wheels?
A: Yes, you can paint over existing powder coat, provided you scuff-sand the surface thoroughly to provide a mechanical key for the new paint.
How many cans of paint will I need?
A: A standard set of four wheels typically requires 3-4 cans of base coat and 2 cans of clear coat. Always buy extra to ensure color matching across all wheels.
Can I fix curb rash before painting?
A: Yes, you can use specialized automotive filler or putty designed for metal to fill the gouge, which you must sand smooth before painting.
What is the most common cause of paint failure?
A: The most common cause is inadequate cleaning or surface preparation, specifically failing to remove invisible traces of brake dust and oils.
Is painting rims safe?
A: Yes, provided you do not use heat-curing methods that exceed the manufacturer's temperature limits for the alloy and that you keep the paint away from the tire mounting surface.
Key Takeaways
- 1 Prep work is 90% of the finish quality.
- 2 Use etching primer on bare aluminum to prevent corrosion.
- 3 2K clear coat is essential for chemical and UV resistance.
- 4 Humidity and temperature significantly impact paint flow.
- 5 Always sand between coats if you notice impurities.
- 6 Respect cure times to avoid long-term paint softening.
- 7 Use internal resources to verify technical specs.
Conclusion
Refinishing your own rims is a rewarding project that transforms your vehicle's appearance. By following this guide, you have the knowledge to prep, paint, and protect your wheels effectively.
Remember that patience is your greatest tool. Avoiding the urge to rush the process will pay off in a finish that stands up to the rigors of the road.
Take your time, prioritize safety, and enjoy the custom look you have created.
📌 Pillar Resource: Read our complete our Can You Paint Rims on a Car? A 2026 DIY Guide resource for in-depth insights.