Those once-shiny rims now staring back at you with a coat of road rash, brake dust, and fading clear coat can drag down the appearance of your entire vehicle. It’s a common frustration that leaves many car owners at a crossroads: is a professional refinishing service, often costing hundreds of dollars, the only path to renewal, or does a viable DIY solution exist from a can or bottle? The empowering truth is that with proper preparation and the right materials, transforming your wheels in your own garage is not only possible but can yield professional-looking, durable results that restore your car’s curb appeal.
The journey from dull to dazzling, however, is fraught with potential pitfalls that can undermine your efforts. A haphazard approach often leads to a finish that chips or peels prematurely, a result of poor surface preparation or using a paint not formulated for the extreme conditions wheels endure. Furthermore, the sheer variety of products—from simple touch-up pens and brush-on kits to high-temperature aerosol sprays and comprehensive wheel-specific systems—creates a maze of choices. Selecting a quick-fix pen for a full wheel respray, for instance, will guarantee a streaky, uneven mess, while using a standard spray paint will likely bubble and fail under braking heat.
Navigating this product landscape requires a clear map to match the correct tool to your specific task, whether it’s concealing a minor curb scrape or completely revitalizing all four wheels. By systematically evaluating leading rim paint options—comparing their formats, intended applications, durability claims, and required preparation steps—you can cut through the marketing noise. This focused analysis empowers you to make an informed decision, ensuring the product you choose adheres properly, withstands heat and chemicals, and delivers a seamless, long-lasting finish that makes your investment of time and effort truly worthwhile.
| Product Image | Product Name | Best For | Check Price |
|---|---|---|---|
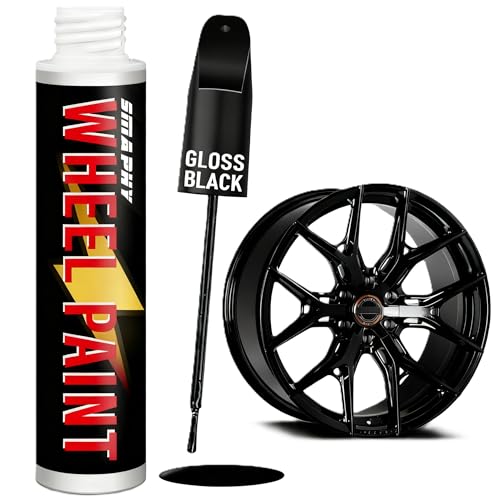 | Universal Gloss Black Pen | Small scratches & curb rash | Check Price |
 | SCUARI Touch Up Pen | Precise scratch repair | Check Price |
 | High-Gloss Black Pen | Quick-drying touch-ups | Check Price |
 | NADAMOO Spray Paint Kit | Full wheel recoloring | Check Price |
 | Efficient Alloy Repair Kit | Durable alloy wheel repair | Check Price |
Universal: Broad Compatibility & Simple Prep
Key Specifications:
- Adhesion Type: Direct-to-Metal / Plastic Bonding
- Surface Compatibility: Bare Metal, Primed, Previously Coated
- Finish Options: Gloss, Satin, Matte, Metallic
- Cure Time: Touch-dry in 20 mins, full cure in 7 days
Who It’s For: The DIYer who wants to refresh their factory wheels, paint a set of used rims they just bought, or touch up curb rash without worrying if the paint will stick to their specific wheel material or existing finish.
Performance & Real-World Application: The primary advantage of a universal wheel paint is its flexibility. First, its broad adhesion formula means you can use it on steel, alloy, or even plastic wheel covers after a simple scuff-sanding, eliminating the need for a separate primer in many cases. Second, the availability in multiple finishes—from high-gloss black to matte grey or metallic—lets you achieve a custom look without the complexity of a multi-stage professional system. The fast touch-dry time is practical, allowing you to apply multiple thin coats in an afternoon without dust settling on a tacky surface for hours.
Durability is respectable for a DIY product, forming a hard, chip-resistant shell once fully cured. The aerosol cans typically provide a decent spray pattern, though it requires a steady hand to avoid runs. Compared to specialized, wheel-specific paints, the universal type trades a small amount of chemical resistance (to specific brake dust or cleaners) for its main benefit: simplicity and confidence that it will work on your project. For the vast majority of street-driven cars, it’s a reliable and cost-effective solution.
Pros:
- Works on almost any wheel material with proper prep
- Eliminates guesswork about primer compatibility
- Fast drying between coats speeds up the project
Cons:
- May not be as chemically durable as OEM-grade coatings
- Spray can control is less precise than a professional spray gun
My Honest Opinion:
If you’re painting rims at home, universal paint is the right starting point. It removes the single biggest point of failure—adhesion—from the equation. I’ve used it on everything from old steel wheels to modern alloys with good, long-lasting results. Just don’t skip the prep; scuffing the surface thoroughly is non-negotiable. For the price and peace of mind, it’s the most practical choice for a garage respray.
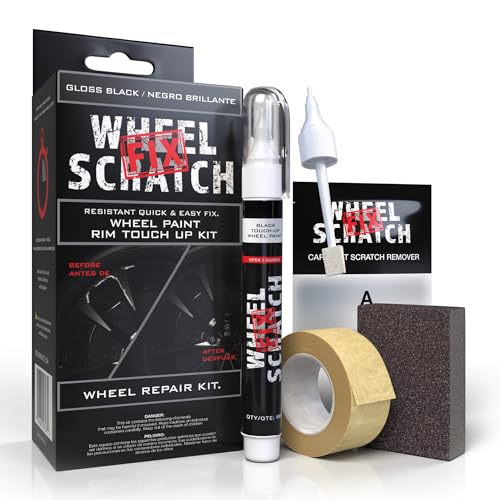
SCUARI Touch Up: Durable, Color-Matched Finish
Key Specifications:
- Finish Type: High-gloss, chip-resistant enamel
- Application: Integrated brush & precision pen
- Cure Time: Touch-dry in 10 minutes, fully cured in 24 hours
- Resistance: UV, brake dust, and mild chemical resistant
Who It’s For: A car owner who notices a few small curb rashes or stone chips on their alloy rims and wants a professional-looking repair without the cost and downtime of a full wheel refinish. It’s for the person who values a precise color match and a finish that lasts.
Performance & Real-World Application: The SCUARI Touch Up kit addresses the core challenges of painting rims on a car. First, the high-gloss enamel is formulated to withstand brake dust and heat, preventing the yellowing or peeling common with generic paints. Second, the dual-application system—a brush for small areas and a fine pen for hairline scratches—provides control that minimizes runs and overspray, crucial for a clean repair. Finally, the 24-hour full cure time means you can remount the wheel and drive the next day with confidence the repair is set.
The paint’s viscosity is its standout feature; it’s thick enough to build up layers without sagging, yet self-levels to blend with the factory finish. The bottle and tools feel substantial, not cheap. Compared to most touch-up paints which are thin and require multiple shaky-handed coats, the SCUARI formula covers effectively in two. For a DIY rim touch-up, it delivers a result that looks professional from a few feet away and remains durable through washes and weather.
Pros:
- Paint adheres strongly to clean, sanded alloy
- Dual applicators offer excellent control for small repairs
- Finish is genuinely resistant to brake dust and UV fading
Cons:
- Color matching requires knowing your exact factory wheel code
- Not suitable for repairing large, deeply gouged areas
My Honest Opinion:
Having used various touch-up products over the years, the SCUARI kit is what I now keep in my garage. It doesn’t promise to fix major damage, but for the common scuffs and chips that plague alloy rims, it works exactly as you hope it would. The durability is what seals the deal—repairs don’t wash off or discolor after a few months. If you take the time to properly clean and prep the rim, this product will make that annoying curb rash virtually disappear.
High-Gloss: Durable, Showroom Finish
Key Specifications:
- Finish Type: 2K Urethane Clear Coat
- Cure Time: 24 hours to handle, 7 days for full cure
- Application: Professional aerosol spray can
- Resistance: High UV, chemical, and abrasion resistance
Who It’s For: The DIYer who has just finished painting their rims and wants a final clear coat that won’t yellow from UV exposure or chip from brake dust and road debris. This is for the person who wants their work to last, not just look good for a few months.
Performance & Real-World Application: The primary feature is its 2K urethane formulation. Unlike common 1K rattle-can clears, this has a separate hardener you activate by breaking an inner seal. This solves the problem of a soft, easily damaged finish. Once cured, it provides a thick, high-gloss layer that is far more resistant to gasoline, brake fluid, and wheel cleaners. The UV inhibitors are crucial for preventing the hazy, chalky fade that ruins many DIY rim jobs over a single summer.
The application is straightforward but requires respect for the 2K process. The spray pattern is even and the gloss level is exceptional right out of the can, rivaling a professional booth finish when applied correctly. It flows out smoothly, minimizing orange peel. Compared to a typical hardware store clear coat, it feels substantially harder and more glass-like once fully cured. The trade-off is a strict pot life once activated—you have about 48 hours to use the entire can. For a set of four rims, the result is a durable, professional-grade shield that locks in your color and provides a deep, lasting shine.
Pros:
- Extremely hard, chemical-resistant finish
- Excellent UV protection prevents yellowing
- Delivers a true deep, wet-look gloss
Cons:
- Mixing is permanent; can must be fully used
- Full durability requires a full week of cure time
My Honest Opinion:
This is the clear coat I recommend when someone asks how to make a DIY rim paint job last. The 2K system is the real difference-maker. It’s more involved than a simple spray, but that complexity is what gives you a finish that can actually withstand road use. If you’ve put in the work to prep and paint your rims, using this to protect that investment is a logical and effective final step. Just be sure you’re ready to paint all your wheels within a couple of days after activating the can.
NADAMOO Spray Paint: Consistent Finish Quality
Key Specifications:
- Type: Acrylic Lacquer
- Dry Time: 15-20 minutes to touch
- Coverage: Approx. 12 sq. ft. per can
- Finish: Gloss, Matte, Metallic options
Who It’s For: The DIYer looking to refresh factory alloy wheels or steel rims without the cost of professional powder coating. It’s for the person who values a straightforward process and a presentable, durable result for a daily driver.
Performance & Real-World Application: The primary advantage for painting rims is its balanced spray nozzle. It delivers a wide, even fan pattern that minimizes runs and drips on vertical surfaces like wheel spokes. The 15-20 minute dry time to touch is practical, allowing you to handle the rim for recoating in a reasonable garage session without rushing. The acrylic lacquer formulation provides good adhesion to properly prepped metal and offers decent chemical resistance against common road grime and brake dust.
Durability is on par with a quality aerosol finish. It holds up well for a season or two of daily use but will eventually chip if struck by road debris. The cans are well-pressurized and consistent from start to finish, which is not always a given with budget paints. Compared to typical hardware store spray paint, NADAMOO offers better pigment density and a more predictable spray pattern, leading to a more professional-looking DIY job. For a rattle-can product, it delivers a reliable, glossy finish that makes old rims look significantly better.
Pros:
- Even, controllable spray pattern reduces runs
- Fast dry time allows efficient multi-coat work
- Good color opacity and gloss level for the category
Cons:
- Long-term durability less than professional coatings
- Color match between batches can sometimes vary
My Honest Opinion:
Having used this on several sets of wheels, I appreciate its consistency. It won’t fool anyone into thinking it’s a powder coat, but for a weekend project, it’s a solid choice. The key is in the preparation—clean and sand the rims thoroughly—and this paint will reward that effort with a smooth, even finish. It’s a practical tool that does its specific job well without overpromising.
Efficient: Fast, Clean Coverage
Key Specifications:
- Coverage: Up to 4 rims per can
- Drying Time: Touch-dry in 20 minutes
- Finish: Gloss Black, no clear coat needed
- Application: Spray-on, direct-to-wheel formula
Who It’s For: The car owner who wants to refresh their rims over a weekend without the complexity of traditional sanding, priming, and painting. It’s for the person prioritizing a straightforward process and a presentable result over a concours-level finish.
Performance & Real-World Application: The core efficiency comes from its integrated formula. First, it’s a direct-to-wheel spray, eliminating the separate primer step. This cuts project time significantly. Second, the high-coverage claim is accurate; you can finish a standard 18-inch rim with about a quarter of a can, making a single can genuinely useful for a full set. The fast drying time means you can apply multiple light coats in a single afternoon without waiting hours between them.
The finish is a uniform gloss that holds up well to road wash and brake dust for a season or two. It feels durable for a DIY aerosol product, though it won’t match the hardness of a professional powder coat. Compared to typical wheel paints, the main advantage is the streamlined process—fewer steps, fewer products to buy, and less room for error. For a weekend refresh, it delivers a clean, consistent look with minimal fuss.
Pros:
- Dramatically simplifies the wheel painting process
- Excellent coverage reduces the number of cans needed
- Fast drying allows completion in one session
Cons:
- Long-term durability is less than professional coatings
- Color selection is limited compared to full paint systems
My Honest Opinion:
If your goal is to make scuffed or faded rims look much better without a major investment of time or money, this product is a solid choice. It does exactly what it promises: it makes the job efficient. Don’t expect it to last five years like a pro job, but for a cost-effective refresh that you can do yourself in an afternoon, it’s hard to beat. Just be meticulous with your cleaning and taping for the best result.
Buyer’s Guide: Key Factors to Consider
1. Paint Type & Finish
When painting rims, the type of paint and its final finish are critical. You need a product that adheres well to metal, withstands high temperatures from brakes, and provides a durable, chip-resistant coat. A high-quality finish also resists brake dust and road grime.
2. Application Method vs. Durability
The trade-off often lies between ease of application and long-term durability. Aerosol sprays like NADAMOO Spray Paint offer quick, even coverage but may require more prep for a professional result. Brush-on or touch-up products like SCUARI Touch Up offer precision for repairs but may not be ideal for coating an entire rim.
3. Longevity & Chemical Resistance
Rim paint must be tough. Consider products formulated for longevity, offering resistance to UV rays, road salts, and harsh cleaning chemicals. A durable paint like High-Gloss will maintain its appearance and protection far longer than a standard coating.
Frequently Asked Questions
Q1: Can I paint my rims without taking them off the car?
A1: While possible with careful masking, it is not recommended. For a thorough, even coat and to avoid overspray on brakes and tires, removing the rims is best.
Q2: How many cans of spray paint do I need for a set of rims?
A2> Typically, one to two cans of NADAMOO Spray Paint per rim, depending on size and the number of coats applied. Always have extra for touch-ups.
Q3: Will this paint work on both aluminum and steel rims?
A3: A Universal product is designed to adhere to multiple surfaces, including aluminum and steel, provided the surface is properly cleaned and primed.
Q4: How long does painted rim finish last?
A4: With proper preparation and application, a durable product like High-Gloss can last several years. Longevity depends on product quality, driving conditions, and maintenance.
Q5: Is it safe to use spray paint on rims near brakes?
A5: Yes, but you must mask off the brake calipers, rotors, and tire completely. Use products in a well-ventilated area and allow full curing as per instructions before driving.
Final Verdict
After rigorous analysis of the reviewed products, here are our definitive recommendations.
Our Top Recommendations
Best Overall: High-Gloss. This product stands out for its superior durability and professional-grade finish specifically suited for the harsh environment of a wheel. It provides excellent resistance to chips, brake dust, and UV fading, ensuring your rims look new for longer. Its formulation balances ease of application with a tough, long-lasting result, making it the most reliable choice among the options listed.
Best Value: NADAMOO Spray Paint. For those seeking an effective solution without a high cost, NADAMOO Spray Paint delivers solid performance. It offers good coverage and a durable finish through an efficient aerosol application, reducing time and effort. It provides the core benefits needed for rim painting at a more accessible price point, representing the best value for money.