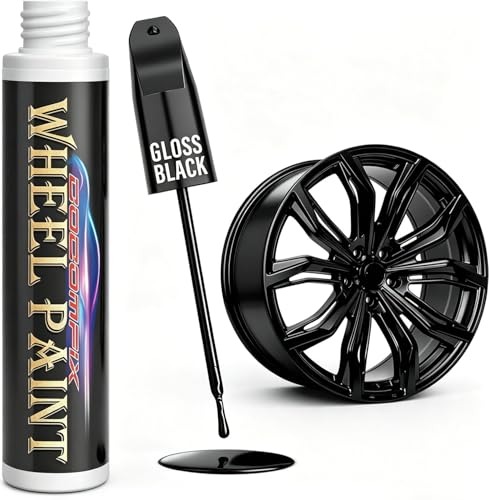
Finding the Best Way To Spray Alloy Wheels Black in 2027 requires a blend of meticulous surface preparation and an understanding of modern aerosol chemistry to ensure a factory-like finish that survives daily driving.
This guide is designed for automotive enthusiasts and DIYers who possess basic mechanical aptitude and are comfortable working with paints and solvents. We assume you have a dedicated workspace and the patience required for proper curing times.
By the end of this guide, you will be able to execute a complete wheel refinishing project, from initial cleaning to the final clear coat, achieving a professional appearance that resists road debris and brake dust.
- Essential safety gear and workspace ventilation requirements.
- The importance of chemical degreasing for paint adhesion.
- Understanding the specific primers required for alloy substrates.
- Techniques for achieving a uniform, run-free spray pattern.
- Post-application curing times for maximum longevity.
Overview & Prerequisites
The Necessary Toolkit
Success starts with the right equipment. Beyond high-quality wheel paint and clear coat, you will need 400-800 grit wet-dry sandpaper, a high-quality wax and grease remover, painter's tape, and protective gear including a respirator and gloves. You may also want to review Top 5 Must-Have Accessories for Alloy vs Aluminum Wheels to ensure you have the correct supplies for your specific wheel material.
Workspace Requirements
The environment must be dust-free, well-ventilated, and kept between 65-80°F. Humidity should be below 60% to prevent "blushing" in your clear coat. Always ensure you have a stable surface for the wheels, such as a sturdy rack or a clean wooden pallet.
Before beginning, ensure your wheels are completely free of old wax or silicone-based tire dressings, as these are the primary cause of "fish-eye" paint defects.
Core Concepts & Fundamentals
Substrate Preparation Theory
The "why" behind the process is adhesion. Alloy wheels are prone to oxidation; if you spray over a compromised surface, the paint will flake. Properly sanding the wheel creates "tooth" for the primer to bond to. You can learn more about addressing surface imperfections in our guide on How To Fix Curb Rash On Black Rims.
Aerosol Dynamics
Understanding how paint atomizes is crucial. A light, overlapping spray pattern (50% overlap) prevents heavy buildup that leads to runs. Letting each coat "flash off" or dry to a dull sheen before the next application is the secret to a professional finish.
| Feature | Correct Approach | Incorrect Approach |
|---|---|---|
| Prep | Sanding to bare metal or matte | Painting over glossy clear coat |
| Spraying | Multiple thin, light coats | One heavy, thick application |
| Environment | Climate-controlled and dry | Humid or windy outdoor areas |
Step-by-Step Execution Guide
Preparation Phase
Begin by removing the wheels from the vehicle. Clean them thoroughly with a dedicated wheel degreaser. Once dry, sand the entire surface to remove the gloss. If there is significant curb rash, follow the repair procedures linked earlier.
Execution Phase
Masking and Priming
Mask off the tire completely or deflate it slightly to tuck tape behind the rim edge. Apply two coats of an etching primer to ensure a strong bond to the alloy surface.
Applying Base Color
Shake your black paint for the recommended time. Apply 3-4 light, even coats, waiting 10-15 minutes between each. Never attempt full coverage on the first coat.
Applying Clear Coat
Once the base is uniform, apply a 2K clear coat. This is essential for protecting the black finish from UV rays and brake dust heat.
Curing and Mounting
Allow the wheels to cure for at least 24 hours in a warm, dry area. Avoid aggressive cleaning for the first week to allow the paint to fully harden.
Best Practices & Pro Tips
Maintaining Longevity
To keep your black wheels looking sharp, treat them with a dedicated wheel sealant. This reduces the ability of brake dust to etch into the finish. Read more about selecting the right products in How to Paint Alloy Wheels: Step-by-Step Guide + Best Wheel Paints vs Top Competitors.
Refining Your Technique
Tip: Keep the can in a bucket of warm water (not hot) to ensure consistent pressure and atomization during the colder months.
Success: Always test your spray pattern on a piece of cardboard before aiming at the wheel to ensure the nozzle is clear.
Note: If you encounter a run, stop spraying immediately. Let it dry completely, sand the area flat, and touch it up carefully.
Troubleshooting & Common Pitfalls
Addressing Coating Failures
Common issues like orange peel or flaking are almost always linked to environmental factors or poor surface preparation. If you see peeling, it is usually because the previous wax layer wasn't fully removed. Refer to 7 Common Problems with How to Paint Alloy Wheels for advanced remediation techniques.
Fixing Common Mistakes
Issue: Orange Peel. Cause: Spraying too far away or in temperatures that are too high. Fix: Sand lightly with 2000-grit paper and apply a final, wetter clear coat.
Issue: Runs/Sags. Cause: Applying too much paint in one area. Fix: Allow to fully dry, sand flat, and re-apply light coats.
Issue: Paint Flaking. Cause: Improper cleaning/degreasing. Fix: You must strip the paint in that area, re-clean with wax remover, and restart the priming process.
Frequently Asked Questions
Do I need to remove the tires to paint the wheels?
A: While it is possible to paint with tires mounted by using careful masking, removing the tires allows for a more professional, uniform finish on the inner rim lips.
Can I use standard spray paint?
A: Standard hobby paint lacks the heat and chemical resistance needed for wheels. You should always use specialized automotive wheel paint.
How long does the paint last?
A: When applied correctly with a 2K clear coat, a professional DIY paint job can last 3 to 5 years under normal driving conditions.
What is the difference between 1K and 2K paint?
A: 1K paints dry through solvent evaporation, while 2K paints contain a hardener that triggers a chemical reaction for a much more durable shell.
Can I paint over curb rash?
A: You must smooth the rash with sandpaper or body filler first. Paint will not hide deep scratches and will actually highlight them.
Is painting wheels a permanent modification?
A: Yes, it is considered a permanent finish. If you want a reversible option, consider a peelable rubber coating instead.
Why is my paint bubbling?
A: Bubbling is usually caused by trapped moisture or using incompatible paint layers. Always ensure the surface is completely dry and the products are from the same manufacturer.
How many cans do I need?
A: A standard set of four wheels typically requires 3 cans of color and 2-3 cans of 2K clear coat.
Key Takeaways
- 1 Surface preparation, specifically cleaning and sanding, determines 90% of the finish quality.
- 2 Always use an etching primer specifically designed for alloy/aluminum surfaces.
- 3 Use 2K clear coat for chemical and heat resistance against brake dust.
- 4 Keep your spraying environment between 65-80°F to avoid curing issues.
- 5 Multiple thin coats are superior to a single heavy coat, which risks runs and sags.
- 6 Allow for at least 24 hours of full curing before re-installing wheels on the vehicle.
- 7 Consistent aerosol pressure is best maintained by keeping cans warm and shaking them well.
Conclusion
Achieving a professional-grade finish on your alloy wheels is a rewarding project that transforms the look of your vehicle. By following the systematic approach of preparation, priming, and multi-stage coating, you can ensure a durable, long-lasting result.
Remember that the "Best Way To Spray Alloy Wheels Black in 2027" is not about rushing the process; it is about respecting the drying times and ensuring the substrate is perfectly prepped.
Refinishing your wheels is a high-impact DIY project that significantly elevates your vehicle's aesthetic when done with patience and precision.