Learning how to fix curb rash on black rims is a manageable DIY project that can save you the significant expense of professional wheel refurbishment.
This guide is designed for car enthusiasts and DIY beginners who want to maintain their vehicle's aesthetic. We assume you have basic hand-tool familiarity and a clean, well-lit workspace to perform the necessary surface preparation and paint application.
By the end of this guide, you will be capable of identifying the severity of rim damage, performing the necessary sanding and filling, and applying a professional-grade color match to restore your black rims to factory-fresh condition.
- Understanding the distinction between cosmetic rash and structural damage.
- Essential safety gear and surface cleaning requirements.
- The chemistry of sanding, filling, and sanding again.
- Selecting the correct black finish (matte, satin, or gloss).
- Proper masking and environmental control for paint curing.
Overview & Prerequisites
Required Materials and Tools
To address curb damage, you will need a progression of sandpaper grits (ranging from 180 to 2000), high-quality automotive body filler, masking tape, protective drop cloths, wheel degreaser, and a color-matched paint specific to your rim finish. Understanding these tools is essential to achieving a long-lasting result.
Assessing Your Skill Level
This repair is classified as intermediate. While the individual tasks—sanding and painting—are straightforward, the patience required for high-quality preparation is often the limiting factor for beginners. If you want to dive deeper into the basics of material science, check out Step-by-Step: How to Setup, Configure & Master Alloy vs Aluminum Wheels : Choose the Right Material (2026) to ensure you are working on the correct substrate.
Core Concepts & Fundamentals

Understanding Surface Adhesion
The primary reason DIY repairs fail is poor surface preparation. Paint adheres best to a clean, slightly "toothed" surface. If you do not remove the clear coat and oxidized layers properly, the new paint will peel within months. Before you start, explore how finish types interact with the underlying metal by reading How to Paint Alloy Wheels: Step-by-Step Guide + Best Wheel Paints vs Top Competitors.
The Geometry of Rim Repair
Curb rash often creates uneven depressions. Your goal is not to remove the curb rash entirely by sanding down the metal, but to fill the depression so that the wheel surface is flush with the original factory contour. This preserves the structural integrity of the wheel.
| Approach | Result |
|---|---|
| Heavy Sanding Only | Visible flat spots and weak spots. |
| Filling and Leveling | Factory-style, seamless finish. |
Step-by-Step Execution Guide

Preparation and Surface Leveling
Finishing and Paint Application
Recommended Equipment & Solution
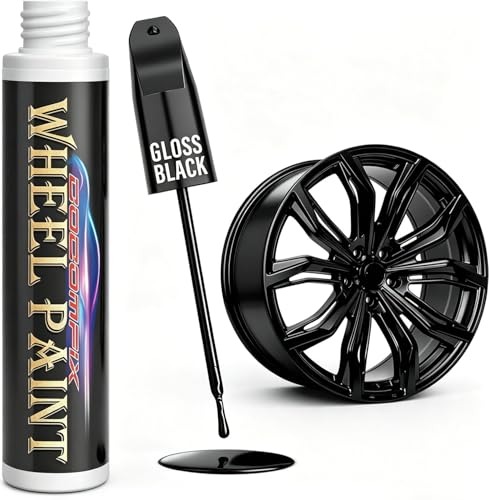
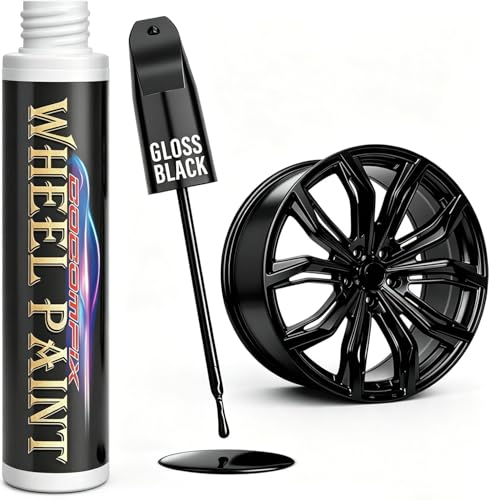
Gloss Black Rim Touch Up Paint, Rim
A reliable pick for Gloss Black Rim Touch Up, selected based on this article's guidance.

SMAPHY Wheel Scratch Repair Kit, High Gloss
A reliable pick for SMAPHY Wheel Scratch Repair Kit, selected based on this article's guidance.
Best Practices & Pro Tips

Environmental Control
Avoid painting in direct sunlight or high humidity. Humidity can trap moisture under the clear coat, causing "clouding." A garage with stable temperatures is ideal.
Refining the Finish
Troubleshooting & Common Pitfalls

Identifying Failed Bonds
If the paint begins to bubble, it is usually due to residual grease or moisture. If you encounter this, you must strip the section back, clean it with alcohol, and restart the process. Proper maintenance and quick fixes are key to avoiding these issues early on.
Fixing Common Errors
Frequently Asked Questions
Can I fix deep gouges in the rim?
A: Yes, but if the gouge is deeper than 3mm, you may need to use a structural filler or consult a professional, as deep damage can compromise the structural integrity.
Do I need to remove the wheel from the car?
A: It is highly recommended. It allows for better access and prevents overspray from damaging your brake calipers or rotors.
How do I know if my rim is matte or gloss?
A: Look at the reflection on your current rim. If it is blurry, it is likely matte or satin; if it is sharp and clear, it is high-gloss.
How long does the repair take to cure?
A: While it may feel dry in an hour, you should wait at least 24 to 48 hours before exposing the wheel to road conditions.
Does the color ever fade?
A: Automotive-grade wheel paints are UV-resistant, but they will eventually age. Applying a protective wax can significantly extend the lifespan.
Can I fix curb rash on chrome wheels?
A: No, this guide is specific to painted black alloy wheels. Chrome plating requires specialized chemical stripping and electroplating processes.
What if the damage is on the edge of the tire bead?
A: If the damage affects the bead seat where the tire meets the rim, take the car to a professional immediately for safety reasons.
Is it cheaper to replace the rim?
A: For minor curb rash, DIY repair is significantly cheaper. For severe damage or bent rims, replacement is the safer and more cost-effective option.
Key Takeaways
- 1 Surface prep is 80% of the work; never rush the sanding process.
- 2 Use specific automotive filler to bridge gaps and create a smooth profile.
- 3 Always clean with degreaser to remove all traces of brake dust.
- 4 Multiple light coats are superior to one heavy, wet coat.
- 5 Protect surrounding components to prevent paint overspray.
- 6 Allow adequate curing time before re-installing and driving.
- 7 Consistent technique is the secret to a professional-grade finish.
Conclusion
Fixing curb rash on black rims is a highly rewarding process that restores your vehicle's appearance and protects your investment. By following these methodical steps, you can achieve results that are nearly indistinguishable from professional services.
Remember that patience is your best tool. If at first your paint job isn't perfect, take the time to sand it down and try again. For more information on wheel maintenance, visit our guide on Step-by-Step: How to Setup, Configure & Master Alloy vs Aluminum Wheels.
With proper technique and attention to detail, your rims will look showroom-ready in no time.