How to Paint Alloy Wheels: Step-by-Step Guide + Best Wheel Paints Sizing & Specs Checklist
Mastering DIY rim restoration is simple with this How to Paint Alloy Wheels: Step-by-Step Guide + Best Wheel Paints Sizing & Specs Checklist.
Achieving a professional-grade finish on your rims requires more than just a rattle can; this How to Paint Alloy Wheels: Step-by-Step Guide + Best Wheel Paints Sizing & Specs Checklist provides the exact framework needed to ensure durability and aesthetic appeal.
This guide is tailored for automotive enthusiasts and DIYers who possess basic mechanical aptitude and a dedication to methodical preparation. No prior paint shop experience is required, though patience is the most critical tool in your kit.
By the conclusion of this guide, you will be able to evaluate the structural integrity of your wheels, prepare the alloy surface, apply professional-grade coatings, and troubleshoot common application errors.
- Understanding alloy surface chemistry.
- Selecting the correct paint and clear coat specs.
- Mastering the art of surface abrasion.
- Techniques for even, run-free paint application.
- Post-paint curing requirements for long-term protection.
Overview & Prerequisites

The Essential Toolkit
Success starts with organization. You will need high-quality 400-800 grit wet/dry sandpaper, specialized degreaser, automotive masking tape, microfibre cloths, and specific wheel-rated primers and paints. Before starting, read the Top 5 Must-Have Accessories for Alloy vs Aluminum Wheels to ensure your gear matches your wheel material.
Defining Success Criteria
This project assumes you have a clean, ventilated workspace and at least 48 hours for the full curing process. Never attempt to paint wheels in direct sunlight or high humidity, as these environmental factors directly inhibit paint bonding and finish clarity.
Core Concepts & Fundamentals

Surface Preparation vs. Paint Quality
The secret to a lasting finish is not the brand of paint, but the mechanical bond of the primer to the alloy. Because alloy wheels are subject to extreme heat from braking systems and road debris impact, the surface must be "toothed" correctly using specific sandpaper grits to facilitate long-term adhesion.
Understanding Heat and Chemical Resistance
Wheels operate in a high-stress environment. Standard spray paints will soften when exposed to brake dust and heat. You must utilize specific high-temperature wheel paint. For deeper insights on performance, compare your approach using How to Paint Alloy Wheels: Step-by-Step Guide + Best Wheel Paints vs Top Competitors: Which is Best?
| Feature | Correct Approach | Incorrect Approach |
|---|---|---|
| Surface Prep | Wet-sanding to 800 grit | Minimal cleaning/Degreasing only |
| Coating Type | High-Temp Wheel Paint | Standard Interior Enamel |
| Layering | Multiple thin coats | One heavy, thick coat |
Step-by-Step Execution Guide

Phase 1: Surface Preparation
Clean the wheels thoroughly using a specialized degreaser to remove all traces of brake dust, wax, and road tar. Once dry, sand the entire surface area with 400-grit wet sandpaper to smooth out imperfections. For existing damage, review How To Fix Curb Rash On Black Rims before proceeding to paint.
Phase 2: Coating and Curing
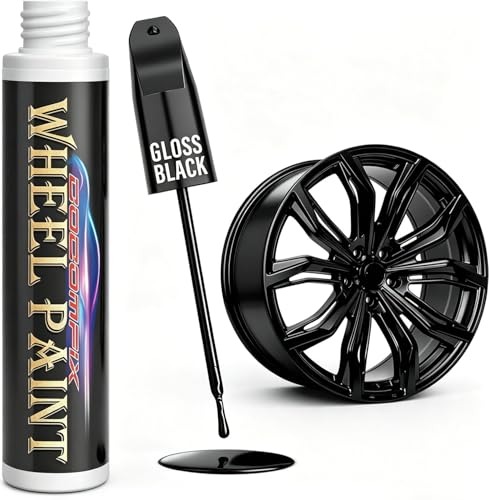
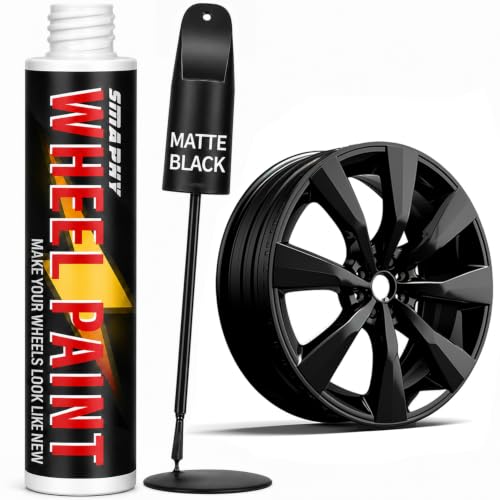
Mask the tires completely to prevent overspray. Apply your primer in thin, even horizontal strokes. Follow with 2-3 coats of color paint, allowing 15 minutes of flash time between each layer. Finally, apply a high-gloss clear coat to lock in the finish and provide UV protection.
Recommended Equipment & Solution

How to Paint on Stone: A Complete
A reliable pick for How to Paint on Stone, selected based on this article's guidance.

How to See Color and Paint It
A reliable pick for How to See Color, selected based on this article's guidance.
Best Practices & Pro Tips
Maintaining the Finish
Once finished, treat your wheels like high-end bodywork. Avoid harsh acid-based wheel cleaners that can strip the clear coat. Stick to pH-neutral soaps and soft wash mitts to maintain the luster of your new finish.
Advanced Application Techniques
Use a professional spray nozzle attachment for your rattle cans. This provides a consistent fan pattern that prevents the "striping" effect often associated with standard button-style nozzles. Check out The 5 Best Best Way To Spray Alloy Wheels Black in 2027: Complete Buyer’s Guide for advanced hardware recommendations.
Troubleshooting & Common Pitfalls

Identifying Coating Failures
Peeling usually indicates poor preparation (residual wax). If the paint drips, it indicates the sprayer was held too close or moved too slowly. For more in-depth solutions, see 7 Common Problems with How to Paint Alloy Wheels: Step-by-Step Guide + Best Wheel Paints (and Quick Fixes).
Correcting Imperfections
If you encounter dust nibs or orange peel, wait for the paint to fully cure, then wet sand the area with 2000-grit paper and buff to a shine. Do not attempt to fix a wet finish; you will only worsen the texture.
Frequently Asked Questions
Q: Do I need to remove the tires to paint my wheels?
A: While you can mask them, removing the tires allows for a more comprehensive prep and eliminates the risk of overspray on your tire beads.
Q: How long does DIY wheel paint last?
A: With proper preparation and high-quality paint, you can expect a professional finish to last 2-3 years under normal driving conditions.
Q: Can I paint over existing chrome wheels?
A: Chrome is notoriously difficult for paint to adhere to; you must sand the surface until it is completely dulled or use a specialized self-etching primer.
Q: What happens if I skip the clear coat?
A: Skipping the clear coat leaves your color coat vulnerable to UV rays, salt, and brake dust, which will cause it to fade or flake within months.
Q: Can I use standard spray paint from the hardware store?
A: It is not recommended; standard paint cannot withstand the high thermal cycling of brake systems and will degrade prematurely.
Q: How many cans do I need for four wheels?
A: Generally, you need two cans of primer, three cans of paint, and two cans of clear coat for a complete, uniform set of wheels.
Q: Is it safe to drive immediately after painting?
A: No, you should allow at least 24-48 hours for the chemical cross-linking of the paint to harden sufficiently for road debris impact.
Q: What is the best weather for this project?
A: The ideal range is 65-80 degrees Fahrenheit with low humidity, ensuring the paint dries at the rate designed by the manufacturer.
Key Takeaways
- 1 Preparation is 80% of the job; never rush the sanding process.
- 2 Always verify the chemical compatibility of your primer, paint, and clear coat.
- 3 Use high-temperature wheel-specific products to survive braking heat.
- 4 Consistent, thin layers prevent runs and ensure a smooth aesthetic.
- 5 Proper ventilation is non-negotiable for both safety and paint curing.
- 6 Clean with degreaser frequently to prevent fish-eye contamination.
- 7 Patience during the 24-48 hour cure time prevents long-term finish failure.
Conclusion
Painting your alloy wheels is a rewarding project that significantly improves vehicle aesthetics when done with precision. By following the steps outlined in this guide and focusing on rigorous preparation, you can achieve results that rival professional powder coating.
Remember that the quality of your finished product is directly proportional to your attention to detail during the cleaning and sanding phases. Continue refining your skills by tackling one wheel at a time.
With proper technique and the right supplies, your DIY project will yield durable, professional-grade results that stand the test of time and road use.
📌 Pillar Resource: Read our complete our How to Paint Alloy Wheels: Step-by-Step Guide + Best Wheel Paints resource for in-depth insights.