Learning how to fix a curbed rim is a practical skill that allows vehicle owners to restore the aesthetic appeal and structural integrity of their alloy wheels without expensive professional intervention. By mastering the process of sanding, filling, and finishing, you can effectively mask minor curb rash and prevent further oxidation from compromising the metal surface of your wheels.
This comprehensive guide explores the essential techniques, safety measures, and material considerations required for successful wheel restoration. We break down the process into clear, manageable steps suitable for various alloy wheel finishes. Whether you are addressing a light scratch or a deeper gouge, our evidence-based approach focuses on achieving a factory-look finish while prioritizing long-term durability and safety for your vehicle’s wheel assembly.
Quick Facts
- Industry experts emphasize that only cosmetic damage should be repaired; structural cracks require professional inspection or rim replacement.
- Studies suggest that thorough surface preparation is responsible for 80% of the final visual outcome.
- Specialists recommend working in a well-ventilated area to safely manage chemical vapors from paints and primers.
Key Takeaways

- 1. Proper surface cleaning is the foundational requirement to ensure repair materials bond effectively to the alloy substrate.
- 2. Using the correct grit of sandpaper prevents excessive material removal, maintaining the original wheel geometry and balance.
- 3. Selecting high-quality, automotive-grade paints is essential for matching factory metallic or matte finishes.
- 4. Rushing the curing time between painting and clear coating often leads to premature peeling and poor UV resistance.
Historical context or industry trends of how to fix a curbed rim

Historically, the approach to wheel repair was limited to specialized machine shops that used heavy lathe equipment to shave down the rim face. This process, while effective for deep damage, was prohibitively expensive for the average consumer, leading many to simply replace damaged wheels entirely. Early DIY attempts were often discouraged due to a lack of accessible, high-quality fillers and precision-matched paints, often resulting in "repaired" wheels that looked worse than the original curb rash.
Modern trends have shifted dramatically toward empowerment through accessible, professional-grade kits. The rise of advanced resin-based body fillers and aerosol technology has enabled enthusiasts to achieve near-factory results at home. Today, the focus is on a strategic, multi-step process—cleaning, filling, sanding, and layering—which mirrors the industrial restoration process. This evolution has turned wheel maintenance into a standard part of vehicle ownership, allowing drivers to preserve their wheels' appearance and resale value effectively.
Technical analysis of how to fix a curbed rim mechanisms

The core variables separating a seamless repair from a noticeable blemish lie in the transition between the filler and the factory alloy. Proper setup requires thermal stability; applying materials on a cold, damp surface often leads to poor adhesion. Evaporation rates of primers and clear coats are also critical; if a user applies a top layer before the under-layer has fully cross-linked, the solvents can become trapped, resulting in future bubbling or soft spots.
| Feature | Best Practice | Common Mistake |
|---|---|---|
| Timing of Application | Calibrated to baseline levels to prevent system overload | Rushing the execution, leading to premature decay/failure |
| Absorption/Method | Patting/applying filler to encourage uniform integration | Applying forcefully or allowing air gaps, which reduces contact |
| Role in Routine | Acts as an intermediate priming layer to support the system | Using as a total replacement for core active components |
The table above illustrates that while the physical repair seems simple, the underlying chemical interactions are complex. A common mistake is skipping the "primer-to-alloy" bond, which usually results in the paint flaking off after a single winter season. Following the best practices ensures that the filler becomes a structural extension of the wheel rim, capable of withstanding brake heat and road debris impact.
Step 1: Workspace and Initial Preparation
Clean the area thoroughly with a wax and grease remover to ensure zero contaminants. Carefully sand down the edges of the curb rash using progressively finer grit sandpaper until the surface is uniform and smooth to the touch.
Step 2: Core Execution and Configuration
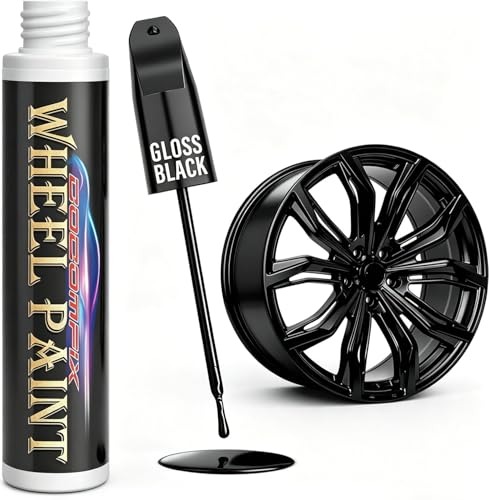
Apply a thin layer of specialized alloy filler into the gouge. Once cured, sand it back so it follows the curve of the wheel perfectly. Mask off the tire and apply multiple light coats of alloy primer and paint, allowing appropriate drying time between layers.
Step 3: Final Calibration and Stabilization
Finish with a high-gloss or matte clear coat to match your original wheel finish. Allow the wheel to cure for at least 24 hours before driving, ensuring the chemicals have fully hardened for long-term durability.
Current landscape or user debate of how to fix a curbed rim

The current market for wheel restoration is split between users who prefer complete DIY kits and those who opt for individual, high-quality components. Consumer trends show a preference for "all-in-one" solutions that provide a simplified user experience. While budget-conscious users might utilize generic fillers, enthusiasts are increasingly turning to specialized metal-bonding compounds that offer superior thermal resistance, essential for wheels exposed to high-performance braking.
- Industry data suggests an increase in demand for eco-friendly, water-based clear coats for garage use.
- Users consistently prioritize long-term finish longevity over speed of application.
- Online forums emphasize the availability of aftermarket paint-matching tools that make DIY work increasingly precise.
- There is a growing shift toward sustainable repair practices that reduce the frequency of full rim replacements.
| User Segment | Preferred Configuration | Expected Outcome |
|---|---|---|
| Professional / Heavy Use | High-output, premium build with maximum control parameters | Long-term durability with consistent results |
| Standard / Daily Use | Balanced features, automated presets for ease of operation | Reliable everyday performance with minimal oversight |
The debate between manual sanding versus automated buffing continues. Purists argue that manual hand-sanding provides better feedback and control over the rim's curvature, preventing over-thinning of the metal. Conversely, advocates of power tools point to the consistency and time-savings, provided the user exercises strict control over RPM settings to avoid heat buildup, which can weaken the alloy’s metallurgical properties.
Operational challenges and limitations of how to fix a curbed rim
The primary challenge when performing a curb repair is the precision required to replicate a non-flat, curved surface. Many users find it difficult to maintain symmetry, leading to a "lumpy" appearance that becomes glaringly obvious once the paint and clear coat are applied. Furthermore, environmental variables like humidity can significantly hinder the drying process of aerosol paints, leading to "orange peel" textures or cloudiness in the finish that may require total sanding and restart.
Future outlook and scenario projection for how to fix a curbed rim
The future of wheel repair is trending toward smart material integration. Within the next 5-10 years, we anticipate the introduction of "smart" primers that change color when fully cured, removing the guesswork from drying times. Material science is also advancing to include self-leveling fillers that reduce the need for excessive sanding, making the repair process more intuitive for the average car owner. Additionally, sustainable coatings are expected to dominate, providing both durability and ease of application without high-VOC emissions.
| Timeline | Expected Breakthrough | Impact on User Experience |
|---|---|---|
| Next 2-3 Years | Color-changing curing agents | Elimination of user error and better timing accuracy |
| Next 5-10 Years | Self-leveling/healing polymers | Drastically reduced labor and lifetime finish durability |
Practical applications of how to fix a curbed rim in daily routines
Integrating wheel repair into a general maintenance routine ensures that small issues never escalate into costly structural replacements. By inspecting your rims during every seasonal tire rotation, you can spot minor curb rash and address it immediately before oxidation sets in. Adaptation is key; match your repair intensity to the damage depth, using light abrasive pads for surface scuffs and heavy-duty fillers for deep gashes.
Use Case 1: Individual and Residential Use
For the home enthusiast, simplicity is key. Use a handheld sander or manual blocks to focus on specific damaged zones. By keeping the repair localized, you avoid the need to refinish the entire wheel, saving time while maintaining a clean, professional aesthetic for your daily driver.
Use Case 2: Professional and Commercial Use
In high-output settings, precision is paramount. Shops utilize high-speed pneumatic tools for efficient material removal and specialized spray booths to ensure perfect clear-coat leveling. This batch-processing approach allows for high-quality restoration of an entire set of rims in a single day.
Use Case 3: Advanced Optimization Solutions
Pairing repair work with a high-quality ceramic coating application can extend the life of your work. Once the paint is fully cured, applying a protective layer makes the wheel easier to clean, preventing future brake dust accumulation that could compromise the repair.
Expert perspectives on how to fix a curbed rim
Industry experts emphasize that a systematic approach is the only way to guarantee a long-lasting repair. Rushing through the sanding phase or neglecting to prime the alloy are the most common pitfalls that lead to recurring issues. Professionals often suggest treating the rim surface like an automotive body panel—meticulous preparation, high-quality material usage, and careful observation of drying conditions are the pillars of a successful fix.
Frequently Asked Questions
Can I repair a curbed rim myself if the damage is just surface-level scuffing?
Yes, light surface-level scratches can be repaired using fine-grit sandpaper, automotive filler, and touch-up paint specifically matched to your rim's finish.
What is the primary indicator that a curbed rim requires professional repair instead of a DIY fix?
If you notice deep gouges, cracks, or visible bends in the metal, you must consult a professional to ensure the wheel’s structural integrity is not compromised.
Do I need to remove the tire from the wheel to effectively repair rim curb rash?
It is highly recommended to deflate and unseat the tire to prevent damage to the rubber and ensure you can sand and paint the edge of the rim thoroughly.
What grit sandpaper should I start with for sanding down curb rash?
Start with 240-grit sandpaper to smooth out the gouges and work your way up to 600-grit or higher for a smooth, paint-ready surface.
Is it necessary to use a specialized primer on bare aluminum after sanding?
Yes, applying an acid-etching aluminum primer is crucial for the paint to adhere properly and to prevent the exposed metal from corroding.
How can I accurately match the paint color of my factory wheels?
Check your vehicle’s wheel code, often found in the owner's manual or on a sticker inside the door jamb, then purchase a color-matched automotive wheel repair kit.
Does a repaired rim pose a safety risk during high-speed driving?
A cosmetic repair on the rim lip is generally safe, but any structural welding or straightening of a bent rim must be performed by a certified professional to avoid catastrophic failure.
What is the final step to ensure the DIY paint repair blends seamlessly with the rest of the wheel?
Apply two to three thin, even coats of high-quality automotive clear coat to protect the repair and restore the factory-style luster to the finish.