Navigating the common problems with how to polish alloy wheels: achieve a gleaming finish effortlessly and fixes is the difference between a mirror-like shine and irreversible surface oxidation.
This guide is designed for automotive enthusiasts and DIY mechanics who possess a basic understanding of wheel maintenance but struggle to achieve professional-grade results. We assume you have access to standard cleaning supplies and basic mechanical aptitude.
By the conclusion of this guide, you will be able to identify oxidation patterns, select the appropriate abrasive grades, execute a uniform polishing sequence, and rectify common surface defects that plague amateur wheel restoration attempts.
- Identifying the difference between clear-coated and bare metal alloy surfaces.
- Selecting the correct chemical compounds for specific oxidation levels.
- Understanding the physics of mechanical versus manual polishing.
- Avoiding common etching and streaking issues during the application.
- Establishing a long-term maintenance schedule for lasting protection.
Overview & Prerequisites
Required Tools and Materials
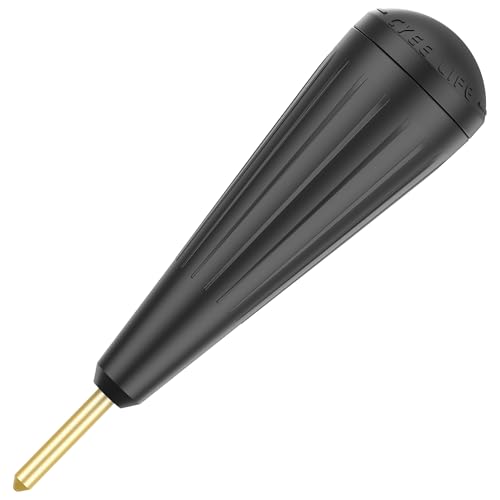
Success begins with preparation. You will need a high-quality alloy wheel cleaner, a soft-bristle brush, a dedicated aluminum metal polish, microfiber towels, and optionally, a power drill with a polishing cone attachment. Before you begin, ensure you are working on a cool surface out of direct sunlight.
Target Audience Requirements
This guide is optimized for those dealing with dull, neglected, or mildly corroded wheels. If your wheels have structural damage or deep curb rash, please refer to Aluminum Filler For Curb Rash: A Complete Guide to Restoring Your Wheels before attempting to polish, as polishing will not resolve structural imperfections.
Always perform a patch test on the inner barrel of the wheel to ensure the chemical polish does not react negatively with your specific alloy finish.
Core Concepts & Fundamentals

Understanding Alloy Surface Chemistry
Alloy wheels consist of a mixture of aluminum and other metals. The primary challenge in polishing is oxidation—a chemical reaction that turns the bright metal surface into a dull, matte grey. Polishing is essentially a controlled abrasion process that removes this thin layer of oxidation to reveal fresh metal.
Differentiating Polishing from Cleaning
Many users confuse cleaning (removing dirt) with polishing (removing oxidation). Using an abrasive polish on a dirty surface will result in micro-scratching as embedded debris is dragged across the metal. For those comparing methods, see How to Polish Alloy Wheels: Achieve a Gleaming Finish Effortlessly vs Top Competitors: Which is Best?
| Feature | Incorrect Approach | Correct Approach |
|---|---|---|
| Surface State | Cleaning over loose grit | Deep-cleaned and decontaminated |
| Application | Heavy, uneven pressure | Consistent, circular, light motion |
| Result | Streaks and cloudiness | Mirror-like, uniform luster |
Step-by-Step Execution Guide

Preparation and Deep Cleaning
Before applying any polish, remove all brake dust and environmental contaminants. Use an iron-dissolving cleaner to ensure the surface is chemically neutral.
Polishing and Buffing Execution
Recommended Equipment & Solution

The Complete Technology Book on Wax
A reliable pick for The Complete Technology Book on, selected based on this article's guidance.
The Complete Technology Book on Wax
A reliable pick for The Complete Technology Book on, selected based on this article's guidance.
Best Practices & Pro Tips

Optimizing for Longevity
Once you achieve the perfect finish, it is essential to seal the metal. Bare alloy is highly susceptible to future oxidation. Applying a dedicated wheel wax or sealant after polishing acts as a sacrificial barrier against brake dust and moisture.
Pro-Level Refinement Strategies
Troubleshooting & Common Pitfalls

Diagnosing Surface Failures
If you encounter cloudy patches, you likely have residual product buildup. If you notice micro-scratches, your polishing pad was likely contaminated with grit during the process.
Correcting Common Errors
Frequently Asked Questions
Can I polish clear-coated wheels?
A: No, standard metal polish is intended for raw alloy. Using it on clear-coated wheels will scratch the protective finish.
How often should I polish my wheels?
A: Generally, polishing is a restorative process, not a daily one. Sealing the wheels quarterly is better than polishing them monthly.
Do I need to take the wheels off the car?
A: It is not strictly required, but removing the wheels allows for significantly better access and safer technique.
What if my polish turns black?
A: The black color indicates the polish is effectively removing oxidation from the alloy surface. Keep buffing until the residue is removed.
Can I use power tools?
A: Yes, a power drill with a soft foam cone attachment is highly effective for reducing labor and achieving a more consistent finish.
Is there a difference between aluminum and chrome polish?
A: Yes. Chrome is much harder than aluminum, so chrome polishes are often too abrasive for raw alloy wheels.
How do I fix light swirl marks?
A: Use a fine-grade finishing polish and a high-quality microfiber towel to lightly buff out the swirls in a straight line.
Why are my wheels still dull after polishing?
A: You likely did not remove all of the old oxidation or your clear-coat has begun to fail, requiring professional intervention.
Key Takeaways
- 1 Always perform a thorough, contact-based wash before starting the polishing process.
- 2 Confirm your wheel material—bare metal versus clear-coated—before selecting a polish.
- 3 Utilize consistent, light circular motions to prevent uneven surface wear.
- 4 Use a dedicated wheel sealant immediately after polishing to prevent rapid re-oxidation.
- 5 If you notice deep scratches, stop polishing as you are likely damaging the wheel metal further.
- 6 Always change microfiber towels frequently to ensure you are not re-contaminating the surface.
- 7 Consistent, light maintenance is always superior to aggressive, infrequent restorative work.
Conclusion
Mastering the common problems with how to polish alloy wheels: achieve a gleaming finish effortlessly and fixes requires patience and attention to surface chemistry. By following the logical progression of cleaning, polishing, and sealing, you can maintain that showroom appearance indefinitely.
Remember that tools like the ones discussed in Top 5 Must-Have Accessories for How to Fix Scuffs on Alloy Wheels: 7 Top Repair Kits Reviewed in 2026 can further assist in reaching high-quality results. If you feel hesitant, start on an inconspicuous area of the inner barrel.
The secret to a gleaming finish is not just the polish you use, but the consistency of the care you provide over time.
📌 Pillar Resource: Read our complete How to Polish Alloy Wheels: Achieve a Gleaming Finish Effortlessly master hub for in-depth insights.