Understanding the Common Problems with How to Fix Alloy Wheel Curb Rash: A Step-by-Step DIY Guide and Fixes is essential for any automotive enthusiast looking to maintain their vehicle's aesthetic value without the high cost of professional shop services.
This guide is designed for the intermediate DIYer who possesses basic mechanical aptitude and a steady hand. We assume you are comfortable working with hand tools, sandpaper, and automotive paints, providing you with the technical foundation to achieve professional-grade results on alloy surfaces.
By the end of this guide, you will be capable of diagnosing surface damage, preparing the substrate properly, and applying durable finishes that resist environmental degradation and brake dust accumulation.
- Identifying the depth and type of curb rash damage.
- Essential safety protocols for handling chemicals and sanding dust.
- Selecting the correct grade of abrasives for aluminum surfaces.
- Mastering the application sequence for primer, color, and clear coat.
- Common mistakes to avoid during the drying and curing phases.
Overview & Prerequisites
What You'll Need for Repair
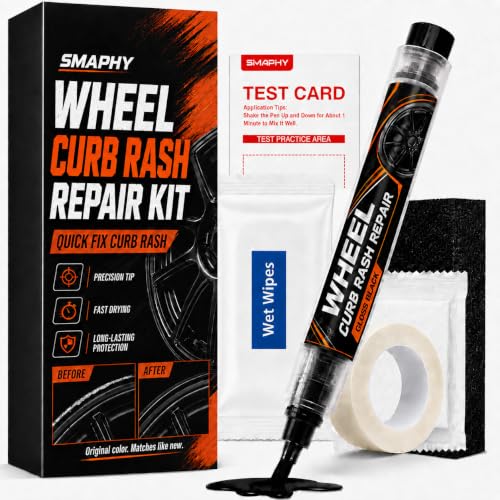
Success starts with organization. Gather a high-quality alloy wheel repair kit, various grits of sandpaper (ranging from 180 to 2000), degreasing solution, masking tape, and high-temperature primer and paint. Before beginning, ensure you have reviewed Best Alloy Wheel Repair Kit : Fix Curb Rash at Home (2026) vs Alternatives to select the right materials for your specific wheel finish.
Who This Guide Is For
This tutorial is intended for owners of vehicles with painted, powder-coated, or machined-finish alloy wheels. If your wheels have significant structural cracks or deep gouges that penetrate the metal beyond the surface layer, you should consult a professional welder rather than attempting a cosmetic DIY fix.
Tip: Always work in a well-ventilated area, preferably away from direct sunlight, to ensure your paint cures evenly without premature drying or contamination.
Core Concepts & Fundamentals
Understanding Alloy Substrates
Alloy wheels are typically made of aluminum, which develops an oxidation layer when exposed to air. When fixing curb rash, you are essentially removing the damaged clear coat and base paint layers to reach the bare metal, then rebuilding the profile to restore aerodynamic and visual uniformity. Proper cleaning is a prerequisite, often involving the steps outlined in Remove grease and asphalt from aluminum wheels: The Ultimate Pro Guide.
The Importance of Profile Smoothing
The "common problems" encountered by novices usually stem from failing to feather the edges of the damage. By blending the sanded area into the surrounding finish, you prevent the appearance of "waves" or "bumps" once the new paint is applied. Consistency in grit progression is the fundamental secret to a seamless transition.
| Feature | Incorrect Approach | Professional Standard |
|---|---|---|
| Surface Prep | Sanding only the damage | Feathering edges into the surrounding area |
| Cleaning | Wiping with a damp cloth | Using dedicated degreaser/solvent |
| Painting | Heavy, thick spray coats | Multiple light, mist-like dust coats |
Step-by-Step Execution Guide
Preparation and Smoothing Phase
Cleaning and Inspection: Thoroughly clean the wheel to remove brake dust and grime. Failure to do this leads to fisheyes in your paint finish. Use a wax and grease remover to ensure a clinical surface.
Insight: If you notice a persistent white powdery layer, address this first using tips from White powdery layer on alloy wheels, what is it and how to fix it fast.
Sanding the Damage: Start with 180-grit sandpaper to remove the rough burrs from the curb rash. Gradually move up to 400, 600, and 1000-grit to create a smooth, feathered transition into the factory finish.
Finishing and Curing Phase
Masking and Priming: Mask the tire bead and center cap. Apply a high-adhesion primer in thin layers. Allow proper flash time between coats as specified on your product packaging.
Painting and Sealing: Apply base coat in light passes until coverage is achieved, followed by a high-quality 2K clear coat. The clear coat is the most critical layer for UV protection and scratch resistance.
Recommended Equipment & Solution

ATG Alloy Wheel Repair Kit – Rim
A reliable pick for ATG Alloy Wheel Repair Kit, selected based on this article's guidance.

Silver Rim Touch Up Paint - Wheel
A reliable pick for Silver Rim Touch Up Paint, selected based on this article's guidance.
Best Practices & Pro Tips
Environmental Control
Temperature and humidity play a massive role in paint curing. Ideally, execute this repair in an environment between 65°F and 85°F with humidity levels below 50%. High humidity can lead to a cloudy appearance in the clear coat, known as "blushing."
Layering Strategy
Always prioritize thin, multiple coats over a single heavy coat. This prevents runs and sagging, which are the most common cosmetic failures in DIY wheel repair. If you see a run, allow it to fully cure before carefully wet-sanding it flat with 2000-grit paper.
Troubleshooting & Common Pitfalls
Addressing Surface Defects
If you encounter issues such as orange peel or dust nibs, do not panic. These are usually addressable through wet-sanding and polishing after the clear coat has cured for at least 48 hours. When dealing with more complex surface hazing, refer back to How to remove oxidation and haze from gloss black alloy wheels: Restore that showroom shine.
Failed Adhesion Identification
Frequently Asked Questions
Q: Can I fix curb rash without removing the wheel?
A: While possible to touch up small spots, it is highly recommended to remove the wheel to ensure proper access and avoid overspray on your tires and brake components.
Q: How long does a DIY repair last?
A: With proper surface prep and high-quality clear coat, a DIY repair can last several years, performing similarly to factory paint.
Q: Does this fix work on diamond-cut wheels?
A: No, diamond-cut wheels require specialized CNC machining and a clear powder coat. DIY methods will not replicate the factory lathe-turned finish.
Q: What is the most important step?
A: Surface preparation. If the metal is not perfectly clean and free of oils, no paint will stick for the long term.
Q: Can I use standard spray paint?
A: You should use automotive-grade wheel paint, which is formulated to withstand higher heat and chemical exposure from brake dust.
Q: How many coats of paint are needed?
A: Generally, 2-3 light base coats followed by 2-3 coats of clear coat provides the optimal balance of durability and finish quality.
Q: Will this fix impact wheel balance?
A: Cosmetic repairs involving minor sanding do not typically affect the weight balance of the wheel, but you should verify balance if the rash was severe.
Q: What if I sand too deep?
A: If you remove too much material, you may compromise the structural integrity or cause an uneven surface that is impossible to hide with paint. Stop if you reach the deep alloy base.
Key Takeaways
- 1 Always perform a thorough cleaning before starting any abrasive work.
- 2 Feathering your edges is the most important skill to avoid visual transitions.
- 3 Use the correct grit progression (180 to 2000) for a factory-smooth surface.
- 4 Humidity control is critical to preventing common painting failures.
- 5 Multiple thin layers are superior to single heavy applications.
- 6 2K clear coat provides the essential UV resistance needed for wheels.
- 7 Never attempt to repair structural cracks; focus only on surface curb rash.
Conclusion
Restoring your wheels is a rewarding process that significantly improves your vehicle's curb appeal. By respecting the process of preparation, patient sanding, and careful paint application, you can reverse the damage caused by accidental contact with curbs.
Remember that the quality of your finish is directly tied to the effort you put into the foundation. With the right tools and attention to detail, you can achieve professional results at home.
With consistency and patience, your wheels will regain their showroom shine. For further reading, check our guide on Is it possible to restore silver rims? A DIY Guide to Bringing Back the Shine.
📌 Pillar Resource: Read our complete How to Fix Alloy Wheel Curb Rash: A Step-by-Step DIY Guide master hub for in-depth insights.