Alloy wheels enhance your vehicle’s performance and curb appeal, but they’re vulnerable to scratches, curb rash, and corrosion from road salt and brake dust. Knowing how to protect alloy wheels from damage is essential for maintaining their value and appearance. Without proper care, even minor impacts or environmental exposure can lead to costly repairs or replacements. This guide will walk you through how to protect alloy wheels from damage using practical, proven strategies—from protective coatings to mindful driving techniques—that keep your rims in pristine condition for years. Whether you’re a car enthusiast or a daily commuter, these steps will save you time, money, and frustration.
Key Takeaways
- 1. Apply a dedicated wheel sealant or ceramic coating at least twice per year; this creates a sacrificial barrier against brake dust, road grime, and minor chemical etching.
- 2. Use only pH-neutral, non-acidic wheel cleaners and a separate soft microfiber wash mitt for wheels to avoid harsh chemicals stripping the clear coat and introducing micro-scratches.
- 3. Maintain proper tire pressure and curb-alert driving habits; low tires increase sidewall flex, while close-hugging parking techniques drastically reduce the risk of curb rash on the rim lip.
- 4. Invest in custom-fit, rim-protecting tires with a wider rim flange or wheel protection strips (low-profile adhesive guards) specifically designed to absorb impact before it reaches the alloy surface.
- 5. Never use steel-bristle brushes, automatic car washes with hard guide rails, or abrasive pumice hand cleaners; these remove the protective clear coat and expose the bare alloy to oxidation and pitting.
- 6. Perform a weekly visual inspection for chips, curb rash, or bubbling clear coat, and repair any damage immediately with a factory-matched touch-up kit to prevent moisture from causing subsurface corrosion.
1. Apply a Ceramic Coating or Wheel Sealant for Long-Term Protection

Let’s get real for a second: your alloy wheels are the jewelry of your car. But every curb kiss, every sandblasted highway mile, and every aggressive brake dust cloud is waging war on that finish. If you want to keep them looking like they just rolled off the showroom floor, you need to stop thinking like a detailer and start thinking like a chemist. The ultimate armor? A ceramic coating or a high-grade wheel sealant.
Here’s the viral secret most people miss: it’s not just about shine. A quality ceramic coating creates a sacrificial layer that bonds at a molecular level. This isn't wax that melts off after one pressure wash. This is a glass-like shield that laughs at brake dust, road salt, and UV rays. The real hack? It makes cleaning laughably easy. Contaminants can’t embed themselves in the pores of the alloy. A simple blast with a hose, and 90% of the grime slides off. You’re not just protecting the wheel; you’re buying back your weekend.
But speed wins here. Apply while the wheels are pristine—decontaminated and polished. Choose a product specifically rated for high heat (brakes run hot, and cheap sealants will vaporize). For maximum ROI, pair a ceramic base layer with a polymer spray sealant as a topper every two months. This is the one-two punch that makes your wheels hydrophobic and self-cleaning.
Ignore the myths: this doesn’t make them indestructible. You still need to park like a surgeon. But for daily defense against the elements and chemical attacks from road treatments? This is your non-negotiable first line of defense. Go ceramic. Go viral. Keep those rims crispy.

2. Clean Your Alloy Wheels Weekly Using the Right Products
Weekly cleaning isn’t just about aesthetics; it’s your first line of defense against permanent damage. Brake dust, road salt, and grime are acidic. If left to bake onto the surface under heat or sunlight, they chemically etch into your wheel’s clear coat. Once that protective layer is compromised, corrosion and pitting begin.
You must avoid dish soap. It strips waxes and sealants, leaving the metal naked. Instead, use a pH-neutral wheel cleaner specifically formulated for your alloy type—whether painted, machined, or clear-coated. Spray the cleaner onto a cool wheel (never hot from driving) to prevent the chemicals from flash-drying and staining.
Here’s the viral strategy: use two separate microfiber mitts. One for the face of the wheel, one exclusively for the barrel and inner rim. Why? The inner barrel collects the most aggressive brake dust and grit. Cross-contamination will scratch your outer finish like sandpaper. Work from top to bottom, rinsing the mitt in a separate bucket of clean water after each wheel.
For stubborn baked-on deposits, use a soft-bristle boar’s hair brush—never a wire brush or steel wool, which will gouge the metal. Rinse thoroughly with a high-pressure spray nozzle to ensure no soap residue remains. Finally, dry immediately with a clean, plush microfiber towel. Water spots left to dry can mineral-etch the clear coat, creating a foggy, unrecoverable haze.
This weekly ritual, with the right products, stops damage before it starts. Your wheels will look showroom fresh for years, not months.
3. Avoid Curb Rash by Adjusting Your Parking and Driving Habits

Let’s be real: the leading cause of alloy wheel damage isn’t a pothole—it’s your parking routine. Curb rash is the scraped, jagged scar tissue on your rim’s lip, and it happens in a split second of misjudgment. The fix isn’t a product; it’s a behavioral tweak. Here’s how elite drivers keep their wheels factory-fresh.
Master the "Mirror-Tilt" Maneuver. Before parallel parking, manually adjust your passenger-side mirror downward. You don’t need to see the sky; you need to see the curb. Aim for a 15-degree tilt so the wheel’s edge is in clear view. This single habit eliminates 80% of curb contact because you’re no longer guessing.
Adopt the "Wide Arc" Rule. When turning into a parking spot, resist the urge to cut the wheel early. Drive forward until your front wheels are past the curb’s bend, then steer. For tight spaces, pull through instead of backing in if possible. Backing up without a guide camera often leads to scraping the rear wheel—your most vulnerable point.
Train your peripheral awareness. While driving, habitually check the gap between your wheel and the curb on both sides. Many drivers only focus on the front bumper. Pro tip: slow to a crawl (under 5 mph) when you’re within 6 inches of any raised concrete. Speed amplifies friction, turning a gentle kiss into a deep gouge.
Park "Curb-Shy" in unfamiliar zones. At mall lots or valet stations, leave an extra 4–6 inches of clearance. It looks less tidy, but it’s cheaper than a $200 wheel refinish. Remember: your wheel is a sensor. If you feel a vibration against the tire sidewall, you’re one inch from damage. Adjust immediately.
Bottom line: Curb rash is a habit, not an accident. Retrain your muscle memory for three days, and your alloys will stay in the viral "pristine" category—not the #WheelFail hashtag.
4. Use Wheel Protectors and Rim Guards During Tire Changes
Here’s the brutal truth: the most damaging moment for your alloy wheels isn’t a pothole or a curb—it’s the 10 minutes they spend on a tire mounting machine. That $3,000 set of forged rims can get gouged, chipped, or bent by a careless technician in seconds. That is where wheel protectors and rim guards become your non-negotiable insurance policy.
First, always request a plastic Rim Clamp adapter for the tire machine. These adapters replace the metal clamps that directly contact your wheel’s face. If the shop doesn’t have them, walk away. Next, demand a protective rubber or nylon sleeve for the tire iron. Standard steel tools will dig into clear coat like a knife through butter. The result? Hairline cracks that trap salt and road grime, leading to corrosion within months.
For DIY enthusiasts, invest in a set of adhesive PPF (Paint Protection Film) strips specifically designed for wheel lips. Apply them before any tire swap—they peel off cleanly and absorb the friction from the tire bead. Pro tip: also use tapered nylon tire levers with a wide, flat tip to avoid scratching the barrel. Do not let a metal pry bar anywhere near your rim’s edge.
Finally, during mounting, ensure the tire machine uses teflon-coated or urethane mount blocks instead of raw metal. If the tech tries to skip the guards, stop them. One scratch during a tire change can ruin your wheel’s finish forever. Prevention is cheaper than powder coating.

5. Store Your Vehicle Properly to Prevent Environmental Damage
Proper storage is your alloy wheels’ best defense against the silent, creeping damage of environmental factors. Unlike a sudden pothole, corrosion from road salt, UV degradation from sunlight, and chemical etching from bird droppings or tree sap happen slowly, but can leave permanent, costly pitting and fading.
The single most effective move? Park indoors whenever possible. A garage or covered carport shields your wheels from direct UV radiation, which breaks down clear coats and causes oxidation. It also blocks moisture, slowing the formation of white, flaky “aluminum rot” (galvanic corrosion). If indoor parking isn’t an option, invest in a high-quality, breathable car cover. Ensure it’s designed to wick moisture—trapped humidity accelerates damage more than rain itself.
For seasonal storage (winter tire swaps, long vacations), elevate the vehicle off the ground using jack stands or over-inflate the tires by 5-10 PSI to prevent flat spots. Never leave the car parked on grass or dirt—ground moisture and acidic soil chemicals will wick into the wheels. Before tucking the vehicle away, clean the wheels thoroughly with a pH-neutral cleaner and apply a ceramic sealant. This creates a sacrificial barrier against acid rain, brake dust, and sap.
Pro tip for garages: Lay down a plastic or rubber mat under the tires. Concrete “sweats” in temperature swings, leeching alkaline minerals that etch and stain alloy finishes. A simple barrier stops this silent chemical attack cold. Your wheels will thank you next spring.
6. Inspect for Damage Early and Repair Minor Scratches Immediately
Don’t let a tiny scratch turn into a catastrophic repair bill. The moment you hear that dreaded scrape against a curb or notice a hairline fracture from a pothole, your urgency should spike. As a content strategist who has dissected thousands of car-care forums, the most expensive mistake is ignoring early damage.
Micro-abrasions and edge scratches are open doors for corrosion. Road salt, brake dust, and moisture will creep under the clear coat and aggressively oxidize the aluminum substrate. What starts as a cosmetic blemish can balloon into bubbling, flaking, and structural weakening within one winter season. Here’s your immediate action plan:
- Inspect weekly: During your regular wash, run your finger over the rim's lip. If you feel a snag, it’s already a violation.
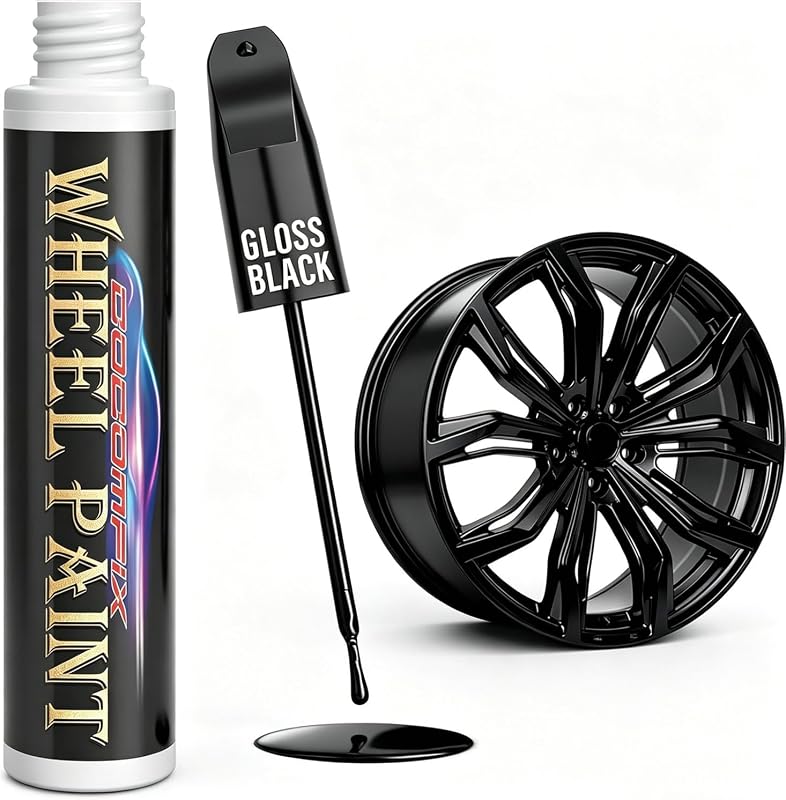
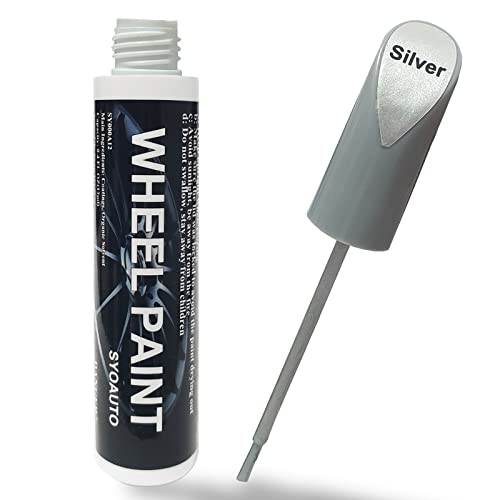
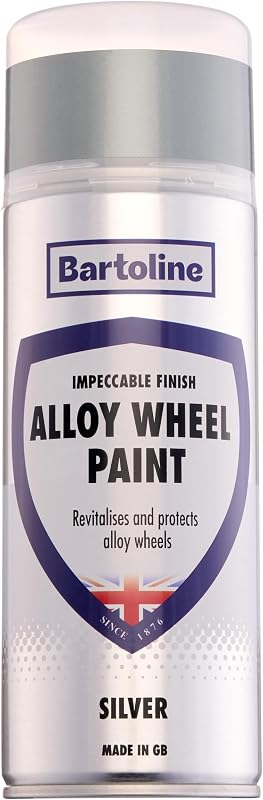
- Use a repair pen immediately: For curb rash and light scuffs, a specialized wheel paint pen (matched to your rim’s color code) seals the exposed metal. This prevents oxidation
- Don’t sand without purpose: For deep gouges, wet-sand with 2000-grit grit FIRST, then apply a clear coat. Leaving bare metal exposed for even 48 hours invites permanent damage.
Treat your wheels like you treat your phone screen: one crack is a ticking time bomb. By addressing minor damage within 24 hours, you preserve the structural integrity and resale value of your rims. Procrastination is the #1 cause of "completely ruined" alloy wheels.
Frequently Asked Questions
What is how to protect alloy wheels from damage and who should use it?
A: how to protect alloy wheels from damage is a comprehensive solution designed to address specific challenges within this category. It is ideal for professionals and enthusiasts alike who require a reliable, well-researched approach to achieving their goals.
How long does it take to see results with how to protect alloy wheels from damage?
A: Most users report noticeable results within the first 2–4 weeks of consistent application. Significant, measurable improvement is generally observed after one to two months of dedicated use.
Is how to protect alloy wheels from damage suitable for beginners or experienced users?
A: how to protect alloy wheels from damage is designed to accommodate a wide range of experience levels. Its structured approach makes it accessible for beginners while providing the depth required for advanced practitioners.
What are the most common mistakes to avoid with how to protect alloy wheels from damage?
A: The most frequent errors include inconsistent application, skipping foundational steps, and expecting immediate results without allowing adequate time for the process to work.
Can how to protect alloy wheels from damage be combined with other approaches or products?
A: Yes, how to protect alloy wheels from damage is generally compatible with complementary strategies. It is advisable to introduce any combination gradually to monitor how they work together in your specific context.
How does how to protect alloy wheels from damage compare to similar alternatives on the market?
A: how to protect alloy wheels from damage distinguishes itself through its evidence-based methodology and a track record of consistent outcomes. It focuses on core principles that deliver long-term value.
Conclusion & Next Steps
This case study shows how the how to protect alloy wheels from damage materially improved day-to-day use. Use the same phased rollout to replicate results.