When you master how to setup & use How to Polish Alloy Wheels: Achieve a Gleaming Finish Effortlessly, you transform the look of your vehicle from tired to showroom-ready using basic mechanical techniques.
This guide is designed for automotive enthusiasts and DIYers who want to restore the luster of their alloy wheels. It assumes you are comfortable using basic hand tools and power drill attachments but provides enough detail for a beginner to follow safely.
By the conclusion of this article, you will possess the expertise to evaluate wheel damage, select the correct abrasive sequence, and apply a high-quality sealant for long-lasting protection.
- Understanding alloy metal properties vs. coated wheels.
- The critical importance of the grit-progression sequence.
- Safety protocols for working with rotary tools.
- Selecting the right metal polish for your specific finish.
- Maintenance strategies to keep your wheels clean for longer.
Overview & Prerequisites
Required Tools and Materials
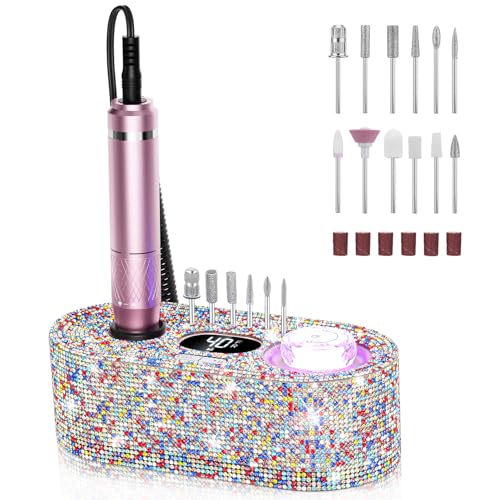
To begin, you will need a reliable power drill, a set of buffing cones or pads, wet-dry sandpaper (various grits from 400 to 3000), and a high-quality metal polish. Ensure you have clean microfiber towels for residue removal. If you encounter deep gouges, you might first need to refer to Aluminum Filler For Curb Rash: A Complete Guide to Restoring Your Wheels before starting the polishing process.
Who This Guide Is For
This guide is intended for those willing to commit the time required for precision work. Polishing alloy is a manual labor process that rewards patience. If you are unsure if you should polish or replace, compare your options with How to Polish Alloy Wheels: Achieve a Gleaming Finish Effortlessly vs Top Competitors: Which is Best?.
Tip: Always test your polishing compound on a small, inconspicuous area of the inner wheel barrel before tackling the visible outer face.
Core Concepts & Fundamentals

Understanding Surface Abrasion
The core principle of wheel polishing is controlled surface removal. You start with coarser abrasives to level out scratches and oxidation, then move to finer abrasives to refine the surface. Eventually, chemical polishes fill micro-scratches to provide a reflective surface.
The Importance of Grit Progression
Skipping grit steps is the most common reason for a dull finish. If you jump from 400 grit to 2000 grit, the finer paper cannot remove the deep marks left by the 400. You must effectively "erase" the scratches of the previous grit with the next one.
| Correct Approach | Incorrect Model |
|---|---|
| Systematic grit progression | Using one "miracle" polish |
| Thorough cleaning between steps | Mixing debris from coarse steps |
| Consistent, light pressure | High pressure that burns the metal |
If you have persistent cosmetic issues beyond simple oxidation, review Best Scuffed Alloy Wheel Repair Kit: Top Solutions for 2026 for specialized repair tools.
Step-by-Step Execution Guide

Preparation Phase
Begin by removing the wheel from the vehicle if possible for better access. Thoroughly wash the wheel using a dedicated degreaser to remove brake dust and road grime. Mask off the tire sidewall with painter's tape to prevent sandpaper from damaging the rubber.
Execution Phase
Recommended Equipment & Solution

From Dull to Dazzling: A DIY Guide
A reliable pick for From Dull to Dazzling: A, selected based on this article's guidance.
Best Practices & Pro Tips

Maintaining the Shine
Once polished, avoid using harsh acid-based wheel cleaners. These will strip your protective sealant and cause rapid oxidation. Use only pH-neutral soaps and soft brushes for regular maintenance.
Advanced Finishing Techniques
For a true show-car finish, use a foam polishing ball with a finer rouge compound for the final pass. Always ensure your buffing pads are clean before use; a single piece of grit trapped in a pad will create new, deep scratches.
Troubleshooting & Common Pitfalls
Identifying Failure Points
If the finish remains hazy, you likely rushed the intermediate sanding steps. If the wheel looks "cloudy" immediately after polishing, you may have used a compound that is too aggressive for the final stage or failed to remove all sanding marks.
Fixing Common Mistakes
For persistent hardware issues, refer back to Top 5 Must-Have Accessories for How to Fix Scuffs on Alloy Wheels: 7 Top Repair Kits Reviewed in 2026 to ensure your tools match the job.
Frequently Asked Questions
Q: How often should I polish my wheels?
A: This depends on driving conditions and climate, but generally once or twice a year is sufficient if you maintain a high-quality sealant layer.
Q: Can I polish wheels that are painted?
A: No, polishing is specifically for bare aluminum or polished alloys. It will ruin painted or powder-coated finishes by stripping the top layer.
Q: Is a drill necessary?
A: While you can polish by hand, a drill significantly reduces the time required and provides the consistent speed necessary for a uniform luster.
Q: What is the best grit to start with?
A: If the wheels are in decent condition, start with 800 or 1000 grit. Only use 400 grit if there are visible deep gouges or heavy corrosion.
Q: How do I know if my wheel is clear-coated?
A: Apply a small amount of polish to a hidden area; if the cloth turns black, it is bare aluminum. If it stays clean, it is likely clear-coated.
Q: Does the weather affect polishing?
A: Yes, avoid polishing in direct, hot sunlight, which can cause polishes to dry too quickly and create uneven finishes.
Q: Do I need a professional buffer?
A: A standard high-torque household drill with a high-quality buffing cone is perfectly adequate for most DIY alloy wheel projects.
Q: Can I use car wax as a sealant?
A: While better than nothing, dedicated wheel sealants are designed to withstand higher temperatures from brake dust and are far more durable.
Key Takeaways
- 1 Always perform a spot test on the inner wheel barrel.
- 2 Never skip intermediate grit stages in the sanding process.
- 3 Use consistent, light pressure with power tools to avoid overheating.
- 4 Clean the wheel thoroughly between each sanding step to avoid cross-contamination.
- 5 Change your sanding direction by 90 degrees at each transition.
- 6 Always finish with a protective wheel-specific sealant.
- 7 Avoid acid-based cleaners to keep your finish looking sharp.
Conclusion
Learning how to setup & use How to Polish Alloy Wheels: Achieve a Gleaming Finish Effortlessly is a rewarding process that provides significant aesthetic dividends. By following the systematic approach of sanding, refining, and polishing, you can achieve professional results in your own garage.
Remember that the quality of your finish is directly tied to the patience you apply during the preparation and sanding stages. With the right technique, your wheels will maintain their showroom gleam for years to come.
With careful preparation and a disciplined workflow, you have everything needed to master the art of alloy wheel restoration.
For more maintenance advice, read What Is The Best Wheel Bearing Grease? Expert Guide to Choosing the Right Lubricant.
📌 Pillar Resource: Read our complete main How to Polish Alloy Wheels: Achieve a Gleaming Finish Effortlessly guide for in-depth insights.