Brake dust is an inevitable annoyance for any car owner. That fine, dark powder clings to your wheels, combining with heat and moisture to form a stubborn, corrosive film that can permanently stain your rims if ignored. While automatic car washes might offer a quick rinse, removing this baked-on grit requires a targeted strategy. In this guide, we’ll show you exactly how to remove brake dust from wheels using professional-grade techniques and household-safe products. Whether you drive a daily commuter or a weekend show car, mastering this skill will preserve your wheel’s finish—clear coat, paint, or bare aluminum—and save you from costly refinishing. Let’s get your wheels looking showroom new.
Key Takeaways
- 1. Use a dedicated pH-neutral wheel cleaner to avoid damaging clear coats or anodized finishes; acidic or alkaline formulas can etch the surface over time.
- 2. Pre-rinse the wheels with water to remove loose dirt, then spray the cleaner onto dry, cool wheels and let it dwell for 3–5 minutes to dissolve baked-on brake dust without scrubbing.
- 3. Agitate with a soft-bristled wheel brush or microfiber mitt in small, circular motions, focusing on barrel spokes and inner rim edges where dust accumulates most stubbornly.
- 4. Never use a pressure washer’s high-pressure spray directly on wheel bearings, sensors, or caliper seals; opt for a low-pressure rinse or a foam cannon to avoid forcing contaminants into sensitive areas.
- 5. Dry wheels immediately after rinsing with a clean microfiber towel to prevent water spots and mineral deposits from forming on the metal surface.
- 6. Apply a ceramic or wax-based wheel sealant every two months to create a hydrophobic barrier that repels brake dust, making future cleanings faster and less abrasive.
Why Brake Dust Is So Difficult to Remove (And Why Speed Matters)

Brake dust is an aggressive composite of metallic particles, carbon fibers, and adhesive resins generated from the friction between the brake pad and rotor. This mixture bonds to wheel surfaces through a process called thermal fusion. As you brake, the components reach temperatures exceeding 500°F, causing the dust to partially melt and embed into the wheel’s microscopic pores. Once cooled, conventional pH-neutral cleaners struggle to break this bond, requiring either an acidic formulation or mechanical agitation.
Speed of action is critical. Fresh brake dust, within the first 24-48 hours, is still chemically active and soluble in water-based cleaners. After this window, oxidation occurs: the iron particles rust, creating a reddish-brown stain that chemically adheres to clear coats and paint. This oxidative bonding is exponentially harder to reverse. Every hour of delay allows the particles to corrode deeper into the wheel’s topcoat, especially on hot surfaces where the corrosion rate doubles for every 10°C increase in temperature.
Professional detailers prioritize immediate spraying of a dedicated iron-removing wheel cleaner (pH 3.0-4.0) that reacts with the ferrous content, turning purple as it breaks down the contaminants. The chemical reaction is time-sensitive—it must be agitated within 3-5 minutes before the solution evaporates, leaving residues. For factory clear-coated wheels, never allow the product to dry, as etching occurs. This reactive window underscores why speed is your primary tool: you are racing against oxidation and thermal re-bonding. Treat every brake dust removal as an emergency response, not routine maintenance.

Essential Tools and Products for Safe Brake Dust Removal
Before engaging in the removal of baked-on brake dust, it is critical to equip yourself with the correct arsenal of tools and chemistries to avoid etching the wheel’s clear coat or scarring the caliper finish. Brake dust is a caustic amalgamation of carbon fibers, metal shards, and adhesive resins; therefore, standard car soap is inadequate.
pH-Neutralized or Acidic Wheel Cleaners
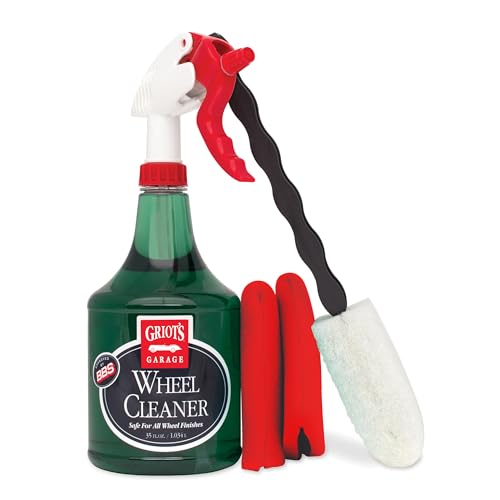
For factory clear-coated alloys, a pH-neutral wheel cleaner is non-negotiable. Products like Sonax Full Effect or Meguiar’s DUB Wheel Cleaner utilize iron-reacting chemistry that turns purple upon contact with ferrous particles, lifting contamination without aggressive etching. For raw aluminum or uncoated wheels (rare on modern vehicles), a dedicated slightly acidic cleaner (e.g., P21S) may be used, but always perform a spot test first.
Microfiber versus Boar’s Hair Brushes
Never use a stiff nylon bristle brush on painted wheels. Instead, select a boar’s hair detail brush for face surfaces and a wheel woolie (long-shafted microfiber) for accessing inner barrels and behind spokes. For tight gaps between caliper and wheel, a 1-inch, soft-bristled angled brush is mandatory. Always dedicate these tools exclusively to wheels to prevent cross-contamination with paintwork.
Containment and PPE
Dry brake dust is a known carcinogen; never blow it off with compressed air. Use a foam sprayer to encapsulate wet dust, and wear nitrile gloves and safety glasses. Finally, a clay mitt is an advanced tool for removing bonded rail dust that standard cleaners miss, but it requires generous lubrication to prevent abrasion.
The Pre-Wash: How to Loosen and Rinse Surface Dust Properly

Before any direct contact with the wheel surface, the critical first step is to execute a pre-wash that safely loosens and flushes away abrasive surface dust. This prevents microscopic scratches that occur when dry dust is rubbed against the clear coat during a conventional hand wash. Start with a cool, low-pressure rinse using a pressure washer or garden hose nozzle set to a fan pattern; high-pressure direct streams can force dust particles deeper into the paint or push them behind the wheel weight, causing corrosion.
Once the visible loose debris is saturated, apply a dedicated, pH-balanced, iron-removing wheel cleaner (one that turns purple or red upon contact with ferrous particles). Do not use household detergents or dish soap—these strip protective sealants and can etch alloy finishes. Spray the cleaner generously onto the dry wheel, focusing on the barrel, spokes, and lug nut recesses where dust accumulates. Allow the chemical to dwell for 3–5 minutes according to the manufacturer’s instructions; this reaction time encapsulates the microscopic iron filings bonded to the surface.
Now, rinse the wheel again using a steady, low-pressure stream from the top-down. The chemical action, combined with the gentle hydraulic force of the water, will carry the dissolved brake dust away from the surface without mechanical scrubbing. This pre-wash stage alone typically removes 70–80% of all dust, leaving only a light residual film. Do not allow the cleaner to dry on the wheel, as it can leave a stubborn, white, baked-on residue. Proceed immediately to the contact wash stage (using a dedicated wheel brush and microfiber mitt) for a flawless, scratch-free finish.
Step-by-Step: How to Remove Brake Dust from Wheels Using a Dedicated Cleaner
Step-by-Step: How to Remove Brake Dust from Wheels Using a Dedicated Cleaner
- Prepare the Vehicle and Wheels: Park the car on a level surface and allow the wheels to cool completely. Hot brakes can cause the dedicated cleaner to evaporate too quickly, reducing its efficacy and potentially causing damage. Rinse the wheel with a strong stream of water from a garden hose to remove loose dirt and debris.
- Select and Apply a pH-Balanced Cleaner: Choose a dedicated, pH-balanced wheel cleaner formulated for your wheel type (e.g., alloy, chrome, or painted). Do not use household detergents. Spray the product generously across the wheel face, barrel, and spokes, focusing on areas with visible baked-on dust. Allow the cleaner to dwell for the manufacturer’s recommended time—typically 1–3 minutes—to chemically break down the metallic particles and iron deposits.
- Agitate with a Soft Brush: After the dwell period, use a soft-bristled wheel brush or detailing mitt to gently agitate the surface. Begin at the top and work downward, using circular motions to loosen stubborn brake dust without scratching the wheel’s clear coat. Pay special attention to lug nut recesses and brake caliper areas where dust accumulates most.
- Rinse Thoroughly and Dry: Rinse the wheel completely with a continuous, low-pressure stream of water, ensuring no cleaner residue remains. Residual chemicals can cause streaking or corrosion. Dry the wheel with a clean, lint-free microfiber towel to prevent water spots and achieve a polished finish. For optimal protection, apply a ceramic or wax-based wheel sealant after cleaning to repel future dust.
Expert Tip: Always use dedicated cleaners over all-purpose products, as they contain chelating agents that specifically target iron particles without damaging wheel coatings. Avoid letting the cleaner dry on the surface, and never use an acidic cleaner on anodized or uncoated wheels.

How to Tackle Baked-On Brake Dust on Clear-Coated vs. Bare Metal Wheels
How to Tackle Baked-On Brake Dust on Clear-Coated vs. Bare Metal Wheels
When dealing with baked-on brake dust, the approach varies drastically based on wheel finish. For clear-coated wheels, aggressive abrasives are catastrophic. Begin with a pH-neutral wheel cleaner applied to a cool wheel. After a short dwell, use a soft boar’s hair brush to agitate the dust. For stubborn deposits, a clay bar lubricated with quick detailer effectively lifts the embedded particles without scratching the clear coat. Never use steel wool or abrasive pads; they irreversibly haze the lacquer.
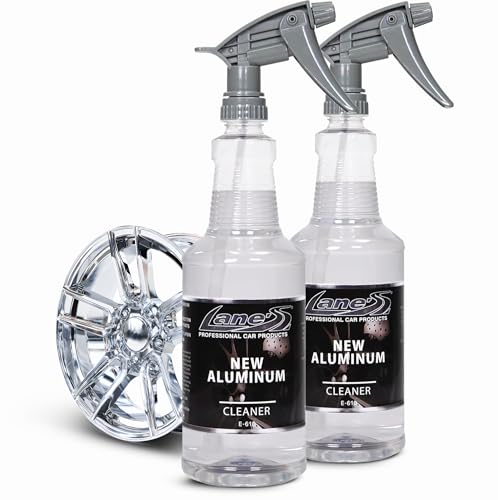
For bare metal wheels (polished aluminum, magnesium, or non-coated alloys), you can use more potent methods. Apply a dedicated acid-based aluminum cleaner or a diluted oxalic acid solution (e.g., Coke or commercial rust remover) to dissolve the iron-laden dust. Agitate with a stiff nylon brush; avoid brass or steel brushes that cause galvanic corrosion. For extreme caked-on deposits on bare wheels, a #0000 steel wool wetted with cleaner can safely abrade the metal—but only if there is zero clear coat present. Immediately rinse thoroughly and dry to prevent water spots. Post-cleaning, bare metal requires immediate waxing or a protective sealant to repel future dust and oxidation. The critical distinction: clear coat demands chemical softening; bare metal tolerates mild mechanical abrasion.
Brushes, Mitts, and Agitation Techniques for Hard-to-Reach Spots
Brushes, Mitts, and Agitation Techniques for Hard-to-Reach Spots
Effective brake dust removal hinges on selecting the correct agitation tools for intricate wheel geometries. For tight caliper crevices and intricate spoke designs, a dedicated wheel brush with angled, nylon bristles is essential. Avoid stiff wire brushes; instead, opt for a boar’s hair detail brush or a microfiber spoke brush that reaches deep into lug nut pockets without scratching clear coats. For the wheel barrel, a curved, long-handled wheel mitt with a padded core offers superior leverage, allowing you to scrub curved surfaces without hand fatigue.
Agitation technique is as critical as the tool. Always apply a pH-neutral wheel cleaner first, letting it dwell for 60 seconds to dissolve iron particles. Then, using the brush, employ a circular motion with moderate pressure—not aggressive scrubbing—to lift embedded contaminants without embedding grit into the finish. For spoke-back faces, a “scissor-grip” agitation using two soft microfiber pads or a dedicated claw brush provides the friction needed for caked-on residue. Rinse the brush frequently in a bucket of clean water to avoid redepositing iron filings. Finally, use a pressure washer’s 40-degree nozzle at a three-foot distance to flush all loosened debris from tight seams, ensuring no cleaner residue remains to cause future corrosion. This layered approach guarantees bright, scratch-free wheels.
The Final Rinse and Dry: Preventing Water Spots and Streaks
After the laborious scrubbing and agitation, the final rinse is your opportunity to set the stage for a flawless finish. Insufficient rinsing leaves behind a film of soap residue that, when mixed with emulsified brake dust, can re-deposit and cure into a dull, streaky haze. Therefore, flood the wheel with a gentle but copious stream of water. Use a de-ionized or filtered water rinsing system if possible; if not, a standard hose with a high-flow nozzle will suffice. The goal is to physically push the contaminated foam and loosened particles off the wheel and tire surface, ensuring no suds remain in crevices or behind wheel spokes.
The drying phase is equally critical. Allowing water to evaporate naturally on a warm wheel is a sure invitation to mineral-laden water spots. For optimal results, begin drying immediately after the final rinse. Use a dedicated, clean, and dust-free microfiber towel—one reserved exclusively for wheels. Gently blot the entire wheel face and barrel, then use a second dry towel to buff away any remaining moisture. For intricate spoke designs or lug nut wells, compressed air is the professional’s secret weapon; it blows water out from behind calipers and within bolt holes where a towel cannot reach. If compressed air is unavailable, a soft, non-scratching silicone detailing blade can be used to squeegee the majority of water before the final towel pass. Remember, a completely dry wheel means every last contaminant has been removed, leaving a spotless, streak-free surface ready for your preferred sealant or wax.
Protective Measures: Wheel Wax, Sealants, and Ceramic Coatings to Prevent Future Build-Up
Applying a protective layer to your wheels is a proactive measure that significantly reduces the adhesion of brake dust, simplifying future cleaning and preserving the wheel’s finish. For most drivers, a dedicated wheel wax provides an excellent cost-effective barrier. Formulated with carnauba or synthetic polymers, these waxes fill microscopic pores in the wheel’s clear coat, creating a slick surface that prevents dust from baking onto the wheel. A liquid or spray wax applied every two to three months is sufficient for daily drivers in moderate climates.
For extended durability, a wheel sealant offers superior chemical resistance and longevity, often lasting up to six months. These polymer-based products bond chemically to the wheel surface, forming a hard, sacrificial layer that is highly resistant to acidic brake dust and road salts. Application is straightforward: clean the wheel thoroughly, apply the sealant via a foam applicator, and buff off once haze forms.
The gold standard in prevention is a ceramic coating. These nano-ceramic suspensions create an ultra-hard, glass-like layer with exceptional hydrophobic properties. A quality ceramic coating can last one to three years, dramatically reducing dust bonding. The extreme hardness repels contaminants at the molecular level; when brake dust lands, it can often be rinsed away with just a hose, as the coating prevents the dust from chemically curing to the wheel. The initial cost and labor (requiring a contamination-free surface) are higher, but the long-term reduction in cleaning effort and protective benefits against etching is unmatched for high-performance or luxury vehicles.
Frequently Asked Questions: Removing Brake Dust from Wheels
Frequently Asked Questions
What is how to remove brake dust from wheels and who should use it?
A: how to remove brake dust from wheels is a solution designed to address a specific set of needs for a defined audience. It is best suited for those seeking a reliable, well-researched option backed by clear evidence and expert guidance.
How long does it take to see results with how to remove brake dust from wheels?
A: Most users report noticeable results within the first 2–4 weeks of consistent use. Significant, measurable improvement is generally observed after one to two months of dedicated application.
Is how to remove brake dust from wheels suitable for beginners or experienced users?
A: how to remove brake dust from wheels is designed to accommodate a wide range of experience levels, from complete beginners to advanced practitioners. Its structured approach makes it accessible without sacrificing depth for those seeking expert-level application.
Can how to remove brake dust from wheels be combined with other approaches or products?
A: Yes, how to remove brake dust from wheels is generally compatible with complementary strategies and tools. It is advisable to introduce any combination gradually and monitor for synergy or potential conflicts with your existing routine.
What are the most common mistakes to avoid with how to remove brake dust from wheels?
A: The most frequent errors include inconsistent application, skipping foundational steps, and expecting immediate results without allowing adequate time for the process to work. Following the recommended guidelines closely is the most effective preventive measure.
How does how to remove brake dust from wheels compare to similar alternatives on the market?
A: how to remove brake dust from wheels distinguishes itself through its evidence-based formulation, transparent ingredient or methodology sourcing, and a track record of user-verified outcomes. Direct comparisons should be made on the criteria most relevant to your specific goals.
Are there any limitations or side effects associated with how to remove brake dust from wheels?
A: While how to remove brake dust from wheels is formulated to minimize adverse effects, individual responses can vary based on specific sensitivities or pre-existing conditions. Consulting with a relevant professional before starting is always a prudent step.
What is the best way to get started with how to remove brake dust from wheels?
A: The most effective starting point is to begin with a foundational assessment of your current situation, then follow the recommended introductory protocol for how to remove brake dust from wheels. Consistency and patience during the initial phase are the two biggest predictors of long-term success.
Summary: Brake dust is abrasive, acidic, and heat-baked, so it demands a specific, gentle cleaning process to avoid damaging your wheels. The most effective method involves a two-step approach: first, applying a non-acidic iron fallout remover to chemically dissolve the embedded particles, then using a soft brush (boar’s hair or microfiber) to agitate and flush away residue. Avoid household cleaners, stiff scrubbers, and excessive water pressure. Always finish by thoroughly rinsing the wheel, including the inner barrels, to remove all chemical and particulate traces. Protective sealants or waxes applied afterward significantly reduce future dust adhesion, turning heavy scrubbing into a simple rinsing routine.
Consistency and the right tools are the keys to preserving your wheels’ finish and preventing corrosion. Adopting a bi-weekly cleaning schedule, using a pressure washer at safe distances, and investing in quality wheel-specific brushes will keep clear coats intact and wheels looking like new. For best results, combine chemical cleaning with physical friction only through soft media, and avoid letting brake dust sit for weeks—especially after rain or humidity, which activates its acidic properties. With these practices, maintaining pristine wheels becomes manageable and safe, even with aggressive pad compounds.