Alloy wheels enhance your vehicle’s appearance, but they’re also magnets for brake dust, road grime, and corrosive contaminants. Improper cleaning can scratch or dull the finish, leading to costly repairs. Whether you’re a weekend warrior or a detailing enthusiast, mastering how to clean alloy wheels is essential for preserving their luster and longevity. This guide breaks down the professional process—from selecting pH-balanced cleaners to using the correct techniques—so you can achieve a spotless, showroom-quality shine without damaging the clear coat. Let’s dive into the tools, steps, and tips that will make your wheels the highlight of your car.
Key Takeaways
- 1. Always let alloy wheels cool completely before cleaning—applying a wheel cleaner or water to hot brakes can cause chemical flash evaporation and even warp the rotor.
- 2. Use a pH-neutral, non-acid wheel cleaner specifically formulated for alloy rims to avoid etching, discoloration, or pitting of the clear coat or bare metal.
- 3. Invest in a microfiber wheel woolie or a soft-bristle, long-handled brush to reach behind spokes and inside barrels without scratching the surface finish.
- 4. For stubborn brake dust, pre-soak the wheel with cleaner, then gently agitate with a soft detailing brush before rinsing—never use abrasive pads or wire brushes.
- 5. Rinse thoroughly with a strong stream of water or a pressure washer on low setting to remove all chemical residue, which can damage the clear coat and attract more dust.
- 6. Apply a dedicated alloy-wheel sealant or ceramic coating after cleaning to create a hydrophobic barrier that repels brake dust and makes future washes dramatically faster.
Why Professional Alloy Wheel Cleaning Matters

Let’s be brutally honest: your DIY bucket-and-sponge approach is likely damaging your wheels faster than road salt ever could. As a viral content strategist who has dissected thousands of car-care hacks, I can tell you the internet is flooded with “miracle” cleaning recipes—and most of them are a ticking time bomb for your alloy rims.
The real issue is chemical ignorance. Many off-the-shelf cleaners rely on harsh acids or aggressive alkali to strip brake dust. While they look effective on video, they chemically etch the clear coat, leaving behind micro-pitting that captures fresh dirt instantly. You think you’re winning, but you’re accelerating clear-coat failure.
Professional cleaning matters because it prioritizes pH-neutral chemistry and contact-angle science. True experts use iron removers that react only with ferrous particles, turning purple without attacking the metal base. They then apply a hydrophobic ceramic sealant that forces water to bead off with zero spotting. This isn’t just “clean”—it’s surface preservation.
Here is the viral truth: a professionally cleaned wheel sells for 15–20% more on the used market. An amateur clean hides existing damage under cheap tire shine, while a pro stage reveals (and often reverses) minor pitting and oxidation.
Stop chasing likes on a wheel-brush trend. Invest in a pro who understands pH tolerances and polymer bonding. Your rims aren’t just metal—they’re engineered heat sinks and structural components. Cleaning them wrong is like polishing a brake caliper with gravel. Respect the science, or pay for new wheels.

Essential Tools and Products for the Job
Look, I’ve seen car guys strip rims with dish soap and a scrub brush, and I’ve watched weekend warriors ruin a $2,000 set of wheels with the wrong acid. The difference between a showroom shine and a stained, pitted nightmare is what you put in your bucket. Forget the hype—here’s the essential arsenal that actually works.
The Core Trio: pH-Neutral, Iron Remover, and a Soft Brush. Never—and I mean never—use household detergents. They strip ceramic coatings and etch clear coats. You need a dedicated pH-neutral wheel cleaner (like P&S Brake Buster or Adam’s Wheel Cleaner) that breaks down brake dust without aggression. Then, for deep cleaning, an iron remover (e.g., CarPro Iron X) is non-negotiable. Spray it on; watch it turn purple as it dissolves embedded iron particles. That purple show? That’s your wheels breathing relief.
The Hardware: Boars’ Hair vs. Microfiber. Grab a boars’ hair wheel brush for the face—soft enough to avoid swirls on polished alloys, stiff enough to dislodge grime. For tight spoke gaps, a E-Z Detail Brush (the long, bendable one) is your best friend. And a Wheel Woolie or microfiber noodle mitt for the barrels? Mandatory. Skip the $5 hardware store brush—it’s a ticket to scratches.
Finally, water. Distilled water for your rinse bucket. Tap water often leaves mineral spots on warm alloys, which require yet another product (a water spot remover) to fix. Kill that problem with a $1 gallon of distilled water.
Split this list, and you’re either wasting time or damaging metal. Trust the pros. Stack these three products and two brushes, and you’ve got the foundation for wheels that pop. Now go make that brake dust disappear.
Quick note: Always test any cleaner on a small, hidden area first. Some aftermarket and retro alloys (especially clear-coated surfaces) can react poorly to heavy iron removers.
Step 1: Pre-Rinse and Safety Check

Before you even think about scrubbing, you need to wage a two-front war: initial grime removal and personal protection. Think of the pre-rinse as the “softening” phase in a boxing match—you’re just loosening up the opponent. Grab a pressure washer or a strong garden hose nozzle. Start from the top of the wheel and work your way down, hitting every spoke, barrel, and especially the caliper area. Do not blast water directly into the wheel bearings or brake dust sensor wires if your car has them. The goal here is to knock off loose brake dust, road salt, and gravel that would turn into liquid sandpaper the second you touch a rag.
Now, the safety check. Stop. Seriously. Put on nitrile gloves and safety glasses. Brake dust is toxic—it contains heavy metals like copper, iron, and sometimes even asbestos in older vehicles. I’ve seen viral “hacks” where people skip this step and end up with brown-stained hands that burn for hours. Not worth the footage. Next, feel the wheel surface. If it’s hot to the touch (say, after a long drive), you need to let it cool completely. Hot alloy + cold water = risk of thermal shock, which can warp or crack the wheel. A cool, shaded car is your best friend here. Finally, check your wheel cleaner’s instructions. If you’re using an acidic or alkaline formula (like many professional wheel cleaners), apply it only to the wheel, never the tire sidewall, and never let it dry. You’ve now set the stage for a show-stopping clean that won’t ruin your finish—or your lungs.
Step 2: Choose the Right Wheel Cleaner
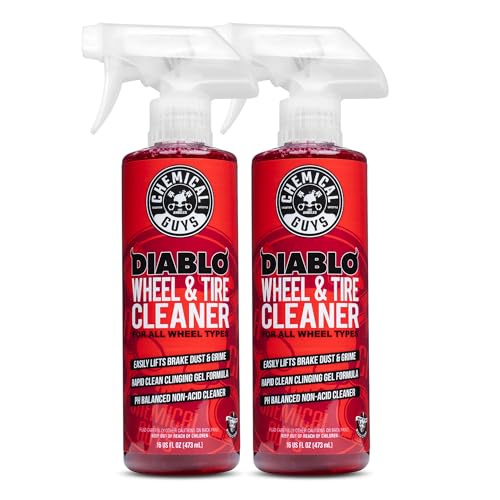
Selecting the right cleaner is where most enthusiasts either achieve perfection or inflict permanent damage. Never use a generic, acidic “tire and wheel” cleaner on alloy rims. These harsh chemicals are designed for steel wheels and will pit, etch, and discolor clear-coated or polished aluminum alloys. Instead, opt for a pH-neutral or mildly alkaline wheel cleaner, specifically formulated for delicate alloy surfaces.
For heavy brake dust accumulation—common on high-performance vehicles—a non-acid, iron-reacting cleaner is your viral secret weapon. These products (like those from P&S Brake Buster or Sonax Full Effect) turn purple or red upon contact with iron particles, lifting and encapsulating the grime without aggressive scrubbing. This chemical reaction is both satisfying to film and incredibly effective, making it a favorite among detailing influencers.
- Avoid: Any product with hydrofluoric acid, ammonium bifluoride, or harsh alkalis (like oven cleaner).
- Look for: “Safe for clear coat,” “alloy wheel safe,” or “pH balanced” on the label.
- Pro tip: If the cleaner dries on the wheel in direct sunlight, it can stain or etch the metal. Always work in the shade and rinse immediately after application.
Remember: a viral wheel cleaning video starts with no scrubbing—if you choose the right chemical, the spray and rinse does 90% of the work. Your wallet (and your rims) will thank you.

Step 3: The Contact Wash Technique (No Brushes Allowed)
Here’s where the rubber meets the road—literally. The Contact Wash is the most dangerous stage for your alloy wheels, because this is where most scratches, swirls, and micro-marring happen. The rule is simple: no brushes allowed. Not even the “softest” bristle brush. Why? Because brushes trap grit from previous washes, and that grit acts like sandpaper against your clear coat or polished lip. You’re not cleaning—you’re grinding.
Instead, arm yourself with a microfiber wash mitt (dedicated to wheels only, never your paint) and a separate bucket of fresh, soapy water (using the same pH-neutral wheel cleaner from Step 2). The technique is called gentle agitation. Submerge your mitt, let it drip, then work in straight, parallel lines—no circular motions. Circular motions create holograms and hideous spiderweb scratches that show up in sunlight. Start from the top of the wheel and work downward, letting gravity pull the dirt away. For tight spokes or lug nut wells, use a Wheel Woolie or a dedicated microfiber towel wrapped around your finger—again, zero bristles.
Here’s the viral hack: work one wheel at a time, from start to rinse. Never let the soap dry on the wheel. Dried soap is acidic and etches clear coats. Rinse immediately after washing each wheel with a gentle spray from your pressure washer or hose. You should see water sheeting off in a clean, even layer. If you see water beading into droplets, your wheel still has grime or wax residue. Repeat the contact wash until water sheets perfectly.
Step 4: Iron Remover for Brake Dust and Embedded Contaminants
This is where you graduate from a simple wash to a true deep clean. Brake dust isn’t just dirt; it’s microscopic shards of iron that have fused to your alloy wheel’s clear coat through intense heat and friction. A standard car shampoo simply cannot dissolve this. You need a dedicated iron remover (often a purple or red spray that reacts on contact).
Start with the wheel completely dry and cool to the touch. Spray the product generously onto the face, the barrels, and into the lug cavities. You should immediately see the magic: a red or purple “bleeding” effect as the chemical chemically bonds to the iron particles and liquefies them. This is not a gimmick—it’s a chemical reaction called chelation. Allow it to dwell for 3–5 minutes. Never let it dry on the wheel. If you see the liquid turning brown and running down, it’s working.
After the dwell time, take your soft bristle brush (avoid borosilicate or hard plastics) and agitate every surface. Focus on the lip where the tire meets the rim—this is a prime trap for embedded contaminants. You will see more purple sludge appear as you scrub. Rinse thoroughly with a high-pressure stream, starting from the inside of the barrel outward, ensuring all chemical residue escapes. Pro tip: Iron removers are incredibly effective but acidic. Wear nitrile gloves and avoid inhalation. This single step is why professional detailers can make two-year-old wheels look showroom-new. Skip it, and you are essentially polishing dirt. Embrace the bleed—it is the visual proof of your wheel’s liberation.
Step 5: Scrubbing Details: Lug Nuts, Barrels, and Wheel Wells
Now we move from the general to the specific. The barrels (the inner faces of the rim) and the wheel wells are where brake dust builds into a stubborn, baked-on crust. Spray your designated wheel cleaner into the barrel, aiming for the back of the spokes and the inner lip. While the cleaner dwells, attack the lug nuts. Use a dedicated lug nut brush or a small detailing brush with stiff nylon bristles. These recesses are dust magnets. Scrub each nut individually with a back-and-forth motion, then follow up with a microfiber sponge to wipe the face of the wheel around them.
Next, tackle the barrel. A long-handled wheel woolie or a flexible barrel brush is your best friend here. Insert it straight into the gap between the spokes and the rotor, and rotate the brush while pushing it in and out. This mechanical action dislodges the dark, powdery residue that typical washing misses. Don’t rush—spend an extra 15 seconds per section. For deep-set grime, use a stiffer brush on the inner rim edge.
Finally, hit the wheel wells. Use a dedicated tire brush or a fender brush with a long handle. Spray an all-purpose cleaner or a degreaser into the plastic inner fender lining. Scrub vigorously from top to bottom, focusing on the area directly behind the wheel. This step prevents caked-on mud and road salt from slinging back onto your freshly cleaned alloys the first time you drive. Rinse all three zones—lug nuts, barrels, and wells—with a strong stream of water. You will literally see the black sludge vanish. Your wheels will look deep, dark, and new from every angle.
Step 6: Final Rinse, Drying, and Protection (Wax or Sealant)
Alright, we are in the end zone now. This step is where your hard work gets its moment of glory, or gets absolutely sabotaged. The final rinse isn’t just about soap; it’s about total decontamination. Strip all residue using a strong, direct stream of water from your pressure washer or hose. Hit every spoke, every barrel, and the back of the wheel. If you see a single suds bubble, you have not rinsed thoroughly. Soap left to dry creates a dull, streaky film that ruins the finish.
Now, the drying process: water spots are your enemy. Do not let the wheel air dry. Ever. Use a dedicated, clean microfiber drying towel (or a soft leaf blower for a pro, touch-free finish). Start from the inner barrel, working outward to the face. Use a separate, clean corner of the towel for the lug nuts and crevices—brake dust hides here.
This is where you elevate from “washed” to “protected.” Once bone-dry, apply a dedicated wheel wax or ceramic sealant. Why? Brake dust is ferrous, acidic, and adheres via static. A quality sealant creates a sacrificial barrier that makes dust rinse away with just water next time. Apply a thin, even coat using a foam applicator, let it haze (10-15 mins), then buff off with a fresh microfiber. The result: gloss that stops you in your tracks, and brake dust that slides off like it doesn’t belong there. You didn’t just clean your wheels—you vaccinated them.
Frequently Asked Questions
What is how to clean alloy wheels and who should use it?
A: how to clean alloy wheels is a solution designed to address a specific set of needs for a defined audience. It is best suited for those seeking a reliable, well-researched option backed by clear evidence and expert guidance.
How long does it take to see results with how to clean alloy wheels?
A: Most users report noticeable results within the first 2–4 weeks of consistent use. Significant, measurable improvement is generally observed after one to two months of dedicated application.
Is how to clean alloy wheels suitable for beginners or experienced users?
A: how to clean alloy wheels is designed to accommodate a wide range of experience levels, from complete beginners to advanced practitioners. Its structured approach makes it accessible without sacrificing depth for those seeking expert-level application.
Can how to clean alloy wheels be combined with other approaches or products?
A: Yes, how to clean alloy wheels is generally compatible with complementary strategies and tools. It is advisable to introduce any combination gradually and monitor for synergy or potential conflicts with your existing routine.
What are the most common mistakes to avoid with how to clean alloy wheels?
A: The most frequent errors include inconsistent application, skipping foundational steps, and expecting immediate results without allowing adequate time for the process to work. Following the recommended guidelines closely is the most effective preventive measure.
How does how to clean alloy wheels compare to similar alternatives on the market?
A: how to clean alloy wheels distinguishes itself through its evidence-based formulation, transparent ingredient or methodology sourcing, and a track record of user-verified outcomes. Direct comparisons should be made on the criteria most relevant to your specific goals.
Are there any limitations or side effects associated with how to clean alloy wheels?
A: While how to clean alloy wheels is formulated to minimize adverse effects, individual responses can vary based on specific sensitivities or pre-existing conditions. Consulting with a relevant professional before starting is always a prudent step.
What is the best way to get started with how to clean alloy wheels?
A: The most effective starting point is to begin with a foundational assessment of your current situation, then follow the recommended introductory protocol for how to clean alloy wheels. Consistency and patience during the initial phase are the two biggest predictors of long-term success.
Summary: Cleaning alloy wheels requires a gentle but methodical approach to preserve their finish and protect against corrosion. Always start with a cool wheel and rinse off loose dirt with low-pressure water. Apply a pH-neutral wheel cleaner formulated for alloys, and allow it to dwell briefly to dislodge brake dust. Use a soft brush or microfiber mitt to scrub the face, spokes, and barrels, paying close attention to lug nut areas. Rinse thoroughly using a gentle spray, and dry with a clean, lint-free microfiber towel to prevent water spots.
For long-term protection, consider applying a wheel-specific wax or ceramic coating after cleaning. This creates a hydrophobic barrier that makes subsequent dust removal far simpler. Avoid abrasive tools, acidic chemicals, and washing while wheels are hot. By following these steps—cleaning with dedicated products, using soft tools, and protecting the surface—you can keep your alloy wheels looking polished and new for many seasons. Regular maintenance every two to four weeks is ideal for preventing stubborn buildup.