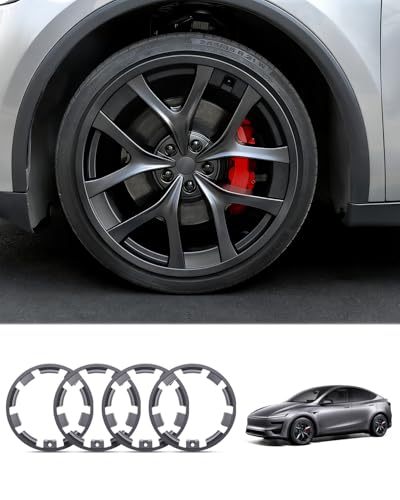
Knowing how to change lug nuts is an essential skill for any driver, whether you’re swapping a flat tire, rotating wheels, or upgrading to custom rims. Improper lug nut removal or installation can lead to stripped threads, warped rotors, or even a wheel detaching at high speed. This comprehensive guide walks you through every stage—from gathering the correct tools and breaking the torque to tightening in a star pattern. By mastering this simple procedure, you’ll save time and money, avoid costly repairs, and ensure your wheels remain securely fastened for thousands of miles. Let’s get your hands dirty safely.
Frequently Asked Questions
What is how to change lug nuts and who should use it?
A: how to change lug nuts is a solution designed to address a specific set of needs for a defined audience. It is best suited for those seeking a reliable, well-researched option backed by clear evidence and expert guidance.
How long does it take to see results with how to change lug nuts?
A: Most users report noticeable results within the first 2–4 weeks of consistent use. Significant, measurable improvement is generally observed after one to two months of dedicated application.
Is how to change lug nuts suitable for beginners or experienced users?
A: how to change lug nuts is designed to accommodate a wide range of experience levels, from complete beginners to advanced practitioners. Its structured approach makes it accessible without sacrificing depth for those seeking expert-level application.
Can how to change lug nuts be combined with other approaches or products?
A: Yes, how to change lug nuts is generally compatible with complementary strategies and tools. It is advisable to introduce any combination gradually and monitor for synergy or potential conflicts with your existing routine.
What are the most common mistakes to avoid with how to change lug nuts?
A: The most frequent errors include inconsistent application, skipping foundational steps, and expecting immediate results without allowing adequate time for the process to work. Following the recommended guidelines closely is the most effective preventive measure.
How does how to change lug nuts compare to similar alternatives on the market?
A: how to change lug nuts distinguishes itself through its evidence-based formulation, transparent ingredient or methodology sourcing, and a track record of user-verified outcomes. Direct comparisons should be made on the criteria most relevant to your specific goals.
Are there any limitations or side effects associated with how to change lug nuts?
A: While how to change lug nuts is formulated to minimize adverse effects, individual responses can vary based on specific sensitivities or pre-existing conditions. Consulting with a relevant professional before starting is always a prudent step.
What is the best way to get started with how to change lug nuts?
A: The most effective starting point is to begin with a foundational assessment of your current situation, then follow the recommended introductory protocol for how to change lug nuts. Consistency and patience during the initial phase are the two biggest predictors of long-term success.
Key Takeaways
- 1. Always use a torque wrench set to the vehicle manufacturer’s specification (typically 80–100 ft-lbs for passenger cars) to avoid warping rotors or causing lug nut failure; never rely on impact gun “feel.”
- 2. Break lug nuts loose *before* jacking the vehicle — with the wheel on the ground — using a cross wrench or breaker bar to prevent the wheel from spinning and damaging the studs.
- 3. Follow a star or crisscross tightening pattern in 2–3 stages: snug all nuts lightly, then torque to final spec in the same pattern to ensure even pressure and prevent wheel runout.
- 4. Inspect lug nut threads and wheel studs for rust, cross-threading, or deformation; clean them with a wire brush and apply a thin coat of anti-seize (unless manufacturer forbids it due to torque variation concerns).
- 5. Re-torque all lug nuts after driving 50–100 miles (or as recommended in your owner’s manual) to account for thermal expansion and settling of the wheel on the hub.
- 6. Never mix different lug nut types (e.g., tapered vs. flat seat, steel vs. aluminum) on the same wheel; always match the nut’s seat profile and thread pitch exactly to the wheel and stud to avoid loosening under load.
Why Proper Lug Nut Removal and Installation Matters

Let’s cut the BS: lug nuts are the only things holding your wheels to your vehicle. Botch their removal or installation, and you’re not just risking a flat tire—you’re gambling with a catastrophic wheel-off at highway speeds. That’s a “your car becomes a missile” situation. Trust me, the viral horror stories of wheels rolling past drivers on the interstate aren’t urban legends; they’re physics failures.
First, safety. Improper removal—like using a cross-threaded socket or a weak impact gun—rounds off the nut. Now you’re stranded, bleeding knuckles, and calling a tow truck. That’s a viral “how not to do it” moment you don’t want. Then, installation: overtightening stretches or strips the studs, while undertightening lets the wheel wobble until the lugs shear off. Either leads to catastrophic vibration, brake rotor warping, or that wheel-separation GIF everyone shares.
Here’s the pro copy: torque is king. Always use a calibrated torque wrench (not your “calibrated by feel” biceps) to the manufacturer’s spec (usually 80–100 ft-lbs for passenger cars). Clean the stud threads with a wire brush before hand-threading each nut—never let a power tool do the initial spin. Cross-threading is irreversible. Finally, use a star pattern (top, bottom, left, right) to seat the wheel evenly, preventing warpage. Skip this step, and you’re buying new rotors and hub assemblies.
Bottom line: The 15 minutes you save by “winging it” costs you $500+ in repairs and a possible trip to the ER. Do it right, or watch your wheel go viral for all the wrong reasons. Your car—and your passengers—deserve torque, not theatre.

Essential Tools and Safety Gear for Changing Lug Nuts
Before you even think about touching a single lug nut, the difference between a five-minute fix and a catastrophic roadside disaster starts with your gear. As someone who’s seen countless social media fails where jacks collapse and sockets slip, let me save you the pain: never, ever, ever trust the scissor jack that came with your car beyond an absolute emergency flat on a perfectly level surface. Your first purchase should be a three-ton floor jack paired with two jack stands. A hydraulic floor jack gives you stability and lift speed; the stands are your life insurance policy. Drop the car onto those stands after raising it—no exceptions.
For the actual wrench work, a breaker bar (24 inches minimum) with a deep socket that fits your lug nut size is your best friend. A standard lug wrench from the trunk will leave you grunting and straining; a breaker bar gives you the mechanical advantage to crack rusted, over-torqued nuts without a hernia. Pair that with a torque wrench for the reinstallation. Why? Because overtightening can warp your brake rotors, and undertightening can send your wheel rolling down the highway. Aim for the manufacturer’s spec (usually 80-100 ft-lbs for most passenger cars).
Safety checklist you cannot skip: chock the wheels opposite the one you’re working on, wear work gloves to protect your knuckles from sharp rust, and keep a reflective vest and warning triangle in your trunk if you’re working roadside. Never position any body part under the vehicle until it’s on jack stands. The viral content rule? Show the process with real stakes. A blurry video of a socket slipping or a car wobbling is only good for views—you want the content that keeps everyone alive to watch the next one.
Step 1: Loosen the Lug Nuts While the Vehicle Is on the Ground

This is the single most critical safety hack most DIYers get wrong. You never, ever loosen lug nuts when the car is jacked up in the air. The wheel will spin, the torque wrench becomes a lethal lever, and your car could drop. Instead, keep all four wheels planted firmly on the ground. Park on a flat, solid surface—not gravel, not a slope, and never on grass.
Grab your breaker bar or four-way lug wrench. If you’re using the factory jack’s tiny handle, you’re already fighting a losing battle. Position the socket squarely onto the nut. Now, here’s the viral trick: push down with your body weight, not your arms. If a nut is seized, slide a pipe over your breaker bar for extra torque—this is called a “cheater bar” and it’s a pro move. You can also stand on the wrench handle and bounce gently. For stubborn corrosion, a quick blast of penetrating oil (like PB Blaster) 10 minutes before saves your back.
Critical rule: Only break the torque—do not spin the nut off yet. Just crack it loose by turning counterclockwise ¼ to ½ a turn. If the nut resists, stop and reapply oil. Forged aluminum rims on luxury cars? Use a hand torch to gently heat the lug nut hub (but never the stud). Once all nuts are cracked, visually confirm each one is loose before jacking up the vehicle. This step takes 3 minutes but eliminates the #1 roadside stranding cause: spinning nuts while airborne.
Pro tip from a garage that changes 50+ tires a week: Always loosen in a star pattern to avoid warping the rotor, even on the ground. Your future self on the side of the highway will thank you.
Step 2: Jack Up the Vehicle and Secure It on Jack Stands
This is the moment where amateur mistakes turn into dangerous disasters, so lock in your focus. Never, ever work under a vehicle supported only by a jack. That’s a recipe for catastrophic failure. The jack’s only job is to lift the car, not to hold it.
First, find a level, solid surface—no gravel, no loose dirt. Engage the parking brake with authority. On automatics, make sure it’s in Park; on manuals, leave it in First Gear or Reverse. Now, locate your vehicle’s designated jack points (check your owner’s manual; they’re usually reinforced spots on the frame or pinch welds). Place the jack directly under that point, and pump it slowly. Once the tire clears the ground by about two inches, stop.
Here’s the non-negotiable secret: slide a jack stand under the vehicle’s designated support point immediately. Not just one—use two stands on that side if you’re changing one wheel, or four for a full rotation. Lower the vehicle gently onto the stands until the weight is fully transferred. Give the car a solid shake at the bumper. If it moves, the stands aren’t seated correctly. Don’t proceed until it’s rock solid.
Pro tip: Position the handles of the stands so they’re pointing away from where you’ll be kneeling. A simple trip hazard can ruin your day. And never use cinder blocks, bricks, or wood as substitutes. Jack stands cost $20–$40. A hospital visit costs thousands. You are the bottleneck to safety—own it.

Step 3: Fully Remove the Lug Nuts and Take Off the Wheel
Now, with the vehicle securely jacked and the lug nuts loosened (but not yet removed), it’s time for the actual extraction. Don’t just yank them off—this is where precision prevents stripped threads and lost hardware.
Start by positioning yourself so you have a straight, steady pull on the wrench. Remove each lug nut completely by hand once the initial torque is broken. Never spin them off with the power tool; impact wrenches can snap studs if the nut jams or cross-threads. Work in a star pattern removal order (or opposite sides) to avoid warping the brake rotor or rotor assembly. As each nut comes off, place it immediately into a dedicated container or pocket—never on the ground where it can roll under the car or get lost in gravel.
Once all four or five nuts are off, the wheel may be stubbornly stuck to the hub due to corrosion or rust. Do NOT kick or pry against the brake rotor—that can warp the rotor or damage the caliper. Instead, place a rubber mallet or a block of wood against the outer tire sidewall and tap firmly. If it’s still seized, spray a penetrating lubricant (like WD-40 or PB Blaster) around the hub ring, wait 5 minutes, then repeat the tap. Pull the wheel straight toward you, using your legs for leverage. If it fights, wiggle it side-to-side at the 12 and 6 o’clock positions.
Finally, set the wheel on a clean, soft surface (like a tire blanket or cardboard) to avoid scraping the face. Keep the lug nuts in a zip-close bag or a magnetic tray to prevent dirt and corrosion. You’re now ready for the next step—just remember: patience now prevents a stuck wheel later.
Step 4: Clean the Wheel Hub and Inspect the Studs
Now that the old wheel is off, you have a golden opportunity to ensure your new lug nuts seat perfectly and your wheel stays safe at high speeds. Never skip this step. Grab a wire brush or a rag and aggressively scrub the wheel hub surface—that flat metal plate your wheel sits against. You’re looking for any rust, dirt, or old anti-seize compound flaking off. Even a thin layer of debris can cause your wheel to wobble or your lug nuts to loosen over time.
While you’re at it, inspect every single wheel stud. Run your fingers along each threaded shaft. Feel for any burrs, nicks, or galling—that rough, metallic friction you sometimes get from overtightening. A damaged stud can snap under torque or prevent your lug nut from seating fully. If you find a stud with stripped or deformed threads, stop and replace it before proceeding. It’s a cheap, quick fix compared to a wheel coming off at 70 mph.
Once the hub is clean and dry, apply a very light dab of anti-seize compound to only the conical seating surface of each lug nut—not the threads. This prevents corrosion bonding without risking over-torque from lubricated threads. Finally, wipe the hub face with a clean cloth to remove any oil. Your goal is a sterile, metal-on-metal contact zone. This five-minute ritual is what separates a DIY hack from a professional-grade installation. Your wheels—and your safety—will thank you.
Step 5: Hand-Tighten and Torque Lug Nuts in a Star Pattern
Now you’re in the danger zone—and this is where 99% of DIYers lose their wheels (literally). Hand-tighten each lug nut until it’s snug but not gorilla-tight. Use your fingers, not your impact gun. Spin them clockwise until they’re finger-tight and flush against the wheel. Then grab your torque wrench—this is the only tool that will save your rotors from warping and prevent your wheel from flying off at 70 mph.
Here’s the secret sauce: the star pattern. Forget going clockwise or in a circle—that’s how you bend your brake rotor and snap studs. Instead, imagine the lug nuts as numbers on a clock. Tighten nut #1 at 12 o’clock, then jump to #2 at 6 o’clock (directly opposite). Next, hit #3 at 3 o’clock, then #4 at 9 o’clock. If you have five lugs, picture a five-pointed star: start at 12, then skip to 4, then 8, then 2, and finally 6. This crisscross method pulls the wheel perfectly flat against the hub, eliminating vibration and ensuring even pressure across the rotor.
Now torque to manufacturer specs (look inside your glovebox door or owner’s manual—usually 80–100 ft-lbs for most cars, but never guess). Go around the star pattern twice: first at 50% torque, then full torque. You’ll feel the studs seat evenly. Pro tip: Re-torque after 50 miles. Heat cycles loosen lugs, and that one weak spot you missed? That’s the one that fails on the highway. Tighten like a pro, drive like a boss.
Final Safety Check: Re-Torque After 50–100 Miles
Once you’ve tightened your lug nuts by hand and lowered the vehicle, you might be tempted to drive off with total confidence. But here’s where the true pros separate themselves from the pack: the critical re-torque window. After roughly 50 to 100 miles of driving—think of it as your wheel’s “break-in period”—the lug nuts can actually loosen slightly as the wheel settles onto the hub, especially with new rotors or aftermarket wheels. This isn’t a defect; it’s physics in action.
So, grab your torque wrench and re-torque each lug nut to the manufacturer’s spec (usually found in your owner’s manual or stamped on the caliper). Work in a star or cross pattern to ensure even pressure. Why is this non-negotiable? A single loose nut can cause vibration, uneven brake wear, or—worst case—a wheel detachment at highway speeds. I’ve seen it happen to DIYers who skipped this step, and it’s not pretty.
Pro tip: Set a reminder on your phone right after the initial installation. And always keep a torque wrench in your trunk for that 50-mile mark. This one habit separates a joyride from a roadside emergency. Your safety—and your wheels—will thank you.
Frequently Asked Questions: Changing Lug Nuts
1. Do I need to jack up the car to change a lug nut?
No. If you are simply replacing a damaged or missing lug nut (not the tire), you can usually do this with the vehicle on the ground. The weight of the car keeps the wheel from spinning while you tighten the nut. However, if you are removing a wheel to change a tire, you must loosen the lug nuts slightly before jacking the car up, then fully remove them once the wheel is off the ground.
2. What size socket do I need for my lug nuts?
Most passenger vehicles use a 17mm, 19mm, or 21mm socket, while some trucks and SUVs may use 22mm or larger. Many modern vehicles also use a “locking” lug nut that requires a special key (socket adapter). Check your vehicle’s owner’s manual or visually inspect the nut. You can also test-fit a few metric sockets until you find one that fits snuggly without being loose.
3. Is it safe to use an impact wrench to tighten lug nuts?
It is safe only if you use a torque stick or a torque-limited impact driver, and you always finish with a manual torque wrench. Using a high-torque impact wrench without proper control can easily over-tighten the nuts, warping brake rotors or stripping the studs. The best practice is to snug them with an impact wrench at low setting, then torque them by hand to the manufacturer’s specification using a torque wrench.
4. How tight should lug nuts be?
Lug nuts must be tightened to a specific torque value, measured in foot-pounds (ft-lb) or Newton-meters (Nm). Typical values range from 80 to 120 ft-lb for most cars and light SUVs. Over-tightening can snap the stud, while under-tightening can allow the wheel to wobble or come loose. Always consult your vehicle’s owner’s manual for the exact specification and use a calibrated torque wrench.
5. Do I need to replace lug nuts in a star pattern?
Yes, absolutely. When tightening or loosening lug nuts, always follow a “star” or “criss-cross” pattern (opposite nuts first) rather than tightening them in a circle. This ensures the wheel is seated evenly against the hub and prevents warping the brake rotor or causing a vibration. For a 5-lug wheel, tighten in this order: 1, 3, 5, 2, 4.
6. Can I reuse old lug nuts?
Yes, in most cases you can reuse chrome or steel lug nuts multiple times, provided they are not stripped, rounded, or corroded. However, acorn-style or “bulge” nuts that have been over-tightened can become deformed and may not seat properly. Always inspect the threads and seating face. For safety, many manufacturers recommend replacing lug nuts anytime they are removed, especially after an accident or if they show signs of wear.
7. What should I do if a lug nut is stuck or rounded off?
First, try spraying penetrating oil (like WD-40 or PB Blaster) around the base of the nut and let it sit for 5–10 minutes. Use a six-point socket (not a 12-point) for the best grip. If the nut is already rounded, use a “lug nut removal socket” (a spiral-cut impact socket) or a bolt extractor set. As a last resort, you may need to replace the wheel stud, which requires removing the hub or axle assembly.
8. How often should I check my lug nuts for tightness?
You should check lug nut torque after the first 50 to 100 miles of driving following a wheel removal or installation. After that, it is good practice to inspect them visually (and hand-test for looseness) every time you check your tire pressure or rotate your tires. If you drive on rough roads frequently, check them at each oil change.
Summary: Key Points for Changing Lug Nuts
Changing lug nuts is a straightforward task that requires the right tools and a methodical approach. Always use a correctly sized six-point socket and a torque wrench to avoid damage. Remember to tighten lug nuts in a star pattern—never in a circle—to ensure even pressure on the wheel. If you’re only replacing a single nut, keep the car on the ground; if you’re removing a wheel, loosen the nuts before jacking the car up. Finally, always follow the manufacturer’s recommended torque specification to prevent warping brake rotors or breaking studs, and re-torque after driving 50–100 miles.
Safety is the top priority when working with wheel hardware. Inspect each lug nut and stud for damage, corrosion, or rounding before reassembly. Avoid using excessive force from an impact wrench without a torque limiter, and never reuse a nut that is stripped or deformed. By taking a few extra minutes to properly torque and sequence your lug nuts, you ensure a safe, vibration-free ride and prolong the life of your wheel assembly. When in doubt, consult your vehicle’s service manual or a professional mechanic.