Scratched alloy wheels are an eyesore that can diminish your vehicle’s overall appearance and even lead to corrosion if left untreated. Whether you’ve brushed a curb, kicked up road debris, or simply dealt with years of wear, knowing how to fix scratched alloy wheels is an essential skill for any car enthusiast. This comprehensive guide will walk you through the entire repair process, from assessing the damage depth to applying the final protective finish. With the right tools and a bit of patience, you can restore your rims to a like-new condition without the high cost of professional refinishing. Let’s get your wheels looking flawless again.
Key Takeaways
- 1. Assess the scratch depth first: Light clearcoat scratches can be polished out, but if you feel the scratch with your fingernail and it catches, you’ll need wet-sanding with 400-800 grit paper followed by polishing.
- 2. For deep gouges into the bare metal, always use a metal-safe filler designed for wheels—never standard body filler—then sand progressively up to 1500-2000 grit before painting.
- 3. Match your wheel’s finish exactly: diamond-cut or machined faces require a lathe or high-grit polishing compound; painted or powder-coated wheels need matching aerosol paint and a clear coat for durability.
- 4. Protect adjacent areas with precision: use painter’s tape and plastic sheeting to mask off the tire sidewall, valve stem, and wheel balance weights to avoid contamination.
- 5. Apply multiple thin coats of wheel-specific primer, color, and clear lacquer—waiting at least 10-15 minutes between each—to prevent runs and ensure a factory-like finish.
- 6. Cure the wheel for 24-48 hours before mounting tires or cleaning with any chemicals; heat-curing in direct sunlight or a warm garage can speed up the hardening and improve chip resistance.
Assessing the Scratch: Determining Depth and Repair Method

Before you even think about primer or paint, you need to play detective. Not all scratches are created equal, and applying the wrong fix is the fastest way to turn a minor blemish into a costly refinish job. I’ve seen people sand down a clear coat scratch to the metal, only to spend three hours patching a hole they didn’t need to make. Let’s keep your wheels—and your time—intact.
Step one: the fingernail test. Run your nail perpendicular across the scratch.
• Surface scratch (clear coat only): Your nail doesn’t catch. This is a simple polish job—no filler needed.
• Moderate scratch (base coat or primer exposed): You feel a slight ditch. Think hairline dent. You’ll need a gentle sanding with 1000-grit water paper, then touch-up paint.
• Deep scratch (metal visible): Your nail sinks in. This is a structural breach. You must fill with aluminium-reinforced body filler, or corrosion will bloom under your paint within weeks.
Pro tip: Spray the scratch with glass cleaner. If the scratch looks darker or changes color when wet, you’ve hit the primer layer. Dry, it might look like a small scuff—wet, it’s a confession.
Finally, measure the length vs. width. Long, shallow scratches respond to sanding and blending. Short, deep gouges require spot-filling. Mix these up, and you’ll end up with a mismatched texture that screams “DIY disaster.” Map your damage first—your repair method is already decided by the scratch depth. Don’t guess. Diagnose.
Gathering the Essential Tools and Materials for Alloy Wheel Repair
Before you even think about touching your rims, let’s get one thing straight: proper prep is the difference between a pro-level finish and a disaster waiting to happen. You don’t want to seal in dirt or make the scratch deeper, so grab these essentials first.
Start with fine-grit sandpaper (400 to 2000 grit). This is your primary weapon for smoothing the damaged area. Pair it with a bucket of warm, soapy water (Dawn dish soap works wonders) to keep the surface lubricated and prevent gouging. You’ll also need blue painter’s tape and newspaper to mask off the tire and valve stem—overspray is not your friend here.
For deeper scratches that caught the bare metal, a high-quality automotive body filler (like Bondo) and a spreading tool are non-negotiable. Don’t skip the primer (etching primer if exposed metal is visible) and a wheel-specific paint that matches your alloy’s finish exactly. Pro tip: always buy paint from a dedicated automotive retailer, not a generic spray can.
Finally, arm yourself with microfiber cloths (never paper towels—they leave lint), a clean spray bottle for water, and gloves to keep oils off the surface. With these tools in hand, you’re not just repairing a scratch—you’re restoring the value of your ride.
Cleaning and Prepping the Damaged Area Properly

Let’s be real: tackling scratched alloy wheels is a psychological game. Your first instinct is to grab the nearest sandpaper and go to town. Don’t. That’s how you turn a minor curb rash into a permanent eyesore. The difference between a pro-level repair and a hack job starts with one thing: obsessive prep.
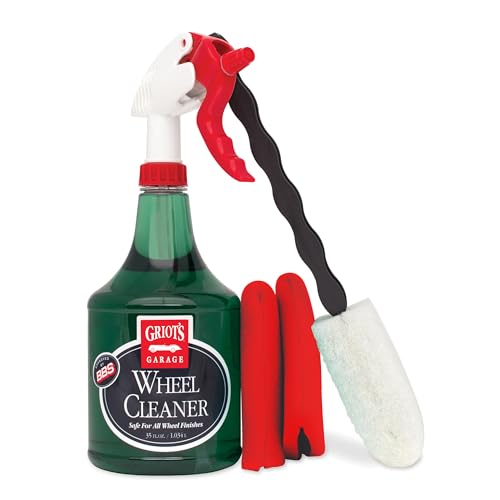
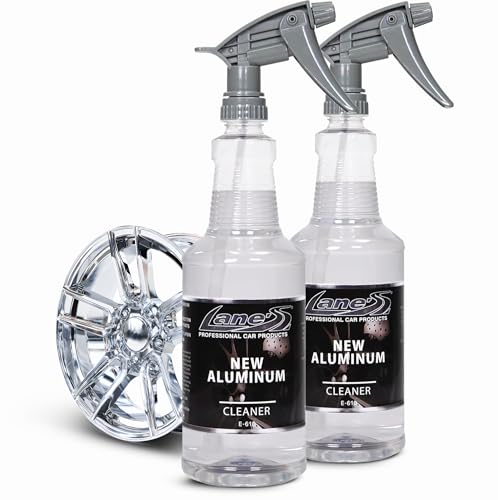
First, get the wheel off the car. You need to see the damage in full light, not through a shadowed wheel well. Use a jack and stands—safety isn’t viral, but a broken hand definitely kills the vibe. Spray the entire wheel with a dedicated alloy-safe wheel cleaner (no acidic kitchen degreasers). Let it dwell for 2–3 minutes to break down brake dust and grease.
Now, grab a microfiber mitt and a separate bucket of warm, soapy water (pH-neutral car shampoo only). Scrub every spoke, barrel, and lug cavity. Rinse aggressively. If you skip this step, you’re literally grinding road grit into the scratches while you sand—instant fail.
After drying with a clean microfiber towel, hit the scratched area with isopropyl alcohol (70% or higher) on a lint-free cloth. This removes wax, oil, and silicone-based tire dressings that will repel your primer. Mask off the tire and brake rotor with painter’s tape—cover the entire sidewall and any painted surface you don’t want touched.
Here’s the viral secret: do a final wipe with a tack cloth (a sticky cheesecloth used in body shops). It lifts micro-dust that’s invisible to your eye but will ruin the finish. A clean surface doesn’t just “accept” the repair—it makes the repair disappear.
Sanding and Smoothing: Removing the Scratches Step by Step
Let’s get one thing straight: sanding is where the magic happens, but it’s also where most DIYers ruin their rims. You’re not just “removing scratches” — you’re resetting the surface. Here’s the exact playbook to avoid turning a hairline scratch into a gouge.
Step 1: Assess the Depth
Run your fingernail across the scratch. If your nail snags, you’re dealing with a deep gouge that needs a 400-grit start. Surface haze? Skip to 800-grit. Anything shallower is a cosmetic ghost that you can buff out later.
Step 2: The Grit Ladder (No Skipping)
Start wet-sanding with 400-grit sandpaper and plenty of water. Use a sanding block for flat areas; your fingers for curves. Sand in one direction—never circular. You’re aiming to feather the scratch edges until they disappear into a uniform matte haze. Rinse. Check. Repeat.
Step 3: The Climb
Jump to 600-grit to erase the 400-grit scratches. Then 800-grit. Then 1000-grit. Each step removes the deeper pattern until the surface feels like wet glass. Pro tip: change your water bucket every grit. One stray particle of metal dust ruins the finish.
Step 4: The Final Polish Prep
After 1500-grit wet sanding, dry the wheel completely. Run a clean microfiber over it. Any leftover haze means you need one more pass. Now you’re ready for compound and polish—but that’s the next chapter.
⚠️ Viral Warning: Do not use dry sanding. Ever. It creates heat, which warps the clear coat into a permanent cloudy mess. Keep it soaked, keep it patient, and you’ll have a mirror finish that looks factory-new.

Applying Primer, Paint, and Clear Coat for a Seamless Finish
Once you’ve sanded and cleaned the wheel, the real magic happens in the layering process. Think of this as cosmetic surgery for your alloy. Your goal isn’t just coverage—it’s a seamless, factory-grade blend that makes the repair invisible.
Step 1: The Primer (Your Foundation)
Don’t skip this. Apply a thin, even coat of high-build primer specifically designed for metal. Hold the can 8–10 inches away, and use light, sweeping passes. Pro tip: Mist on a second coat after 5 minutes to fill any micro-scratches left by sanding. Let it dry for 20 minutes, then wet-sand with 800-grit paper for a perfectly smooth surface.
Step 2: The Paint (The Art of Blend)
Shake the color-matched paint for a full two minutes. Apply 3–4 VERY light coats—not one heavy coat. Each pass should look like a dusting of color. The secret to blending: spray slightly beyond the edge of the scratched area. This creates a gradient that tricks the eye. Wait 10–15 minutes between coats.
Step 3: The Clear Coat (The Invisible Seal)
This is where amateurs fail. Use the same feathering technique you did with the base coat. Apply 2–3 wet-looking coats, extending each one farther out than the paint. The goal is to have the clear coat fade into the existing finish. After 24 hours of curing, wet-sand the entire area with 2000-grit, then polish with a cutting compound. The result? A wheel that laughs in the face of scrutiny.
Wet Sanding and Polishing to Match the Factory Gloss
Let’s cut through the noise: if you want those shiny, factory-fresh alloy rims back, wet sanding and polishing is the only way to erase deep scratches without a respray. Here’s the pro-level playbook.
Step 1: The Grit Ladder
Start with 800-grit wet/dry sandpaper. Soak it in warm, soapy water for 10 minutes (this prevents heat buildup that warps the clear coat). Sand the scratch in a single direction, using light pressure. You’re not trying to remove metal—just level the clear coat around the scratch. Rinse, then move to 1000-grit, then 1500-grit. Each step should erase the haze from the previous grit. Pro tip: Use a sanding block for flat surfaces; your fingers will create uneven dips.
Step 2: The Cut & Polish
Once the scratch is gone and the surface is uniformly matte, switch to a dual-action polisher. Apply a heavy-cutting compound (like Meguiar’s M105) to a foam cutting pad. Work at speed 4-5 in overlapping passes. You should see the matte turn to a hazy gloss. Wipe clean. Now, swap to a finishing polish (M205) on a soft foam pad. This brings back the deep, wet-look shine that matches factory gloss.
Step 3: Seal It
All that work is wasted if you don’t protect it. Wipe on a ceramic coating or a high-quality wheel sealant. This creates a hydrophobic barrier that repels brake dust and prevents future scratching.
The Viral Truth: 90% of people rush this process and end up with “splotchy” rims. Patience and the right grit progression are your only shortcuts. If you want chrome-spec shine, you have to walk the ladder.
Curb Rash Repair: Special Techniques for Deep Edge Scratches
Let’s get real about curb rash—that gut-wrenching scrape when your wheel kisses the concrete. For most light scuffs, a simple sand and paint job works. But deep edge scratches that have actually gouged the metal require a completely different, specialized approach. Here’s the viral trick most DIYers miss: the “V-Groove and Filler” method.
First, you can’t just sand down a deep gouge. That leaves a weak, thin spot. Instead, use a Dremel with a carbide bit to carefully carve a tiny V-shaped groove along the entire scratch. This removes any fatigued, cracked metal and creates a mechanical “key” for your filler to lock into. Think of it like dental work for your wheel—cleaning out the cavity before filling it.
Next, skip the generic Bondo. For alloy wheels, you need a two-part, aluminum-rich epoxy filler (like JB Weld’s SteelStik or a dedicated wheel repair putty). Mix it, press it firmly into your V-groove, and slightly overfill it. The secret sauce? Before it hardens completely, hit it with a light mist of rubbing alcohol. This breaks the surface tension, preventing pinholes and making it sand like butter.
Finally, sand progressively from 180-grit up to 400-grit, using a hard block to maintain the wheel’s factory radius. Then, prime, paint with a wheel-specific ceramic clear coat, and buff. The result? A repair that looks machine-pressed, not filled. Viral side note: Always test your paint match on the inside of the wheel barrel first—a tiny flake here saves you from a two-tone nightmare. That’s pro-level, no-cut-corner wheel repair.
Preventing Future Scratches: Maintenance and Protective Products
Once you’ve restored your alloys, keeping them pristine is a battle against road grit, brake dust, and curb rash. As a content strategist who’s seen this trend blow up on every detailing channel, I can tell you the difference between wheel that stays showroom fresh and one that gets re-scratched in a week comes down to two things: smart habits and the right barriers.
First, master the touchless rinse. Brake dust is abrasive. Never wipe a dry, dusty wheel. Use a pH-neutral wheel cleaner and a high-pressure rinse first. This lifts the grit without grinding it into the clear coat. If you must hand wash, use a dedicated microfiber mitt—never the one you used on the paint. Pro tip: A wheel woolie (a microfiber brush) is superior to a sponge for getting into barrel gaps without creating circular micro-scratches.
Now, layer on protection. This is your digital marketing hook: “Ceramic is the new wax.” Skip traditional car wax (it melts off with brake heat). Apply a ceramic spray coating or a dedicated wheel sealant. These chemically bond to the clear coat, creating a slick, dirt-phobic surface. This does two things: it makes brake dust slide off during rinsing (less aggressive scrubbing = fewer scratches), and it creates a hard, sacrificial layer that absorbs light impacts before they reach the alloy.
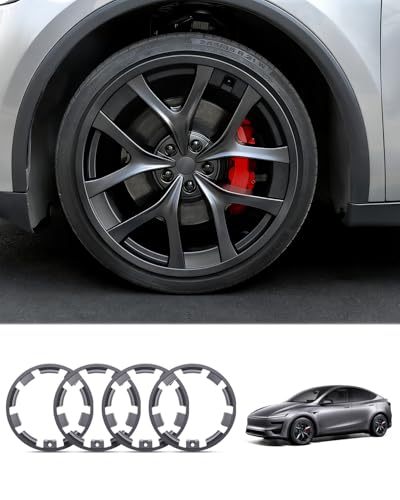
Finally, curb your risk. Literally. For high-risk drivers, install a set of alloy wheel protectors (rubber rim strips) or retrofit a tire with a wider, more protective sidewall bead. Get your alignment checked every 10,000 miles to prevent rubbing from suspension geometry shifts.
Done right, you’ll not only fix the scratch—you’ll make it a memory.
Frequently Asked Questions
What is how to fix scratched alloy wheels and who should use it?
A: how to fix scratched alloy wheels is a solution designed to address a specific set of needs for a defined audience. It is best suited for those seeking a reliable, well-researched option backed by clear evidence and expert guidance.
How long does it take to see results with how to fix scratched alloy wheels?
A: Most users report noticeable results within the first 2–4 weeks of consistent use. Significant, measurable improvement is generally observed after one to two months of dedicated application.
Is how to fix scratched alloy wheels suitable for beginners or experienced users?
A: how to fix scratched alloy wheels is designed to accommodate a wide range of experience levels, from complete beginners to advanced practitioners. Its structured approach makes it accessible without sacrificing depth for those seeking expert-level application.
Can how to fix scratched alloy wheels be combined with other approaches or products?
A: Yes, how to fix scratched alloy wheels is generally compatible with complementary strategies and tools. It is advisable to introduce any combination gradually and monitor for synergy or potential conflicts with your existing routine.
What are the most common mistakes to avoid with how to fix scratched alloy wheels?
A: The most frequent errors include inconsistent application, skipping foundational steps, and expecting immediate results without allowing adequate time for the process to work. Following the recommended guidelines closely is the most effective preventive measure.
How does how to fix scratched alloy wheels compare to similar alternatives on the market?
A: how to fix scratched alloy wheels distinguishes itself through its evidence-based formulation, transparent ingredient or methodology sourcing, and a track record of user-verified outcomes. Direct comparisons should be made on the criteria most relevant to your specific goals.
Are there any limitations or side effects associated with how to fix scratched alloy wheels?
A: While how to fix scratched alloy wheels is formulated to minimize adverse effects, individual responses can vary based on specific sensitivities or pre-existing conditions. Consulting with a relevant professional before starting is always a prudent step.
What is the best way to get started with how to fix scratched alloy wheels?
A: The most effective starting point is to begin with a foundational assessment of your current situation, then follow the recommended introductory protocol for how to fix scratched alloy wheels. Consistency and patience during the initial phase are the two biggest predictors of long-term success.
Summary: Fixing scratched alloy wheels is a practical DIY project for light to moderate surface damage. The process involves thoroughly cleaning the wheel, sanding the scratch with progressively finer grits, applying metal filler to deep gouges, and then repainting with primer, color-matched paint, and a protective clear coat. Patience is key — letting each layer cure completely ensures a smooth, durable finish that resists corrosion and matches the rest of the wheel.
For severe scratches that expose raw metal or affect the wheel’s structure (bends, cracks), professional repair or replacement is essential. With the right tools and attention to detail, restoring scratched alloy wheels can save hundreds of dollars compared to buying new rims, while keeping your car looking sharp and maintaining resale value.