Alloy wheels add style and performance to any vehicle, but road grime, brake dust, and oxidation can dull their luster over time. Learning how to polish alloy wheels properly not only restores their mirror-like finish but also protects against corrosion and extends their lifespan. Whether you’re a weekend warrior or a detailing enthusiast, this guide walks you through every phase—from cleaning and sanding to buffing and sealing. With the right tools and technique, you can achieve professional-grade results at home. Ready to make your wheels shine like new? Let’s get started.
Key Takeaways
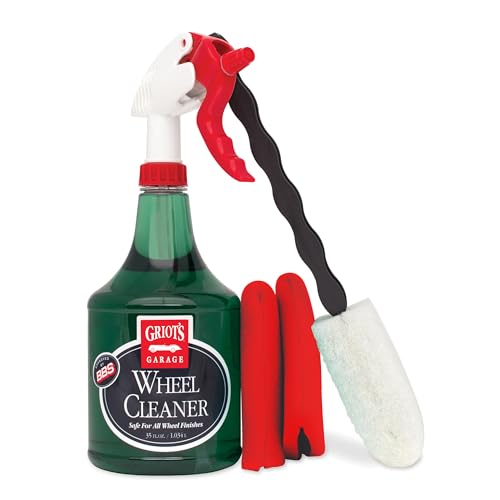
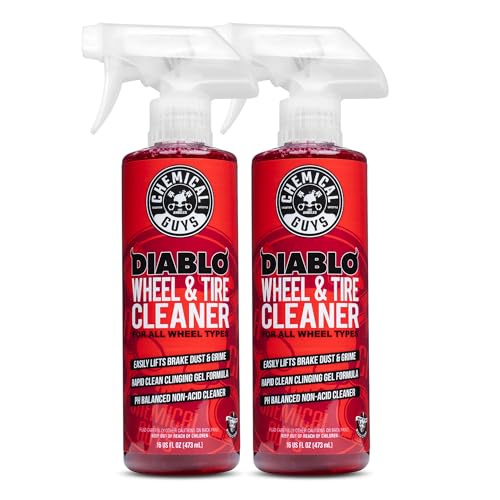
- 1. Always start with a dedicated alloy wheel cleaner to break down brake dust and stubborn grime; avoid using aggressive acid-based formulas on lacquered or painted wheels, as they can damage the protective clear coat.
- 2. Use a set of soft-bristled brushes specifically shaped for wheel barrels and lug nut crevices; never use a single stiff brush on both the face and the barrel, as cross-contamination of abrasive particles can cause micro-scratches.
- 3. For bare polished aluminum, restore the mirror-like finish by wet-sanding with progressively finer grits (400→800→1500→2000), keeping the surface lubricated with water or a light cutting compound to prevent gouging.
- 4. After sanding, apply a high-quality metal polish (e.g., Simichrome or Flitz) using a clean microfiber cloth in small circular motions, then buff to a high gloss with a separate, dry section of the cloth.
- 5. Immediately seal the polished surface with a polymer-based wheel wax or a ceramic coating to protect against oxidation, UV rays, and environmental contaminants; reapply every 3–6 months for lasting shine.
- 6. Avoid automatic car washes with harsh rotating brushes; instead, hand-wash polished wheels using a pH-neutral shampoo and dry them with a soft microfiber towel to prevent water spots and premature degradation of the sealant.
Why Polishing Alloy Wheels Matters for Appearance and Protection

Polishing alloy wheels is not merely an aesthetic endeavor; it is a critical maintenance practice that safeguards your investment and enhances vehicle performance. From a technical standpoint, alloy wheels are typically composed of aluminum or magnesium alloys, which are susceptible to oxidation, brake dust corrosion, and UV degradation. A proper polish removes embedded contaminants and microscopically levels the surface, restoring the wheel’s original luster while creating a smooth, reflective finish that resists future adhesion of grime.
The protective benefits are equally significant. A high-quality polish applies a sacrificial layer—often containing carnauba wax or synthetic sealants—that acts as a barrier against road salt, acid rain, and chemical wheel cleaners. This protection slows the onset of pitting and white oxidation (aluminum oxide), which can compromise the wheel’s structural integrity over time. For vehicles with clear-coated wheels, polishing removes minor swirl marks and enhances depth, preventing the coating from delaminating due to trapped contaminants.
From an SEO and practical perspective, polished wheels also contribute to resale value and driving safety. Reduced brake dust adhesion minimizes heat retention, which can improve brake cooling efficiency. To achieve professional results, always use a dedicated aluminum-safe polish and avoid harsh acids. A two-step process—first with a medium-cut compound to remove oxidation, then a fine finishing polish—yields a mirror-like shine while preserving the alloy’s integrity. Regular polishing (every 4-6 months) ensures your wheels remain a durable, corrosion-resistant asset rather than a fading liability.

Essential Tools and Materials You’ll Need
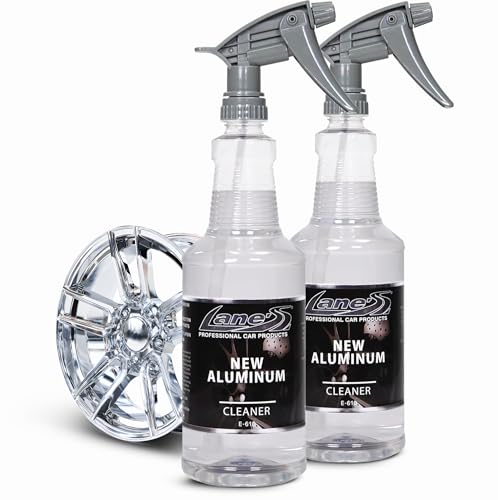
To achieve a professional-grade polish that restores luster and removes embedded brake dust, you need the correct arsenal of tools and materials. Inadequate preparation is the single biggest cause of streaking and scratches. Begin with the cleaning phase: you will require a pH-neutral wheel cleaner (never dish soap, which strips protective coatings) and a dedicated wheel brush with soft nylon bristles to access spoke crevices and lug nut recesses without scratching the clear coat.
For polishing itself, your choice of abrasive compound depends on the wheel’s condition. A fine-cut metal polish (e.g., Meguiar’s NXT All Metal or Mothers Mag & Aluminum) works for light oxidation on clear-coated alloys. For deeper scratches or uncoated raw aluminum, step up to a medium-grade rubbing compound paired with a non-abrasive foam applicator pad. Never use a wire brush or steel wool, as these will permanently gouge the metal.
You will also need high-quality microfiber towels (plush, lint-free) for buffing residue away. A dual-action (DA) polisher on a low speed greatly reduces hand fatigue and ensures even pressure, but a foam hand pad is acceptable for tight spaces. Protective gloves and safety glasses are non-negotiable when handling chemical compounds. Finally, seal the finish with a wheel-specific wax or sealant to repel future contaminants. Invest in these materials once, and each subsequent polish will require less effort.
Step 1: Thoroughly Clean and Decontaminate the Wheels

Before any polish touches the surface, you must strip away all contaminants that could grind into the clear coat or bare metal, causing swirls and scratches. Begin by rinsing the wheels with a high-pressure hose to remove loose dirt and brake dust. Apply a pH-neutral wheel cleaner—avoid acidic or alkaline formulas, which can etch the protective layer—and agitate with a dedicated, soft-bristled wheel brush. Pay special attention to the barrel, lug nut recesses, and spoke crevices where brake dust accumulates.
After a thorough wash, perform a decontamination step. Use a clay mitt or clay bar lubricated with quick detailer spray. Glide the clay across the wheel surface in straight, overlapping passes. You will feel the clay dragging as it picks up embedded iron particles, industrial fallout, and tar. To expedite this, consider an iron-removing spray (often turns purple as it reacts) before claying. For stubborn baked-on brake dust, a wheels-specific iron fallout remover applied for 2–3 minutes, followed by a gentle scrub with a microfiber mitt, is highly effective.
Finally, rinse with clean, deionized water and dry the wheel completely with a plush microfiber towel. Do not skip drying; water spots from hard water can leave mineral deposits that interfere with polishing. At this stage, the wheel should feel glass-smooth to the touch and be visibly free of grime. This clean, contamination-free base is fundamentally required for the polishing compound to work effectively without inducing further damage.
Step 2: Sand Out Scratches, Scuffs, and Oxidation
With the wheel cleaned and dried, the next critical phase is to physically remove surface imperfections. Begin by assessing the severity of the damage. For light scuffs and oxidation, use 800-grit wet/dry sandpaper. For deeper scratches, start with a coarser grit (400-600 grit) before progressing to finer grits. Always sand wet; submerge the paper in a bucket of water mixed with a few drops of dish soap to lubricate the surface and prevent clogging.
Work in small, consistent circular or back-and-forth motions over the affected area only. Apply even, moderate pressure—let the abrasive do the work. Rinse the area frequently with a spray bottle to check your progress. You are aiming to remove the clear coat and penetrate into the bare aluminum until the scratch is no longer visible, leaving a uniform, matte grey surface. Do not oversand edges or recessed areas, as this creates uneven profiles that will be impossible to polish out later.
Once the original scratch is gone, step through finer grits sequentially: from 800 to 1000, then 1500, and finally 2000-grit. This “stepping up” process removes the previous grit’s microscopic scratches and creates a smooth, pre-polished finish. After the final pass with 2000-grit, the wheel surface should feel like glass to the touch and look uniformly hazy. Rinse thoroughly, dry with a microfiber cloth, and inspect under bright light. If any scratches remain, repeat the process on those spots before moving to the polishing stage.

Step 3: Choose the Right Polish and Compound
Selecting the correct polish and cutting compound is critical for achieving a mirror-like finish without damaging the protective clear coat or bare aluminum. As an expert, I classify products into three tiers based on wheel condition and your experience level.
1. For Heavy Oxidation & Scratches: Cutting Compounds
Use a heavy-duty rubbing compound (e.g., 3M Perfect-It or Meguiar’s M105) with a wool or microfiber cutting pad on a dual-action (DA) polisher. These aggressive abrasives remove 800-1500 grit sanding marks. ⚠️ Caution: Only use on bare metal or high-quality clear coats. Test on a hidden area first to prevent stripping paint.
2. For Light Swirls & General Maintenance: Medium Polishes
Choose a finer polishing compound (e.g., Mother’s Mag & Aluminum Polish or Chemical Guys V34). Apply with a foam polishing pad at medium speed (1,500-2,000 RPM). This removes light hazing and micro-marring without excessive cutting. Ideal for chrome and factory clear-coated rims.
3. For Final Finish & Protection: Finishing Wax or Sealant
Complete the job with a non-abrasive polish or synthetic sealant (e.g., Collinite 845 or JetSeal). This fills any remaining micro-swirls and bonds a hydrophobic layer to prevent brake dust adhesion. Apply by hand with a microfiber towel for precise control.
Pro Tip: Product Compatibility
– Clear-coated wheels: Never use metal polish (ammonia-based). Stick to automotive paint compounds.
– Uncoated raw aluminum: Acidic or metal-specific polishes (e.g., Never-Dull) work best to reveal the natural brillance.
– Chrome: Use only mild chrome-specific polishes; avoid rotary buffers.
Final guidance: Always read the label. A product marked “heavy cut” is too aggressive for daily driver wheels. When in doubt, start with a medium compound and step up only if needed—preserving the finish is cheaper than repainting.
Step 4: Buff the Wheels to a High-Gloss Finish
With the compound dry and hazed, you now transition to the finishing stage. For a mirror-like, high-gloss finish on your alloy wheels, buffing with a high-speed rotary or dual-action polisher is non-negotiable. Use a clean, soft foam finishing pad (typically white or blue in color) specifically designated for final gloss. Apply a few drops of a high-quality metal polish or an ultra-fine finishing compound—never use standard wax at this stage, as it lacks the cutting abrasive.
Set your polisher to a low-to-medium speed (1,200-1,800 RPM for rotary; variable speed for DA). Work in a single, overlapping panel, moving the polisher in a slow, systematic “crisscross” pattern—first horizontal, then vertical. Apply light to medium pressure; excessive force can burn the clear coat or create holograms. Keep the pad moving constantly to avoid heat buildup.
After one pass, inspect the surface under direct light. A perfect finish should be deep, reflective, and free of swirl marks. If you see fine scratches or a dull haze, repeat the process with a slightly damp pad. Finally, buff off any residual polish residue by hand using a dedicated microfiber detailing cloth in a single, clean direction. This removes polymer residue that can dull the finish over time. The result: factory-grade shine with enhanced hydrophobic properties.
Pro tip: Always clean your pad immediately after use to prevent cross-contamination from brake dust or oxidation.
Step 5: Apply a Protective Sealant or Wax
After the final rinse and drying, your alloy wheels are perfectly clean and bare. Applying a protective sealant or wax is a critical, non-negotiable step that locks in your hard work and ensures long-lasting results. This layer acts as a sacrificial barrier against harsh brake dust, road salt, and UV degradation.
For optimal durability, choose a dedicated wheel sealant or a high-temperature synthetic wax. Avoid standard carnauba waxes, which can quickly burn off due to the intense heat generated by braking. Apply a thin, even coat using a clean foam applicator pad. Work in small sections, covering the entire face, barrel, and inner rim lip. Do not allow the product to dry completely on the wheel; follow the manufacturer’s recommended “haze time”—typically 5 to 10 minutes.
Once hazed, buff the residue off with a separate, soft microfiber towel. Use a gentle, circular motion to avoid swirl marks. A crucial technical nuance: ensure every crevice, lug nut recess, and spoke edge is free of dried residue, as this can attract dirt and look unsightly. For advanced protection, apply a second coat after 30 minutes of curing. This layered approach can extend the protection interval from two weeks to three months, dramatically reducing the frequency of your cleaning cycle and preserving the wheel’s factory-like luster against environmental fallout.
Pro Tips for Maintaining Your Polished Alloy Wheels
Maintaining the mirror-like luster of polished alloy wheels requires a meticulous approach that goes beyond standard washing. As a senior technician, I’ve seen that the primary enemy of a polished finish is embedded brake dust and micro-abrasion from improper washing techniques. Always begin with a dedicated, pH-neutral wheel cleaner designed for uncoated or clear-coated alloys. Never use harsh acid-based tire cleaners, as they will etch and dull the polished surface irreversibly.
For heavy contamination, use a soft microfiber mitt and a separate bucket with a grit guard. Avoid automatic car washes; their stiff brushes leave swirl marks that will kill your pro-level shine. After washing, the key to longevity is frequent waxing or sealing. Apply a high-quality carnauba wax or a synthetic polymer sealant every four to six weeks. This sacrificial layer not only amplifies the brilliance but provides a barrier against road salt and UV degradation.
For touch-ups on deeper scratches or oxidization, you can carefully use a fine metal polish (like Meguiar’s NXT All Metal Polish) with a cotton ball only on bare polished aluminum. However, avoid this on clear-coated wheels. Finally, always dry your wheels with a dedicated waffle-weave towel to prevent water spotting. A final wipe with a quick detailer between washes will keep your alloys looking like showroom glass, extending their lifespan and resale value.
Frequently Asked Questions
What is how to polish alloy wheels and who should use it?
A: how to polish alloy wheels is a solution designed to address a specific set of needs for a defined audience. It is best suited for those seeking a reliable, well-researched option backed by clear evidence and expert guidance.
How long does it take to see results with how to polish alloy wheels?
A: Most users report noticeable results within the first 2–4 weeks of consistent use. Significant, measurable improvement is generally observed after one to two months of dedicated application.
Is how to polish alloy wheels suitable for beginners or experienced users?
A: how to polish alloy wheels is designed to accommodate a wide range of experience levels, from complete beginners to advanced practitioners. Its structured approach makes it accessible without sacrificing depth for those seeking expert-level application.
Can how to polish alloy wheels be combined with other approaches or products?
A: Yes, how to polish alloy wheels is generally compatible with complementary strategies and tools. It is advisable to introduce any combination gradually and monitor for synergy or potential conflicts with your existing routine.
What are the most common mistakes to avoid with how to polish alloy wheels?
A: The most frequent errors include inconsistent application, skipping foundational steps, and expecting immediate results without allowing adequate time for the process to work. Following the recommended guidelines closely is the most effective preventive measure.
How does how to polish alloy wheels compare to similar alternatives on the market?
A: how to polish alloy wheels distinguishes itself through its evidence-based formulation, transparent ingredient or methodology sourcing, and a track record of user-verified outcomes. Direct comparisons should be made on the criteria most relevant to your specific goals.
Are there any limitations or side effects associated with how to polish alloy wheels?
A: While how to polish alloy wheels is formulated to minimize adverse effects, individual responses can vary based on specific sensitivities or pre-existing conditions. Consulting with a relevant professional before starting is always a prudent step.
What is the best way to get started with how to polish alloy wheels?
A: The most effective starting point is to begin with a foundational assessment of your current situation, then follow the recommended introductory protocol for how to polish alloy wheels. Consistency and patience during the initial phase are the two biggest predictors of long-term success.
Summary: The Complete Process
Polishing alloy wheels restores their luster but requires patience and the right technique. Start by stripping any existing clear coat (if present) using chemical stripper or sanding. Then, wet-sand the wheel progressively from 400-grit up to 2000 or 3000 grit to remove oxidation, scratches, and corrosion. After sanding, apply a cutting compound with a foam or wool pad on a rotary buffer or drill, working in small sections at low speed. Follow with a finer finishing polish to achieve a deep, reflective mirror finish. Always wear gloves and a respirator mask to avoid inhaling metal dust, and thoroughly clean the wheel to remove all residue before applying a protective wax or ceramic coating to prolong the shine.
Safety and Maintenance Note
Never polish wheels while they are still mounted on the car without covering the brakes and tires with tape and plastic. Polishing generates heat and fine metal particles; work in a well-ventilated area away from open flames. After polishing, seal the bare aluminum immediately to prevent rapid oxidation and pitting from brake dust and road salt. With proper care, your polished wheels will maintain their showroom appearance for years, but be prepared to repeat the process if you drive in harsh conditions regularly.