Learning How to Setup & Use Best 10 Alloy Wheel Repair Kits 2026 : Top DIY Fixes for Scratches is the most cost-effective way to restore your vehicle's aesthetic appeal without visiting a professional body shop.
This guide is designed for automotive enthusiasts and DIY beginners who possess basic mechanical aptitude but seek a structured, professional approach to wheel maintenance. We assume you have access to a standard garage environment and basic hand tools.
By the end of this guide, you will be able to diagnose alloy damage, select the appropriate repair components, and execute a high-quality finish that withstands road debris and weather conditions.
- Understanding the chemical composition of alloy wheels.
- Preparing the surface for maximum adhesion.
- Techniques for filling deep gouges and light scratches.
- Color matching and clear coat application tips.
- Final curing and maintenance strategies.
Overview & Prerequisites

Required Tools and Safety Gear
Successful repair begins with proper preparation. Before starting, ensure you have a clean workspace. You will need safety glasses, nitrile gloves, varying grits of sandpaper (240 to 2000), isopropyl alcohol for degreasing, and your chosen repair kit. Always check Best Alloy Rim Cleaner: Professional Grade Solutions for Brake Dust Removal to ensure the surface is chemically neutral before applying fillers.
Target Audience Requirements
This tutorial is tailored for those looking to manage cosmetic curb rash. If your wheels show structural cracking or significant warping, these kits are not appropriate, and you should consult a professional wheel refurbishment specialist for safety reasons.
Core Concepts & Fundamentals

Understanding Alloy Wheel Composition
Alloy wheels are typically made from aluminum mixed with magnesium or nickel. They are protected by a layer of paint and a clear coat. When you scrape a curb, you break this seal, exposing the raw alloy to oxidation. Repairing this requires a multi-layer approach to restore both the protective seal and the aesthetic look. For more context on the material science involved, refer to What Does Alloy Tires Mean: Understanding Performance Wheels.
The Philosophy of Surface Preparation
The longevity of a DIY repair is entirely dependent on surface cleanliness. The filler material cannot bond to oils, brake dust, or road grime. A meticulous sanding and degreasing process ensures the chemical bond remains intact through thermal expansion and contraction during normal driving.
| Feature | Correct Approach | Incorrect Approach |
|---|---|---|
| Cleaning | Degreaser + Isopropyl Alcohol | Soap and Water only |
| Sanding | Gradual progression of grit | Heavy grit only |
| Application | Thin, layered passes | Single thick glob |
Step-by-Step Execution Guide

Preparation and Cleaning Phase
Clean the area thoroughly. Use Best Alloy Rim Cleaner: Professional Grade Solutions for Brake Dust Removal to remove embedded contaminants. Sand the damaged area starting with 240 grit to smooth edges, then move to 400 grit for a uniform texture.
Application and Finishing Phase
Apply the filler compound, ensuring it is slightly over-filled to account for shrinkage. After curing, sand the filler flush with the surrounding rim. Apply primer, color, and clear coat using the Best Wheel Paint for Aluminum: Top Rim Paints & Touch-Ups to Restore Your Alloy Wheels Complete Specifications, Sizing & Features.
Recommended Equipment & Solution
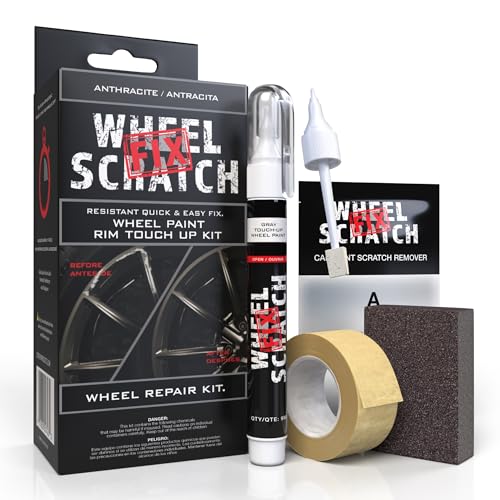
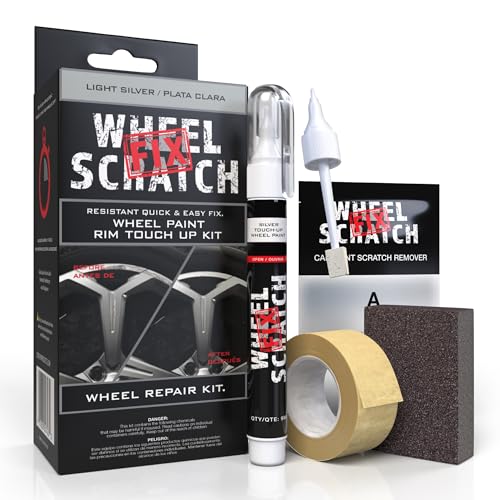
Wheel Scratch Fix® Anthracite Rim Touch Up
A reliable pick for Wheel Scratch Fix® Anthracite Rim, selected based on this article's guidance.

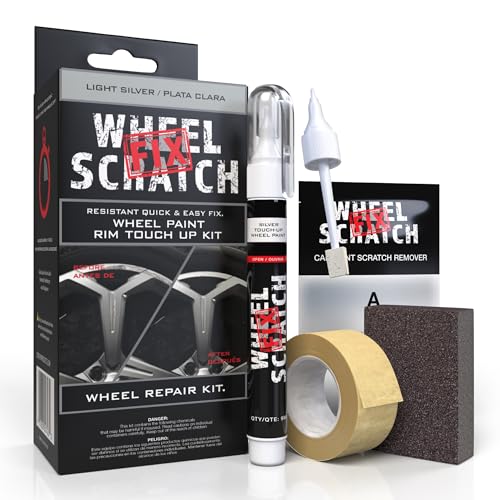
Wheel Scratch Fix® Light Silver Rim Touch
A reliable pick for Wheel Scratch Fix® Light Silver, selected based on this article's guidance.
Best Practices & Pro Tips

Environmental Considerations
Humidity and temperature play a critical role. Aim for 70°F (21°C) in a dry, shaded area. Direct sunlight can cause paint to "flash dry" too quickly, resulting in an uneven, orange-peel texture.
Layering and Curing
Patience is your greatest tool. Always adhere to the manufacturer's suggested cure times between the filler and the paint stages. Rushing the process often results in the filler reacting with the paint solvents, causing soft spots.
Troubleshooting & Common Pitfalls

Identifying Failed Bonds
If the repair peels, you likely skipped the degreasing or the sandpaper grit was too fine, leaving no "tooth" for the filler to grab. If the paint bubbles, you may have applied the clear coat over a wet base layer.
Fixing Color Mismatches
If the color looks off, verify if your wheel has a satin, matte, or gloss finish. A mismatch in sheen is often more noticeable than a slight variation in color. See Top 5 Must-Have Accessories for Best Wheel Paint for Aluminum for guidance on sheen matching.
Frequently Asked Questions
Q: Can I use these kits on chrome wheels?
A: No, these kits are generally designed for painted or clear-coated alloy wheels. Chrome requires specialized plating repair services.
Q: How long does the repair last?
A: With proper surface prep, a high-quality DIY repair can last several years even in harsh road conditions.
Q: Does the tire need to be removed?
A: No, you can mask the tire, but deflating it slightly allows better access to the rim edge.
Q: Can I repair deep gashes?
A: Yes, provided the gash is limited to the alloy and hasn't compromised the structural integrity of the wheel's barrel.
Q: Is it safe to drive immediately?
A: Allow at least 24 hours for the final clear coat to fully cure before exposing the wheel to heavy road vibration.
Q: Do I need a professional spray gun?
A: Most kits include high-quality aerosol cans that are sufficient for spot repairs.
Q: Will the repair be invisible?
A: A skilled DIYer can achieve a "factory finish" look, though it requires attention to detail during the final sanding stage.
Q: Is wheel balancing affected?
A: Cosmetic repairs involving minor filler will not affect the wheel balance significantly.
Key Takeaways
- 1 Always perform a thorough cleaning before starting the repair.
- 2 Never attempt to repair structural cracks or bent rims with these kits.
- 3 Use a progressive sanding technique for a seamless finish.
- 4 Always mask off the tire to prevent contamination.
- 5 Apply thin layers of paint to avoid running or dripping.
- 6 Humidity and temperature are critical factors for successful curing.
- 7 Allow sufficient time for the clear coat to cure before driving.
Conclusion
Repairing your alloy wheels is a rewarding project that bridges the gap between basic maintenance and advanced auto detailing. By following the systematic approach outlined in this guide, you ensure a durable, professional-grade restoration of your wheels.
Remember that the quality of your finish is directly tied to the effort you invest in the surface preparation phase. Take your time, monitor your environment, and do not rush the curing cycles.
Precision, patience, and the right materials will transform your damaged rims into show-stopping features once again.
📌 Pillar Resource: Read our complete main Best 10 Alloy Wheel Repair Kits 2026 : Top DIY Fixes for Scratches guide for in-depth insights.